vIDM is policy-driven and adds a significant amount capability over the IDVA. vRA 7 customers will gain many of the OOTB capabilities of the stand-alone vIDM product and be able to configure and manage these features directly with the vRA UI. For anyone who has used vIDM as a stand-alone solution or as part of another product (e.g. Horizon Workspace), configuring vIDM will be just as straight forward. But even if you’ve never configured it before, it is intuitive and walks you through the logical steps of setting up auth sources and advanced policies…
For Active Directory integration, vIDM Directories are configured to sync with one or more domains. AD can be configured as the exclusive provider, a backup (e.g. when 2FA fails), or as part of a more complex authentication policy. Several AD-specific policies are available to fit most use cases. vRA itself does not query AD directly. Instead, only the vIDM Connector communicates with the configured AD providers and performs a database sync (AD -> Local vPostgresDB) based on the configured sync policy. In addition to AD, vRA 7.1 added support for LDAP auth stores.
More on vIDM: https://www.virtualjad.com/2015/11/vrealize-automation-7-part-5-identity-management.html
Checklist:
- Configure local admin access to default tenant (vsphere.local)
- Add Auth Directory (Active Directory) in vIDM
- Sync target AD Users and Groups
- Configure user and group access
- Modify vIDM services for high availability
Video
Detailed Steps
| Configuration Detail | Screenshots |
|---|---|
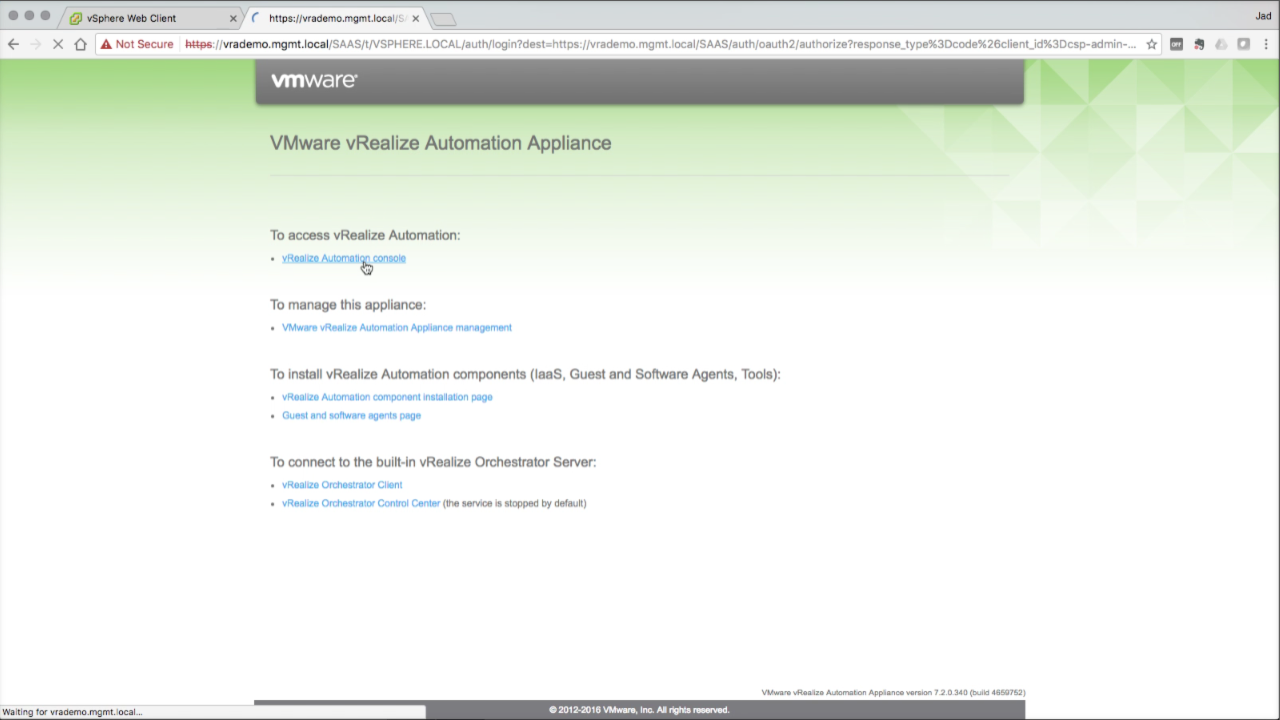
| Log in to the vRA Console
Browse to the vRA URL (e.g. https://vrademo.mgmt.local) To access vRA’s default tenant, click the link for vRealize Automation console This link will direct you to the default tenant login, which can also be directly accessed by going to https://vrademo.mgmt.local/vcac/org/vsphere.local directly (good idea to bookmark your direct URL). The vRA URL from this point forward is the VIP/CNAME FQDN of the appliances. This is the entry point for all vRA management and consumption. At this point, that URL is still pointing to the primary VA. |
|
| vRealize Automation Console
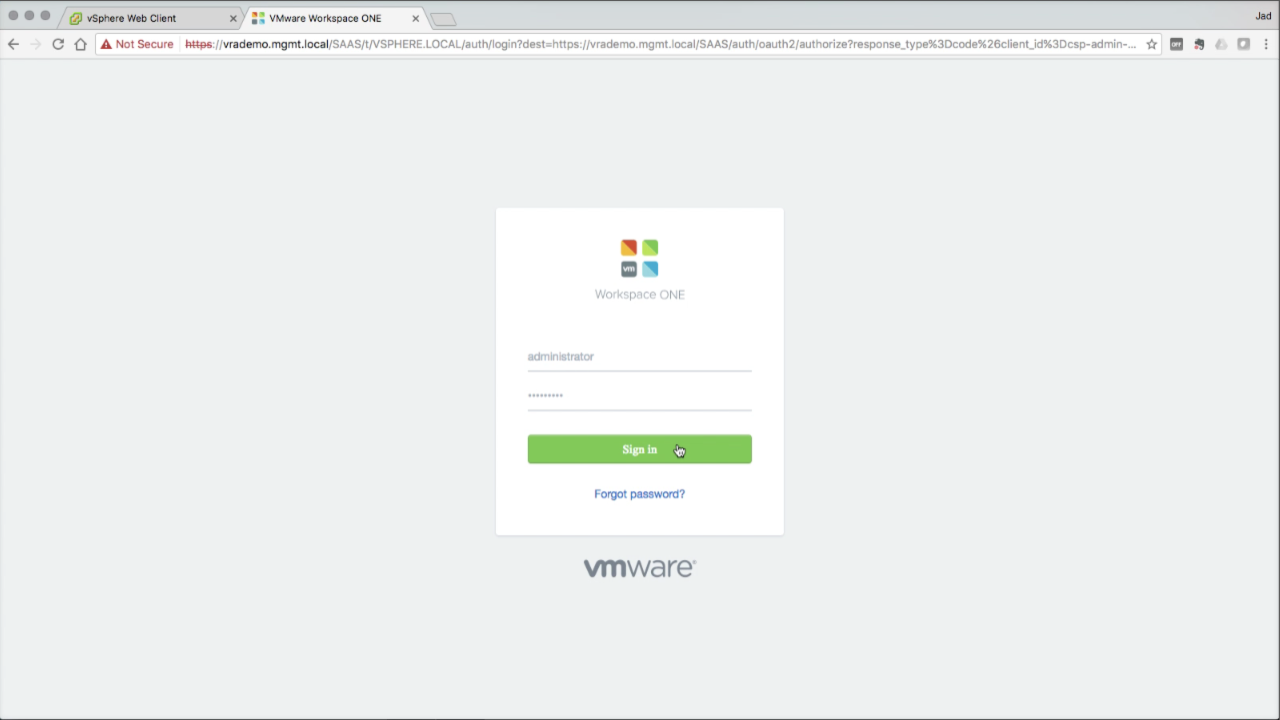
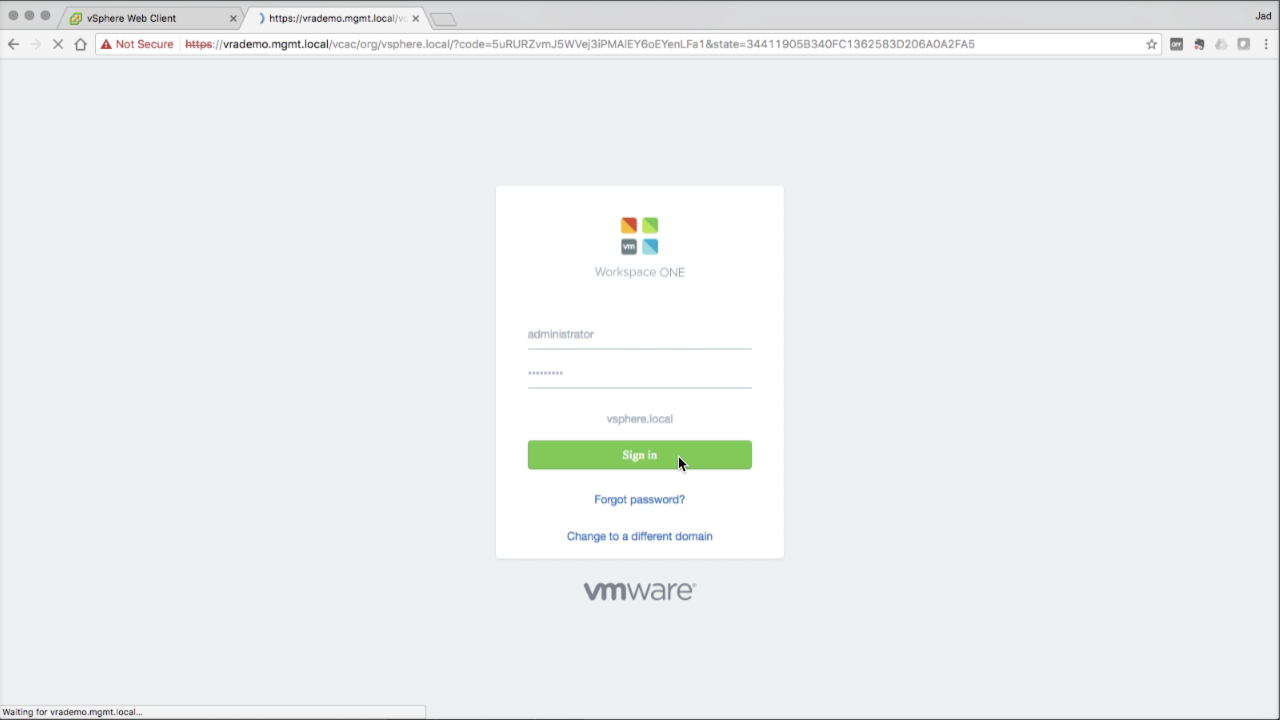
To log into vRA, use the SSO administrator account and password configured during the wizard:
Click Sign in to log in… |
|
| vRealize Automation Console
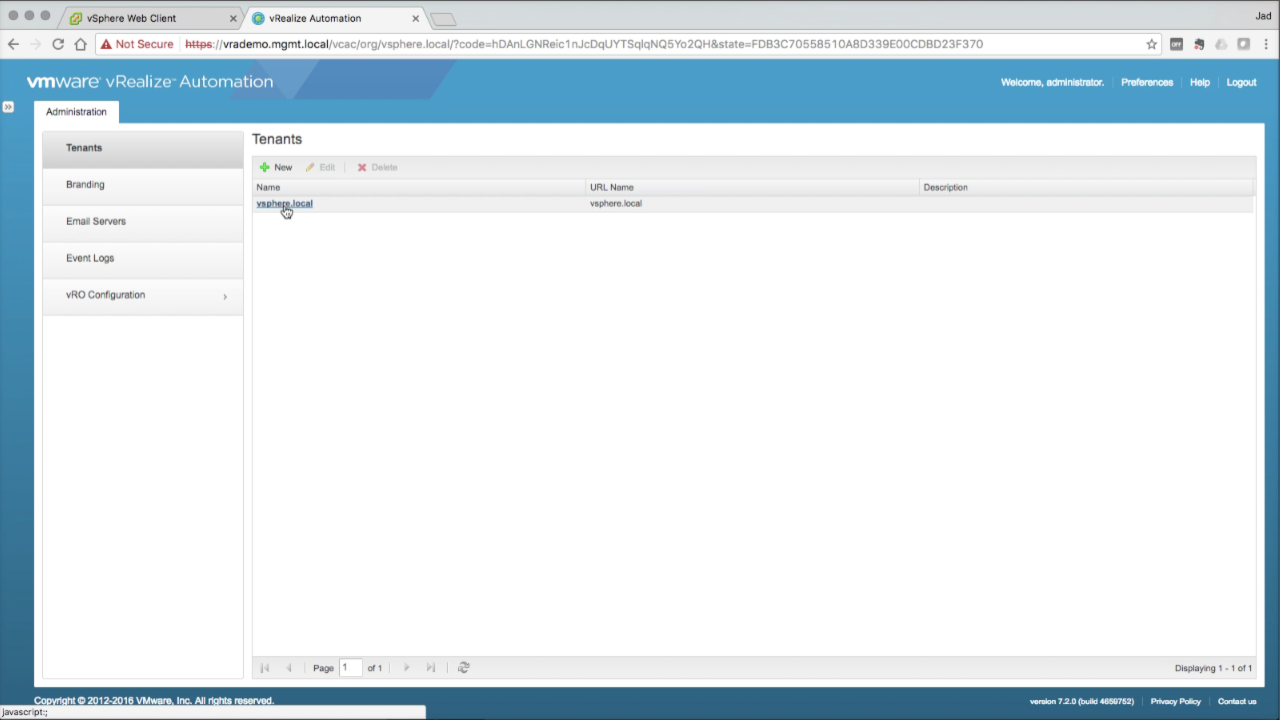
Once logged in, the only Tenant that should be visible is the default Tenant – vsphere.local. Logging in with the administrator account is required for all system-level configurations, including creating Tenants and granting the initial admin permissions to each. Click on vsphere.local to edit it (or highlight and select Edit from the menu)… |
|
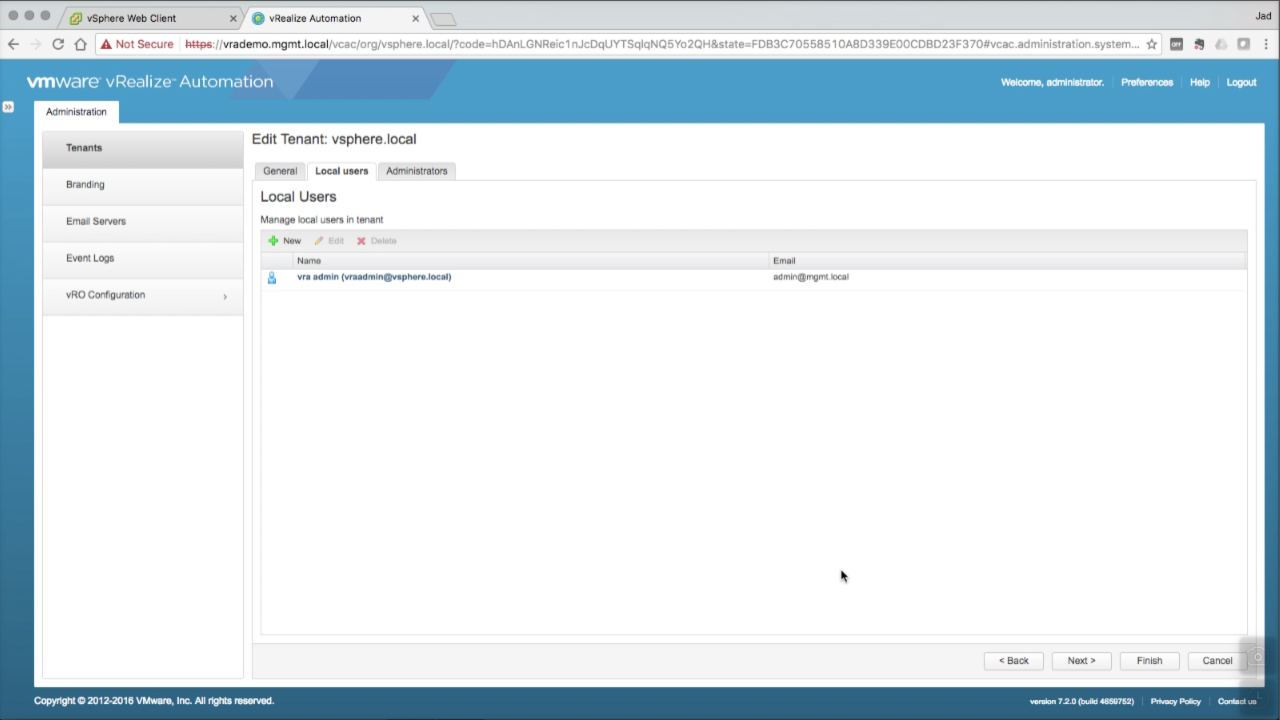
| Create a Local Admin User
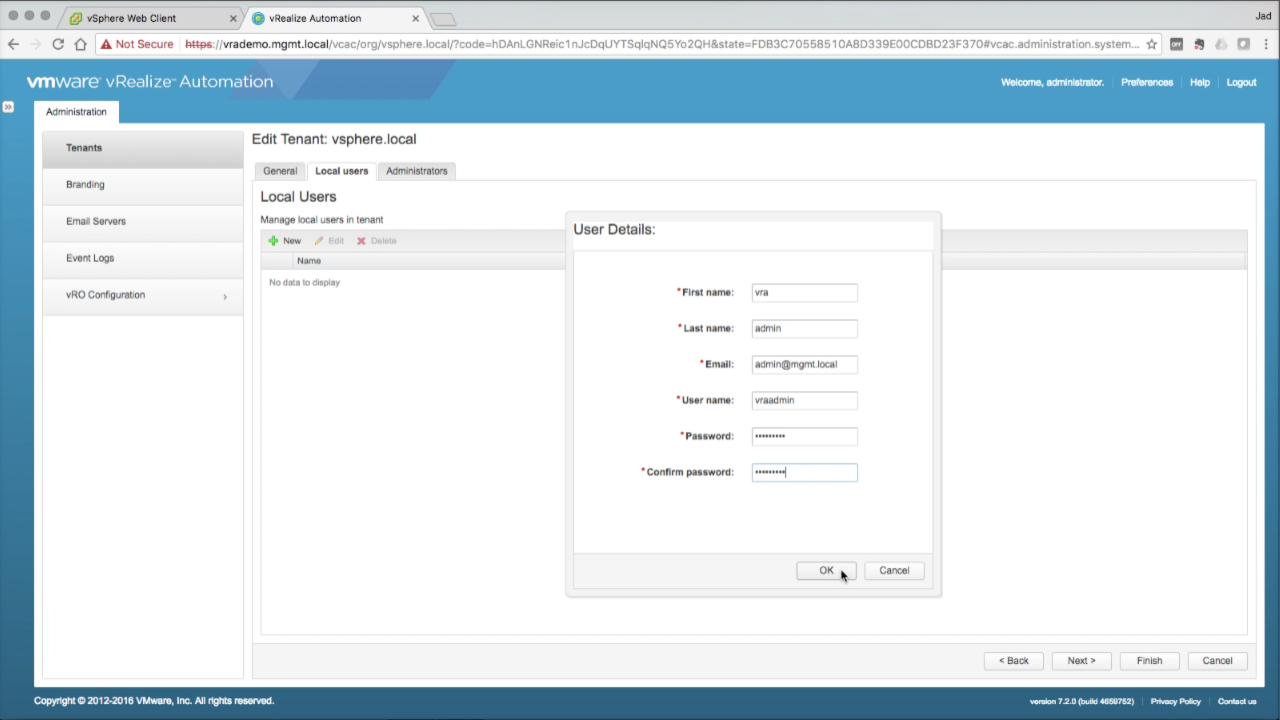
Click on the Local users tab Click the + to add a new local user Enter the User Details for your new local admin:
In this example i’m creating a local user name “vra admin” – this can be whatever you want it to be. Also note Email does not have to be a valid address. Click OK to accept… |
|
| Grant Local Admin Rights
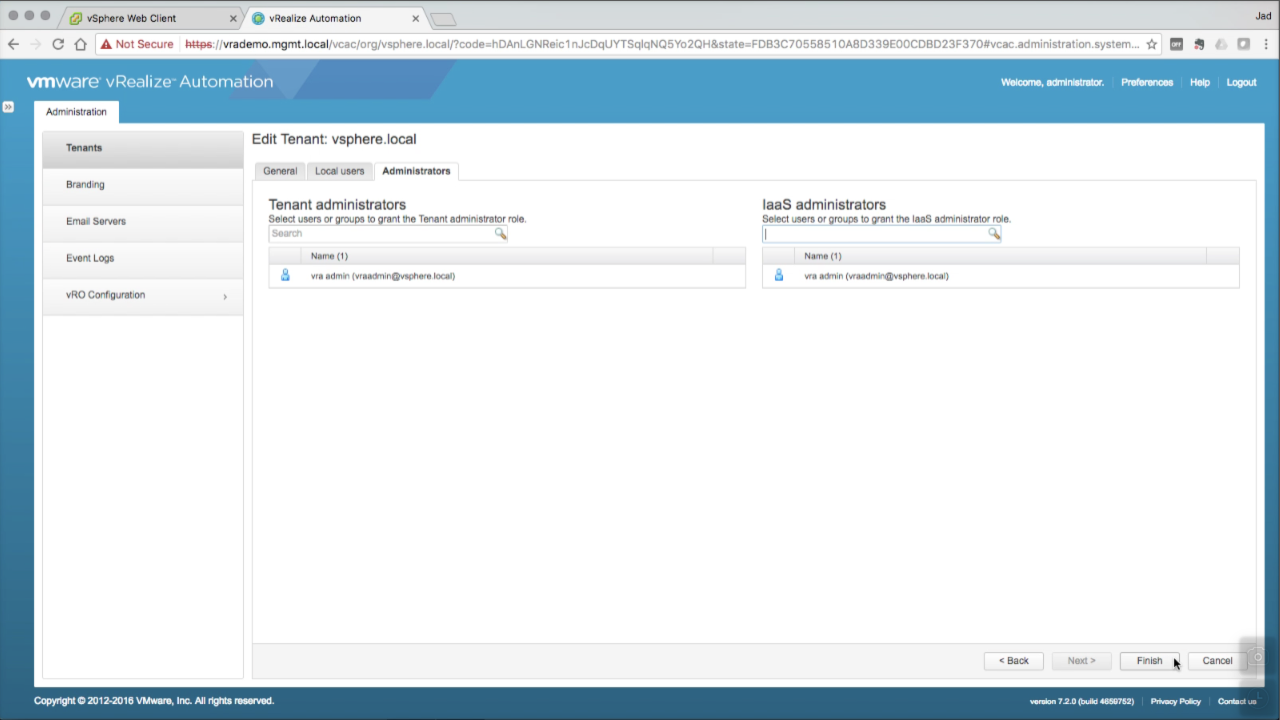
Click on the Administrators tab Add your new user to the Tenant Administrators and IaaS Administrators roles (being typing the name in the Search field and hit Enter). Click Finish to add the user. Once added, go ahead and Logout (top-right corner) of the console… |
|
| Log back in to vRA console using the newly create local admin account… | 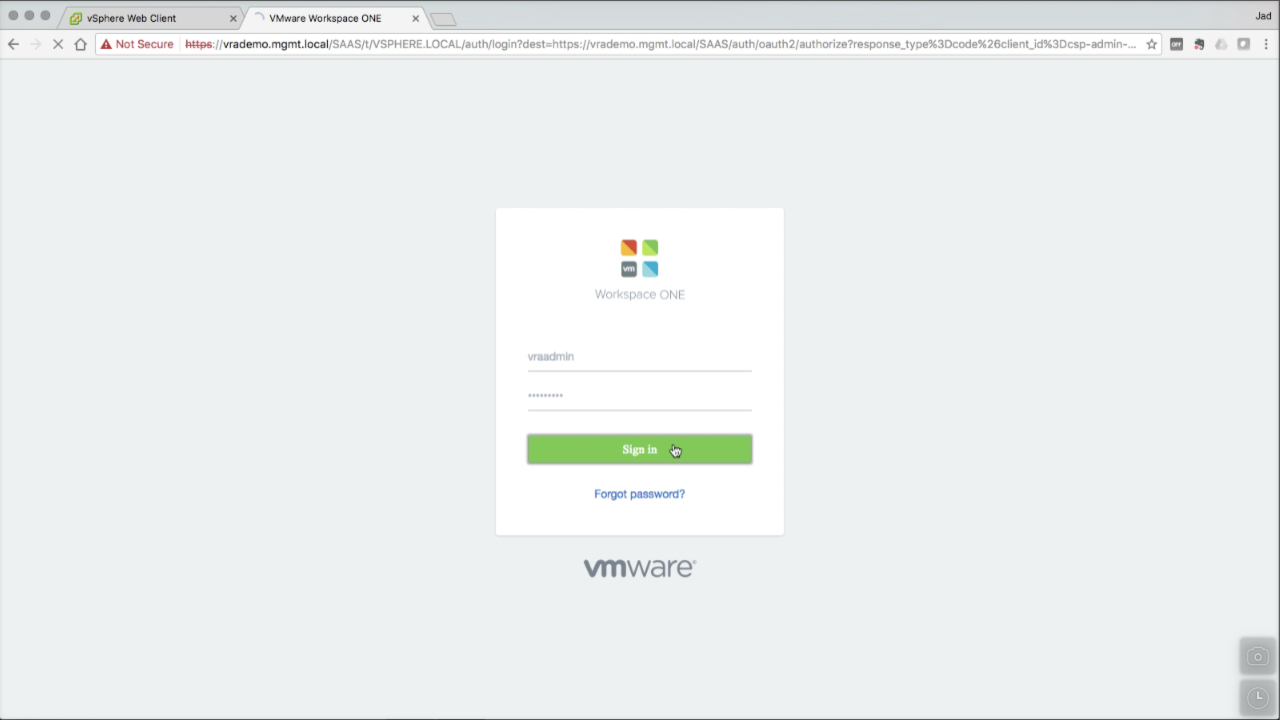
|
| Add an AD Directory
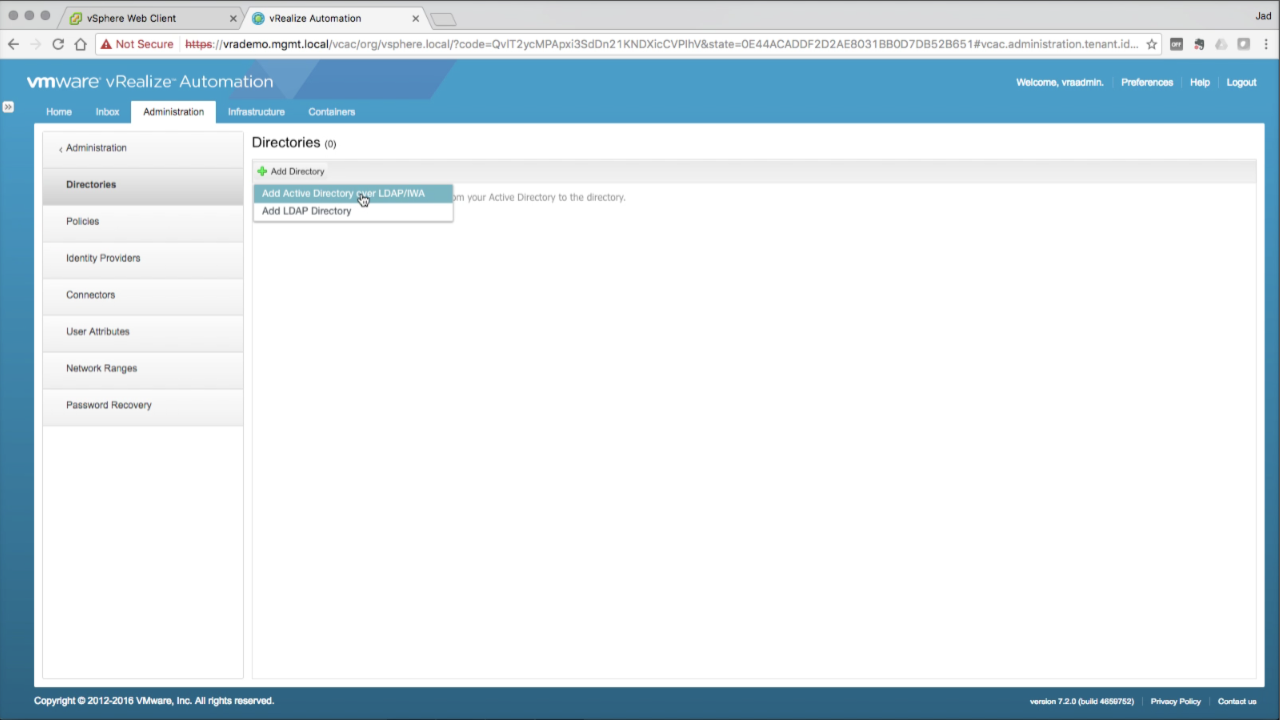
Navigate to Administration tab → Directories Click on + Add Directory and select Add Active Directory over LDAP/IWA |
|
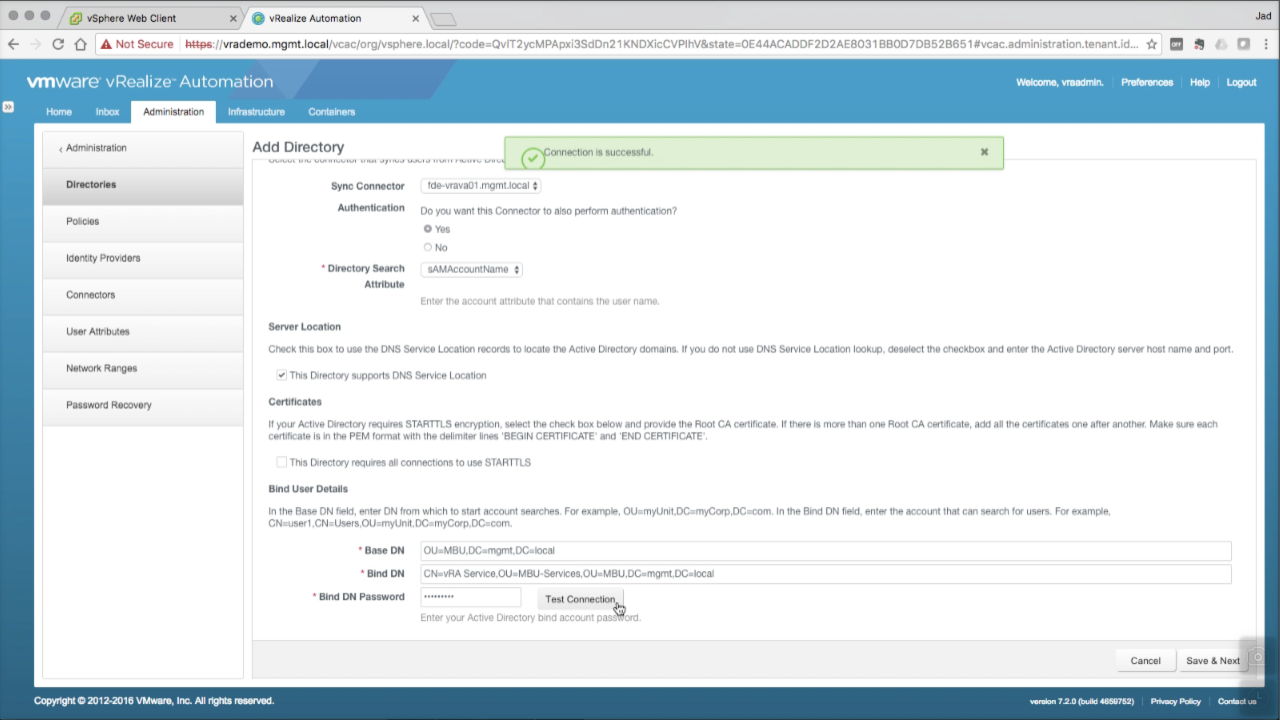
| Add an AD Directory
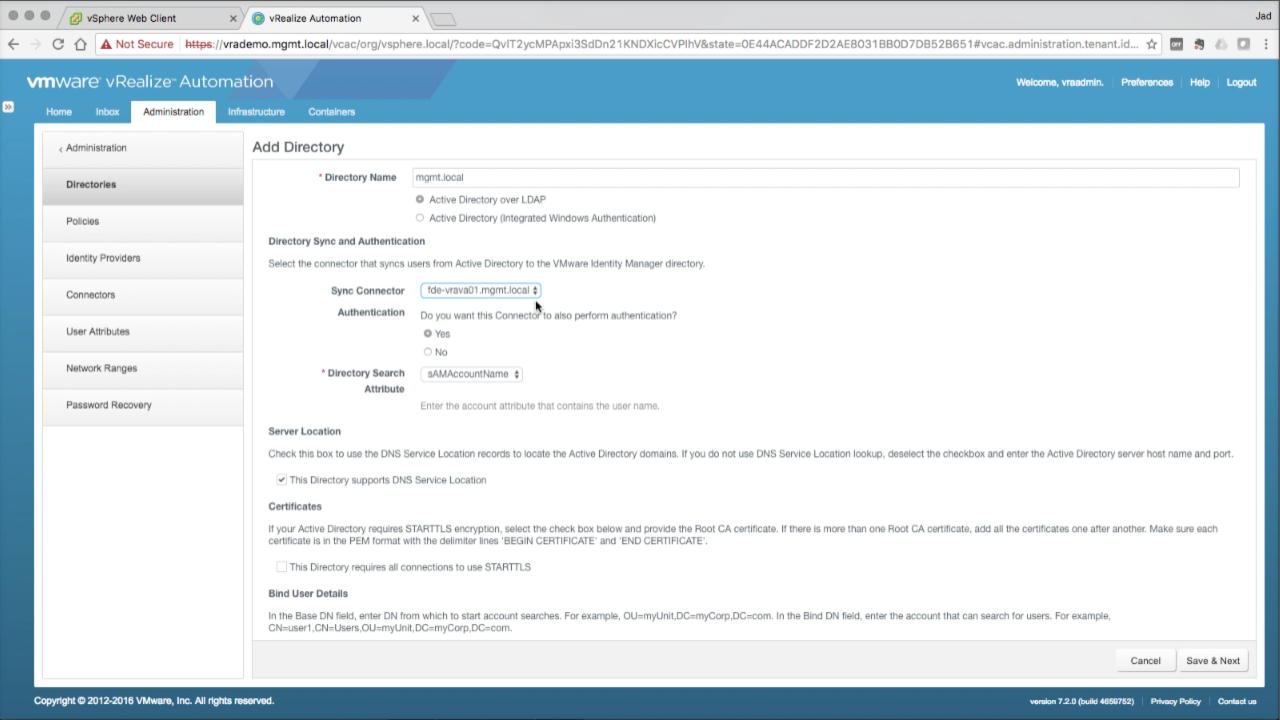
Enter the required configuration details:
Directory Sync and Auth
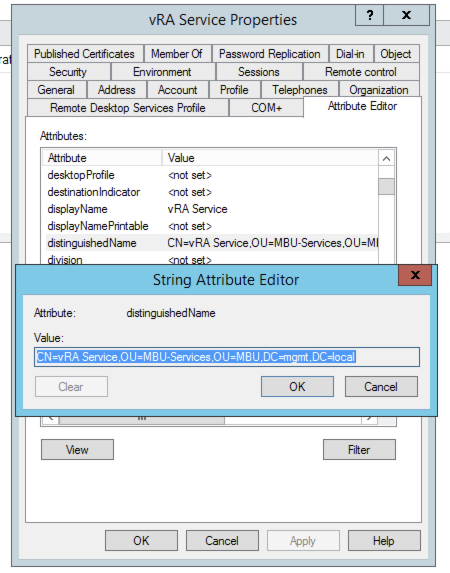
Bind User Details:
NOTE: You can quickly find the DN path of any AD object in the Attribute Editor tab in Active Directory Users and Computers:
Click Test Connection to validate the settings Click Save & Next to continue… |
|
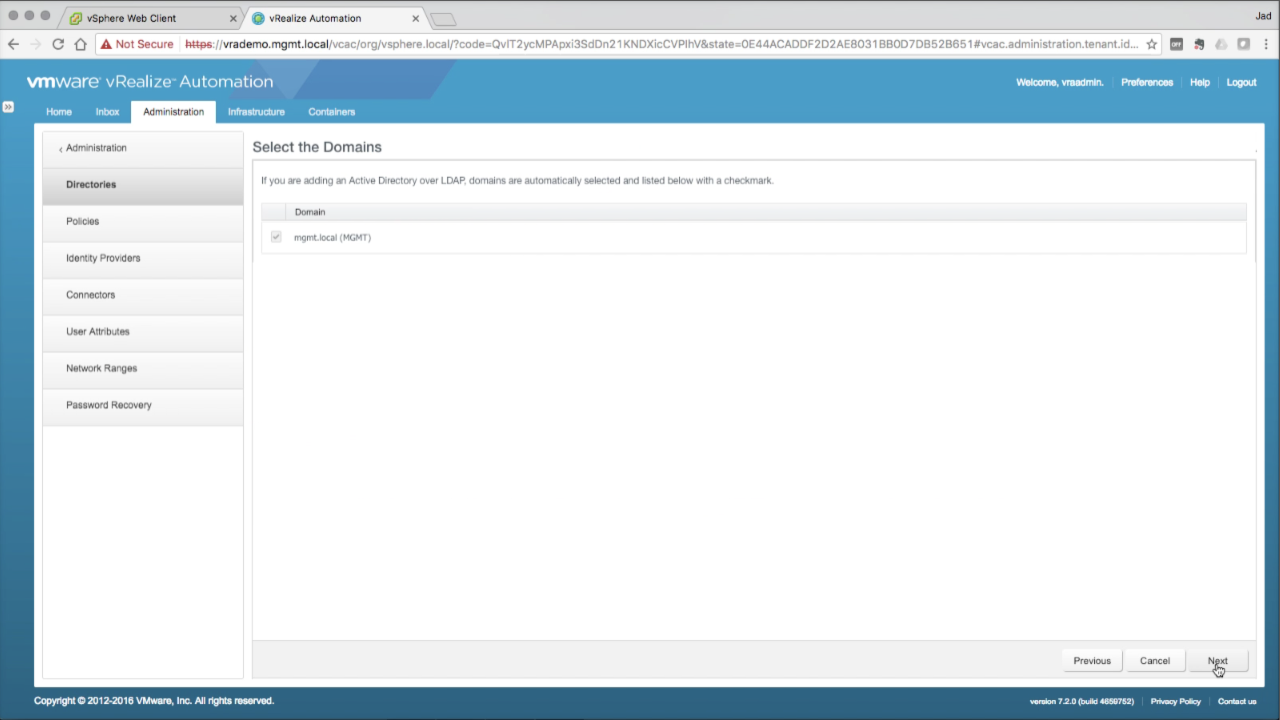
| Select the Domains
If not already selected, select the target domain from the list (default for single domain) Click Next to continue… |
|
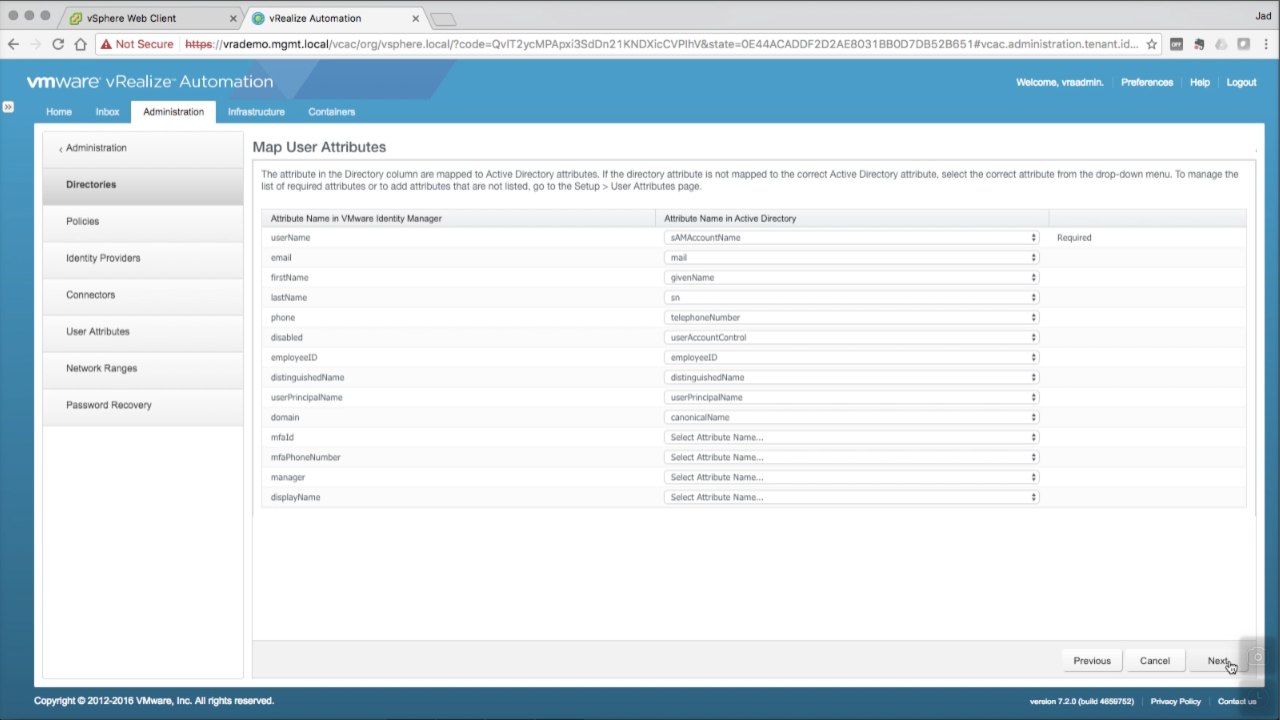
| Map User Attributes
You can modify user attribute mappings as needed. This can also be done at at a later time. Click Next to continue… |
|
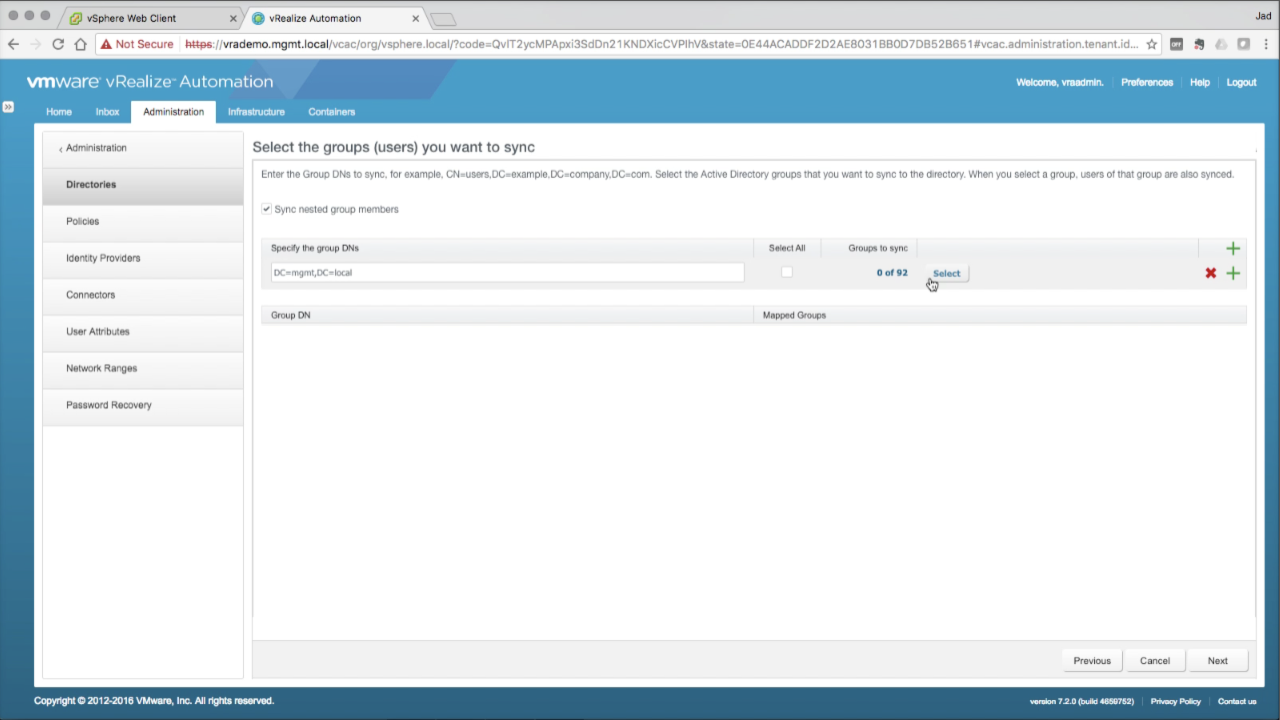
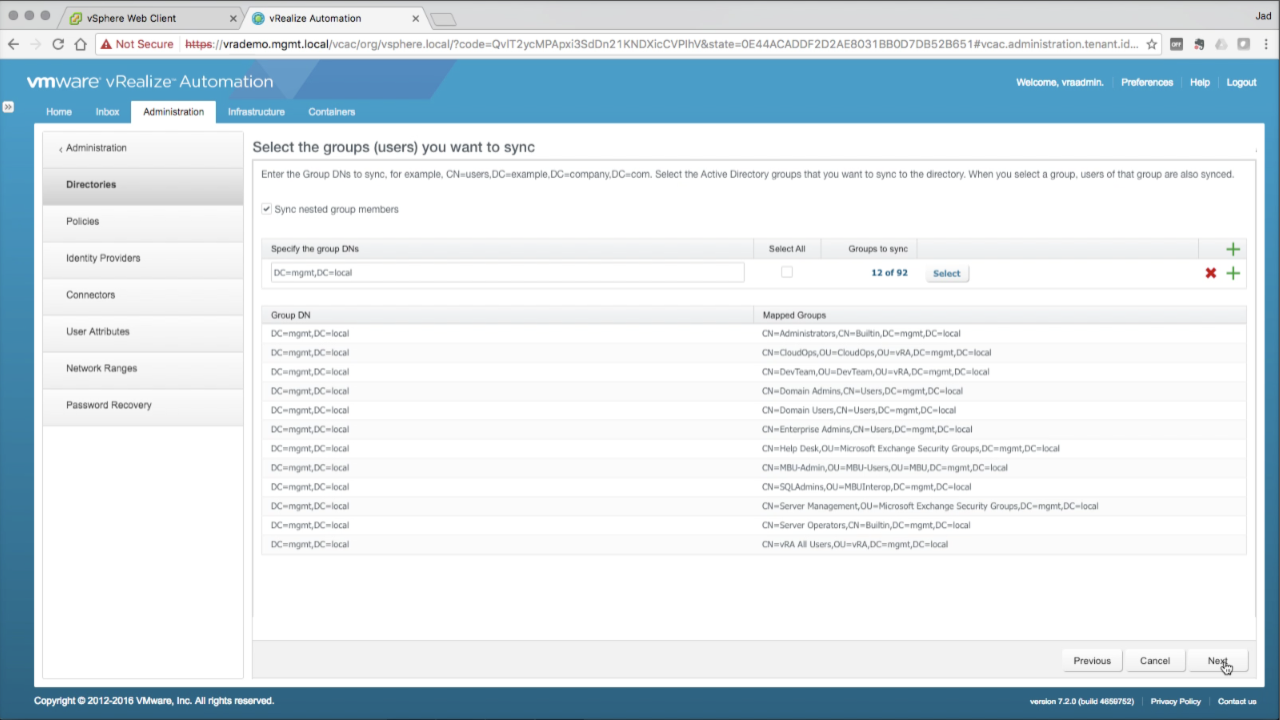
| Select Groups to Sync
You can specify a specific DN path (e.g. a specific OU) as the starting point for group search. This is a good thing in large environments that don’t necessarily want the entire AD synced with vIDM. Enter the DN path you want vIDM to query for AD group sync. If you’re unsure (or don’t need the granularity), enter the root DN (e.g. DC=mgmt,DC=local) Once entered, vIDM will return the total number of AD Groups found at the target path. Click Select… (you can also opt to Select All instead) |
|
|
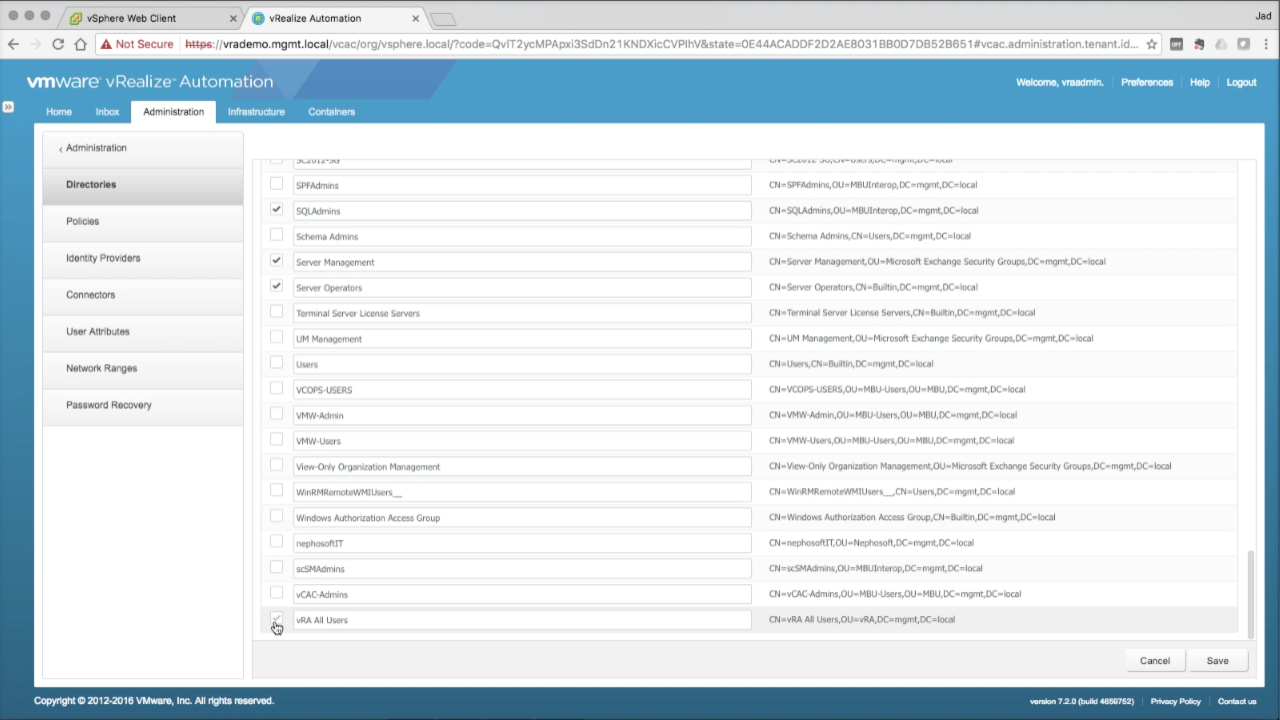
Select Groups to Sync Browse the list of AD groups and select only the groups you want to sync with vIDM.
NOTE: Only groups that are synced can be added directly to vRA for any role or function. It may be easier to simply sync with the root DN and add all groups, but some limitations may apply. This is fine for most environments, but some might need/want the granularity of pinpointing groups (and users for that matter). Click Save to accept the selections Review the groups, then click Next to continue… |
|
| Select Users to Sync
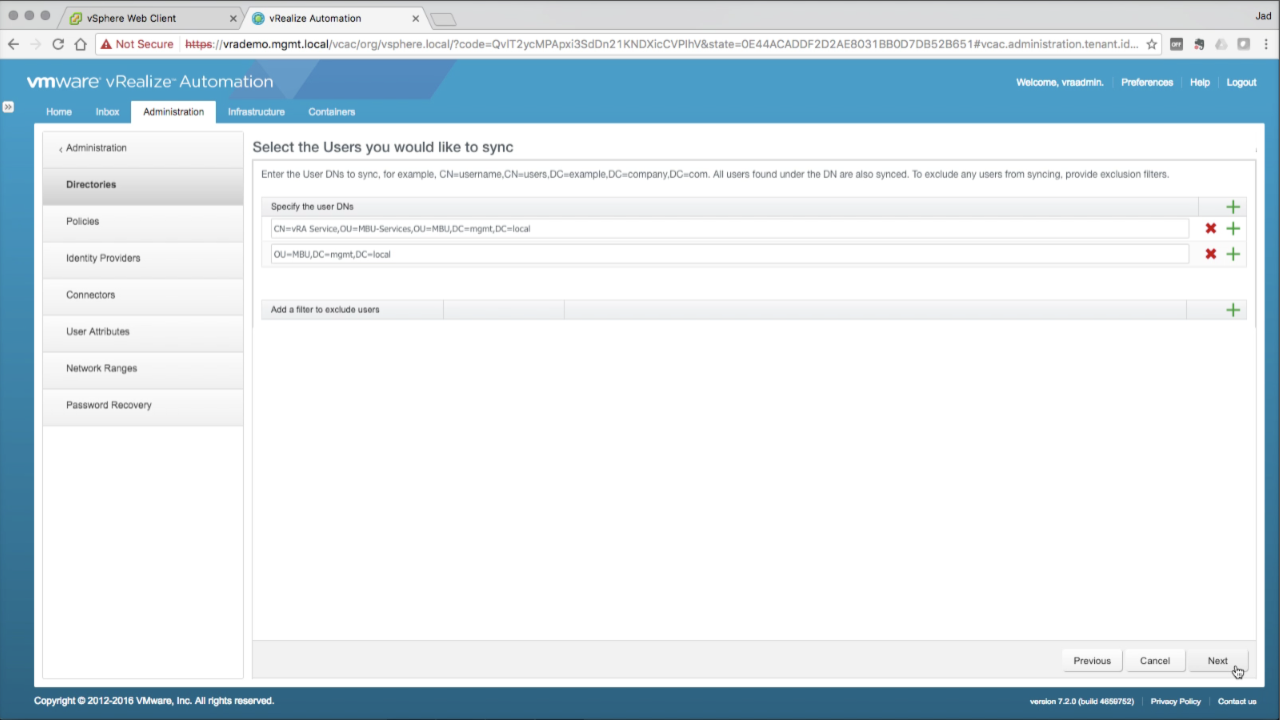
Similar to Groups, you must enter the DN path to the target AD users you want to sync with vIDM. Enter one or more DN paths to the target user accounts Click the + to add another DN path if needed
NOTE: Be sure to the path includes all AD users that will need access to vRA services (admin, consumer, anything). If the user account is not synced, you will not be able to add it any roles or functions in vRA. If you’re unsure, you can simply add the root DN to include all AD users. Click Next to continue… |
|
| Review
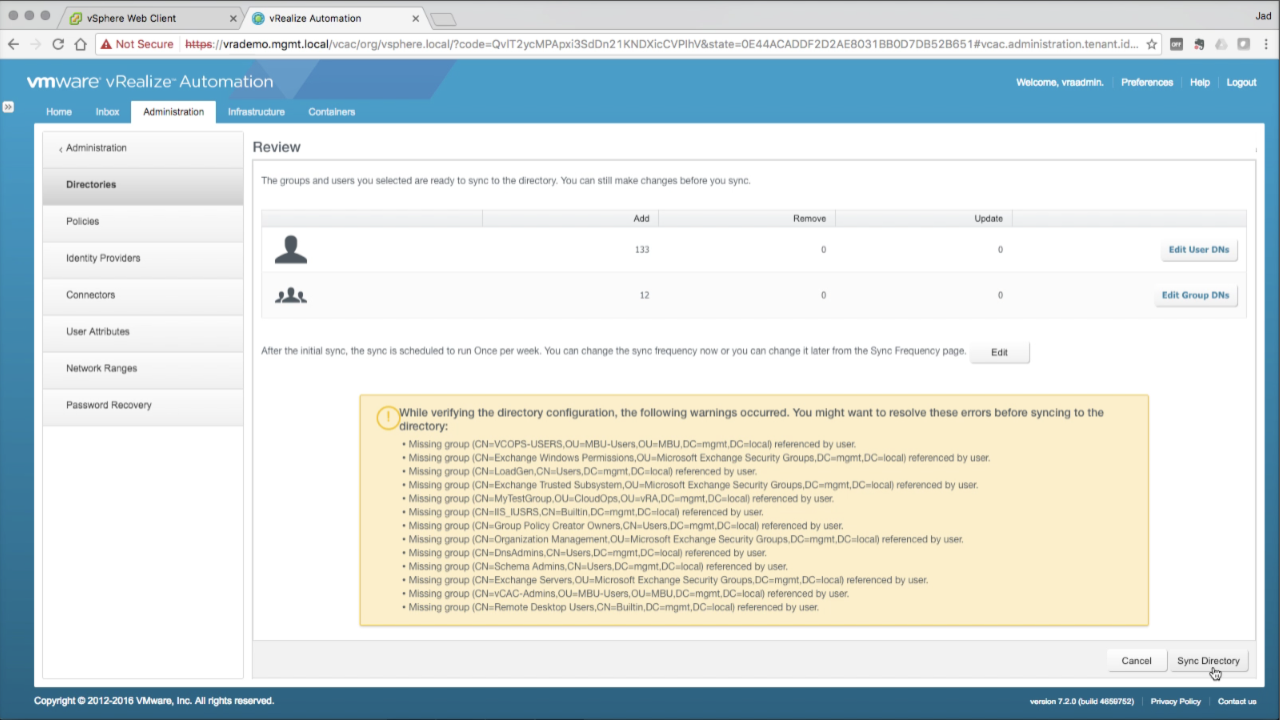
Review the sync details and make any necessary modifications if needed. You will be notified if target users belong to groups that are not selected for sync. This is okay, assuming you’ve made sure to cover your bases. Once reviewed, click Sync Directory to initiate the sync of the target AD Users and Groups to vIDM. |
|
|
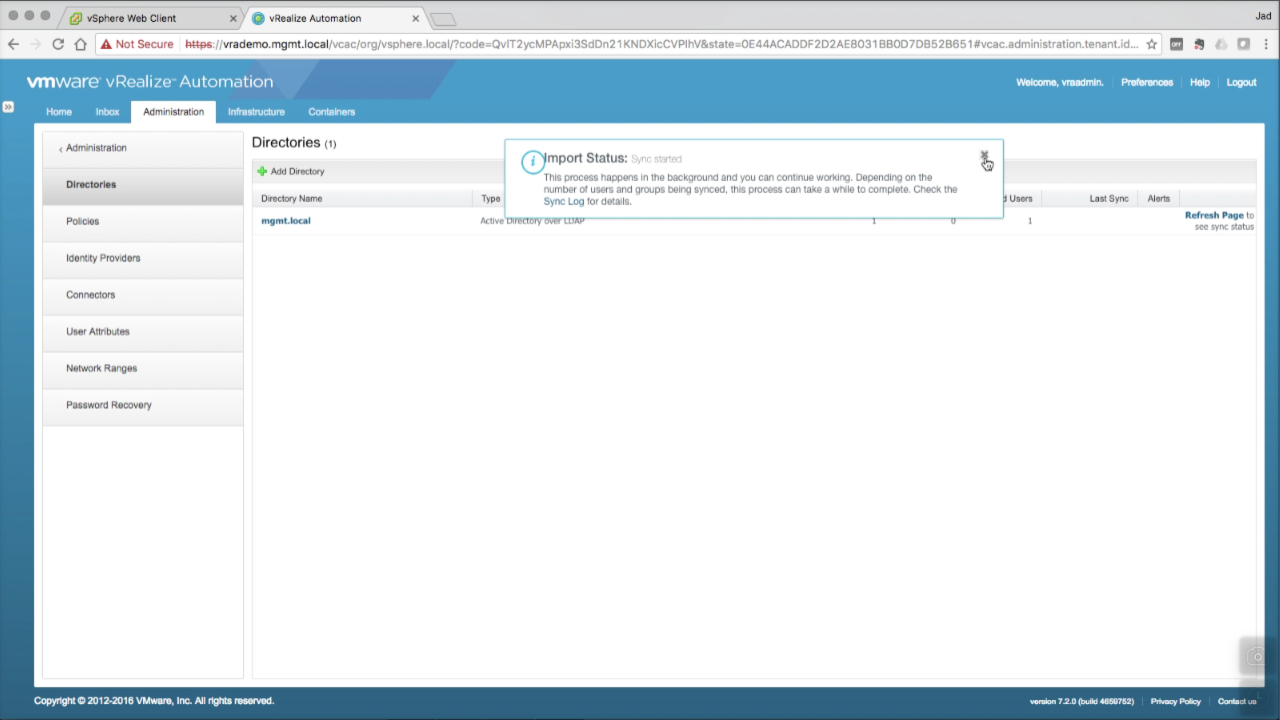
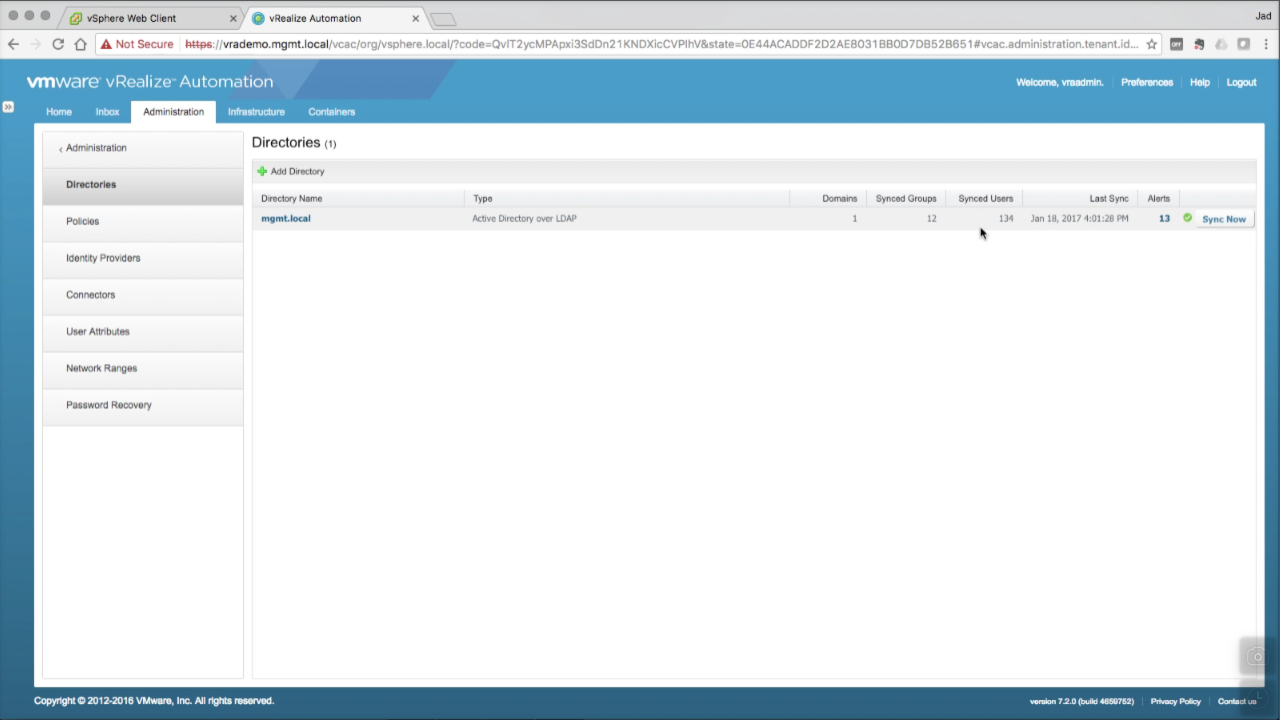
Sync Status You can monitor the sync status. The initial sync can take seconds to hours, depending on the number of target users and groups. Click Refresh to update the status until you get the green check and Last Sync column is updated. In this environment, syncing 12 groups and 134 users took about 10 seconds.
NOTE: vRA leverages vIDM for all things authentication and access control. Rather than hitting AD each time, vIDM stores the account object in the local database and syncs with the directory on a scheduled basis. Only the object and it’s relationships are stored…vIDM does not store or manage the account password. The sync schedule can be configured as needed (default once every 24 hrs). If you need to immediately add a new AD user account, come back to this screen and select Sync Now. |
|
vIDM High-Availability |
|
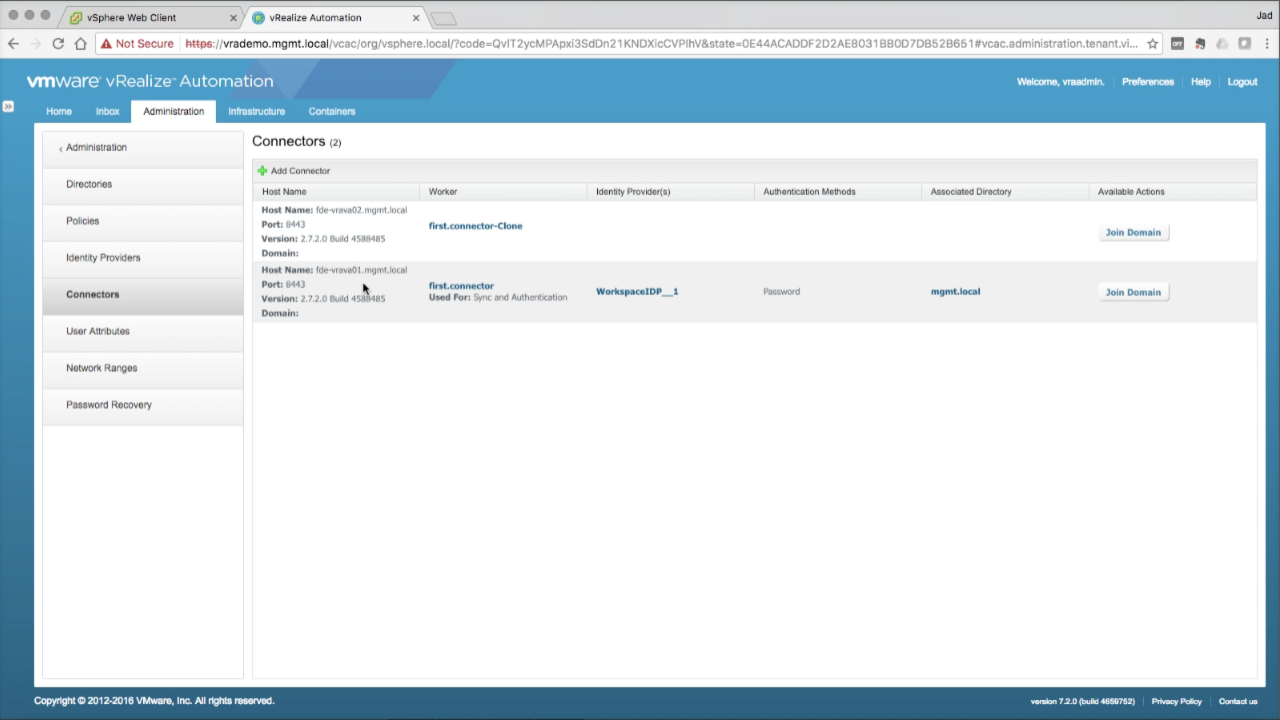
| Next we’ll add the vIDM connector from the secondary vRA VA and pass authentication to our load balancer VIP vs. the primary VA.
Navigate to the Connectors section Review the available connectors. Notice the primary VA is already configured and belongs to the default Identity Provider (IdP)… |
|
| Add Secondary Connector
Navigate to the Identity Providers section Notice the default Identity Provider, WorkspaceIDP_1, lists only the primary connector (Connectors column) Click on WorkspaceIDP_1 to edit… |
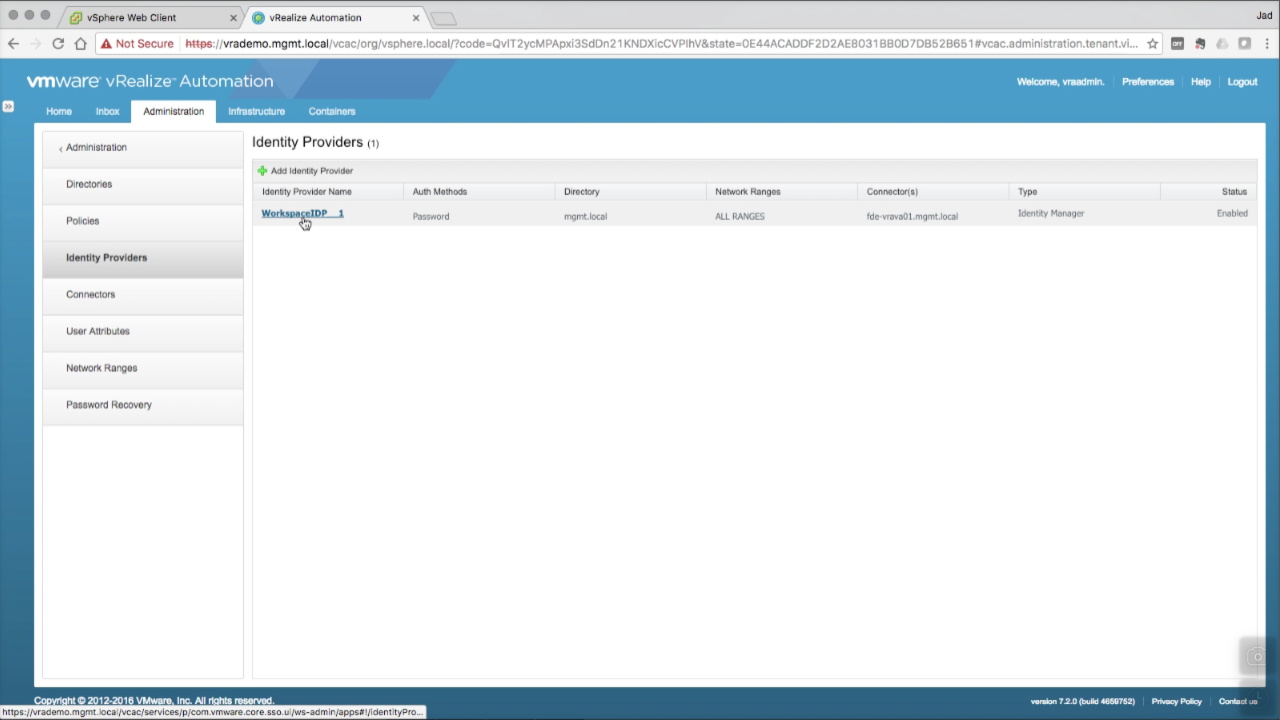 |
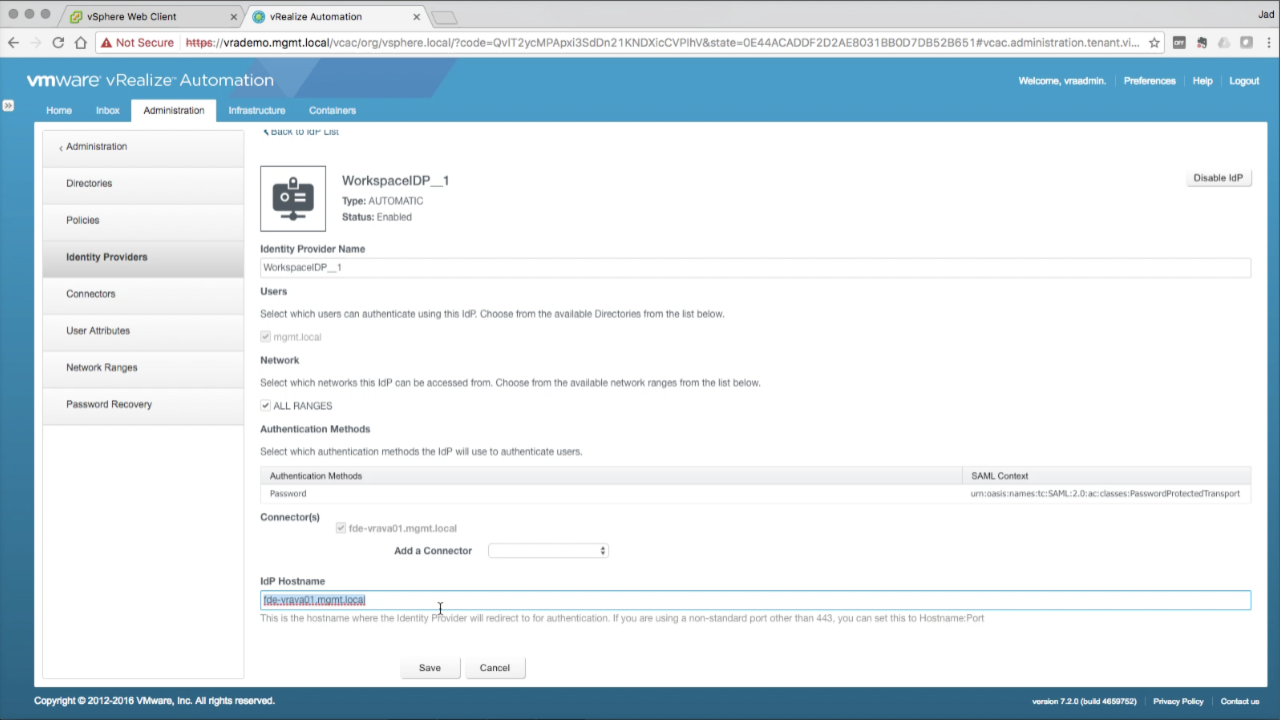
| Enable IdP HA
In the IdP Hostname section, replace the existing hostname (defualt should be the FQDN of the primary VA) with the load balancer VIP / CNAME FQDN (e.g. vrademo.mgmt.local)… |
|
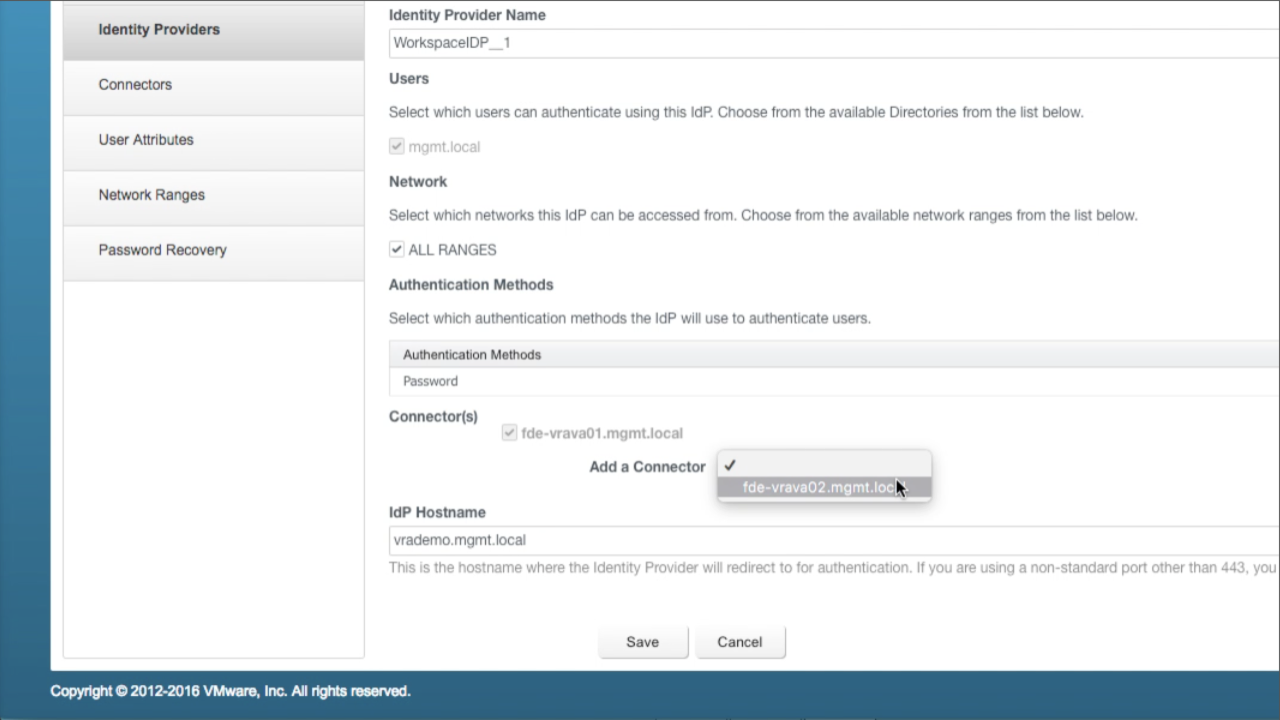
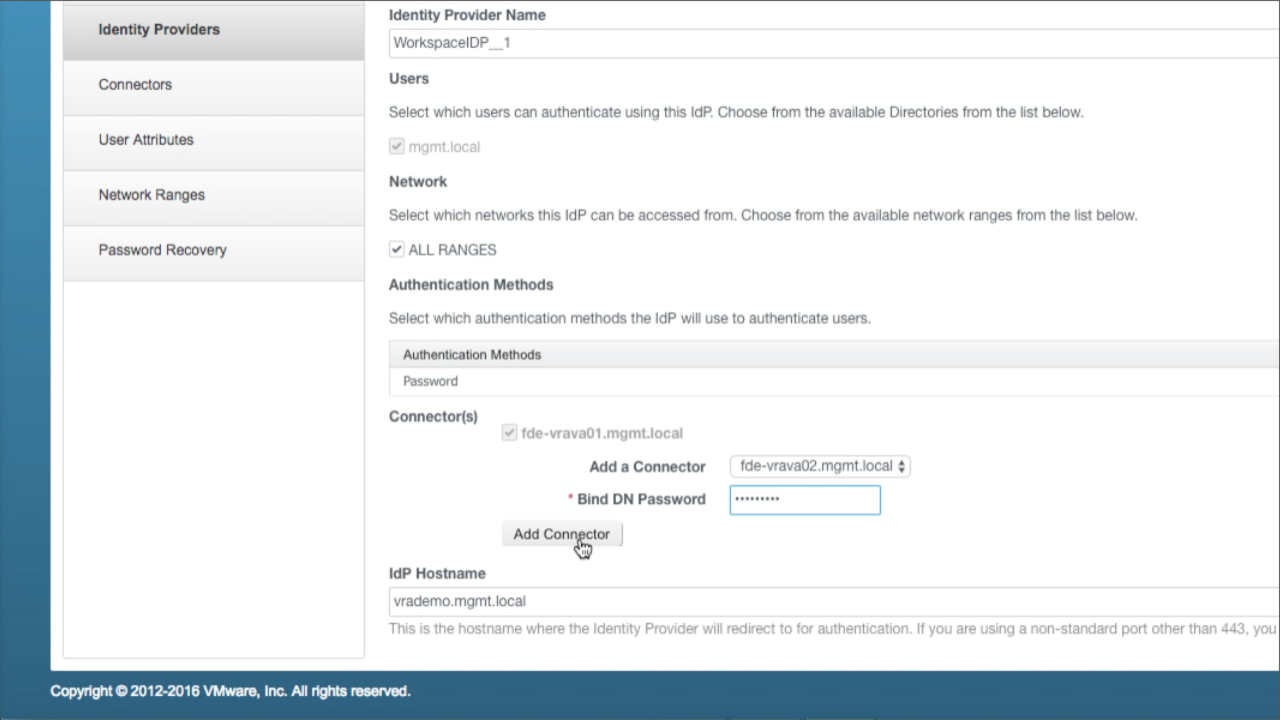
| Add Secondary Connector
Navigate to the Connector(s) section immediately above IdP Hostname Use the Add a Connector drop-down to select the secondary VA Once selected, enter the Bind DN Password (this is the PW to the account used during the initial directory bind). Click Add Connector to add the secondary node… |
|
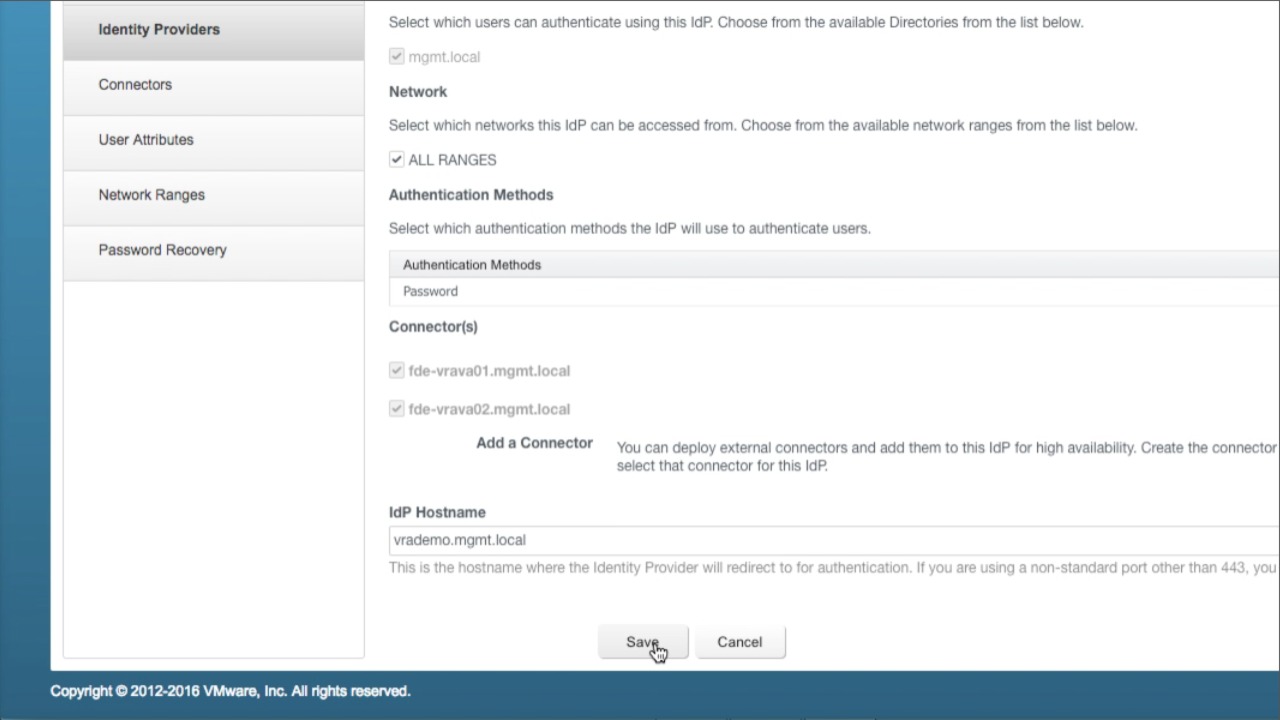
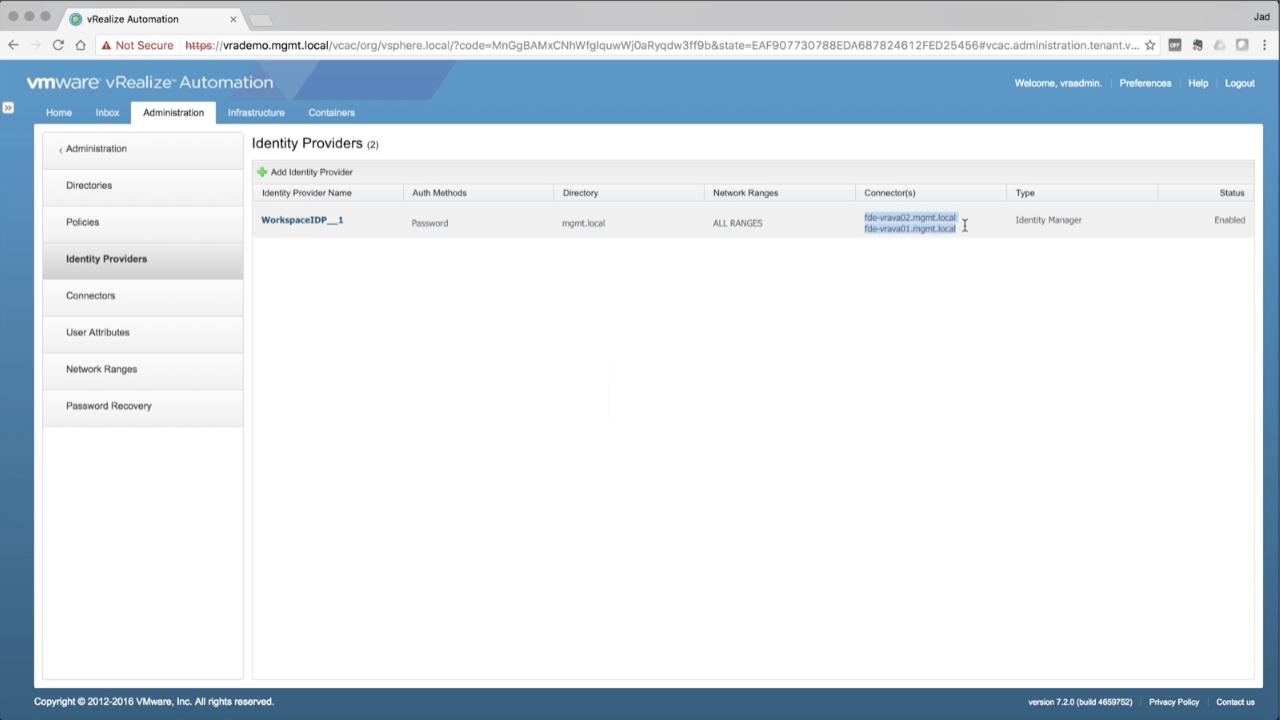
| Add Secondary Connector
Confirm the new connector is added to the list of Connector(s). Confirm the IdP Hostname is pointing to the VA’s VIP FQDN Click Save to save the changes. Back in the Identity Providers section, both Connectors should now be listed for the default Identity Provider, WorkspaceIDP_1 |
|
| Next, you’ll want to assign AD users and/or groups to vRA tenants for administration.
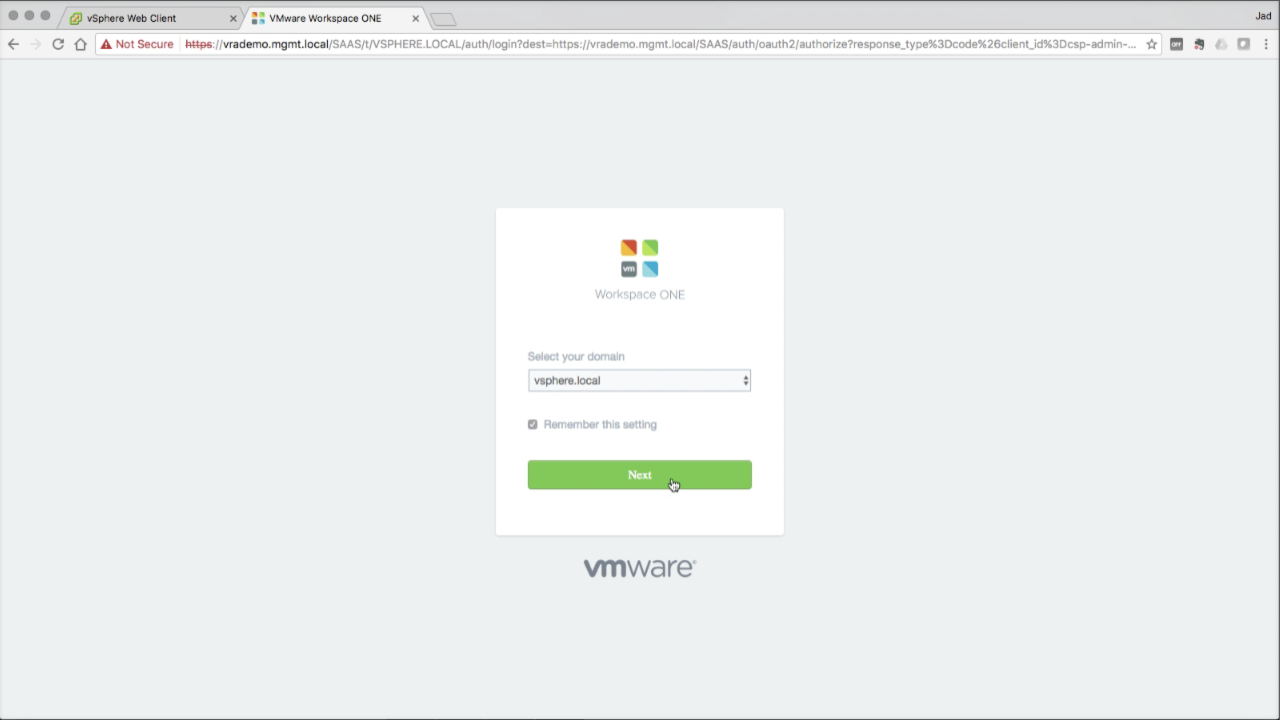
Open a new tab and browse to the vRA login screen (default tenant in this example). Notice there is now a domain drop-down available, which allows you to select the new directory. However, no accounts from the new directory have been given access yet, so we need to log in to the vsphere.local domain first. Log in to vsphere.local using the local SSO admin account:
Click Sign in to log in… |
|
| Add AD Accounts to defaul Tenant
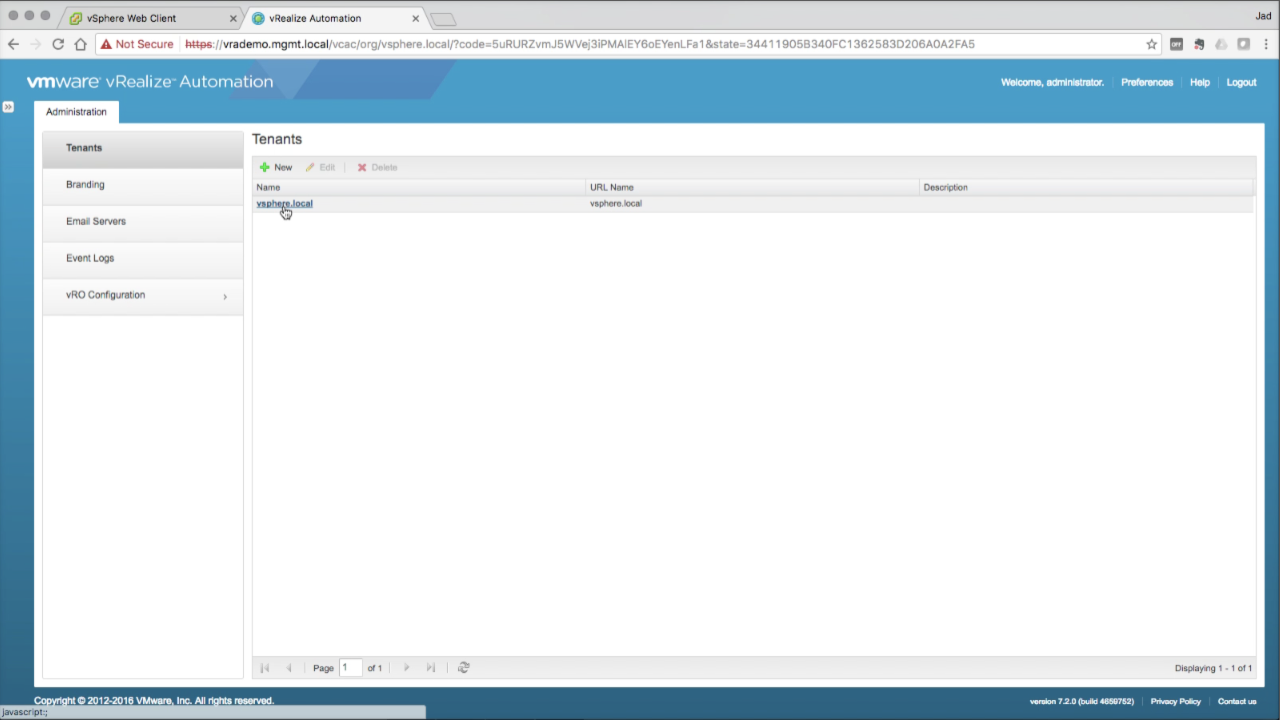
In the Tenants section, click on vsphere.local to edit… |
|
| Add AD Accounts to default Tenant
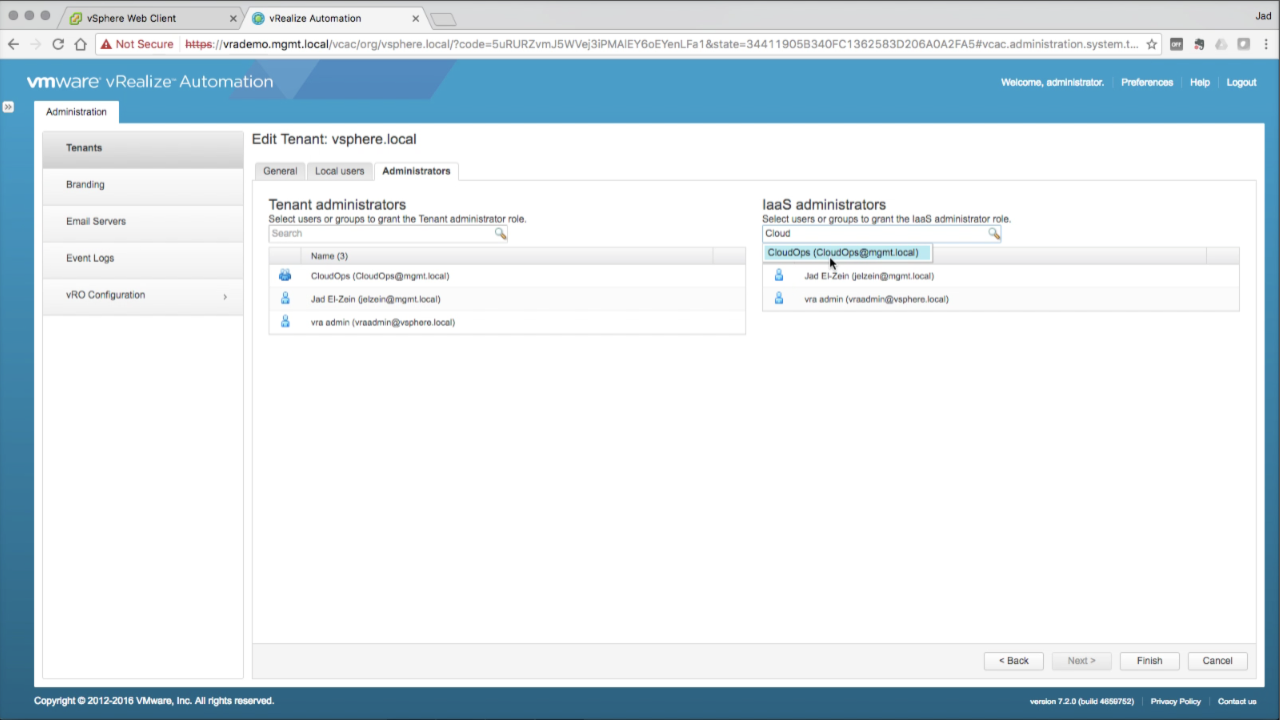
Go to the Administrators tab You can now add users and groups from the configured AD directory. In this example, i’m adding my domain account, [email protected], to the Tenant Administrators and IaaS Administrators roles. You can also add AD groups to either role (e.g. [email protected]). Once you’ve added all the desired AD users and groups to either role, select Finish to save. Click Logout to log out of the admin session. |
|
|
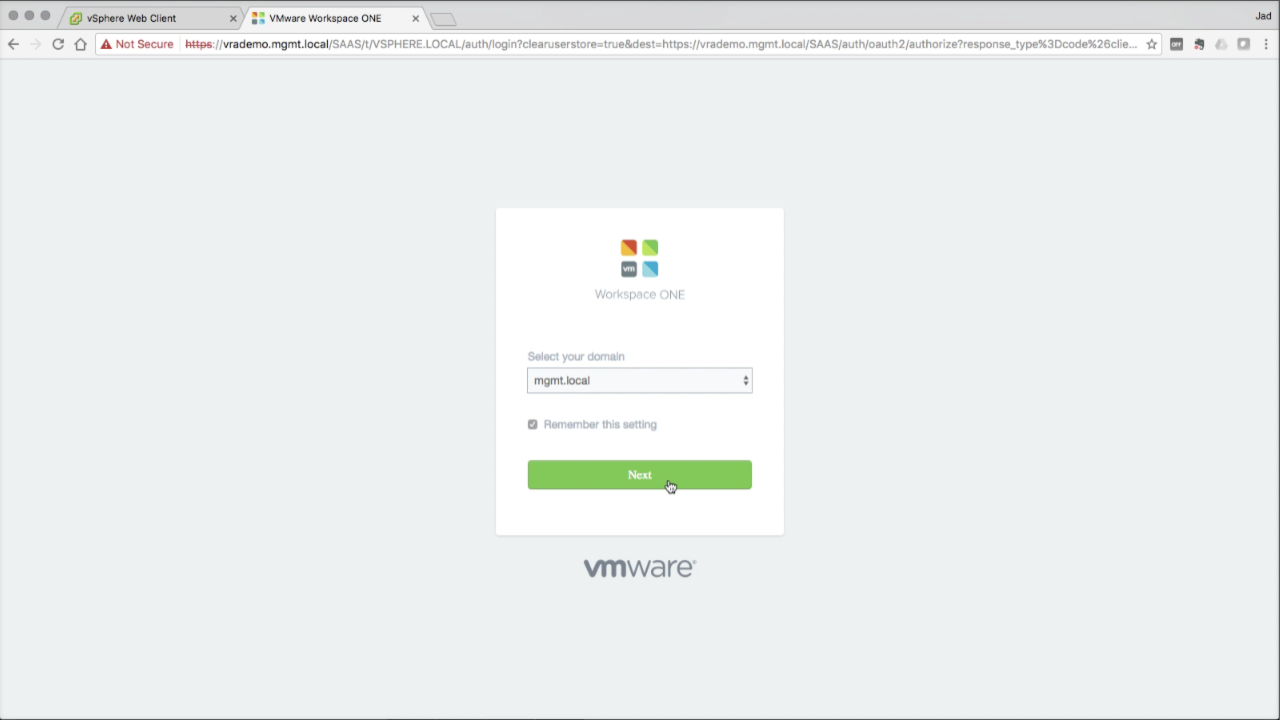
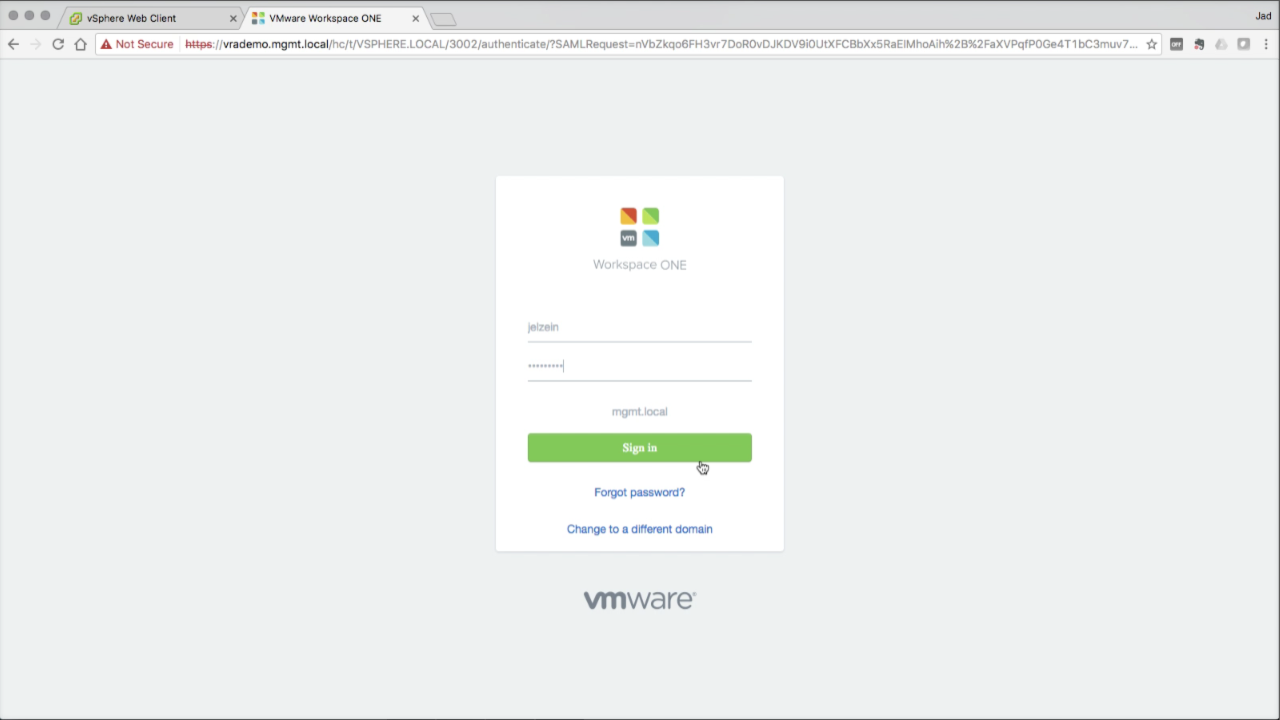
You can test AD integration by logging back into the vsphere.local Tenant using an AD user account that was granted Tenant Administrator access in the previous step. From the login screen, click Change to a Different Domain Select your AD domain from the drop-down menu, then click Next to log in. Sign in with the desired AD account… |
|
| And there you have it… | 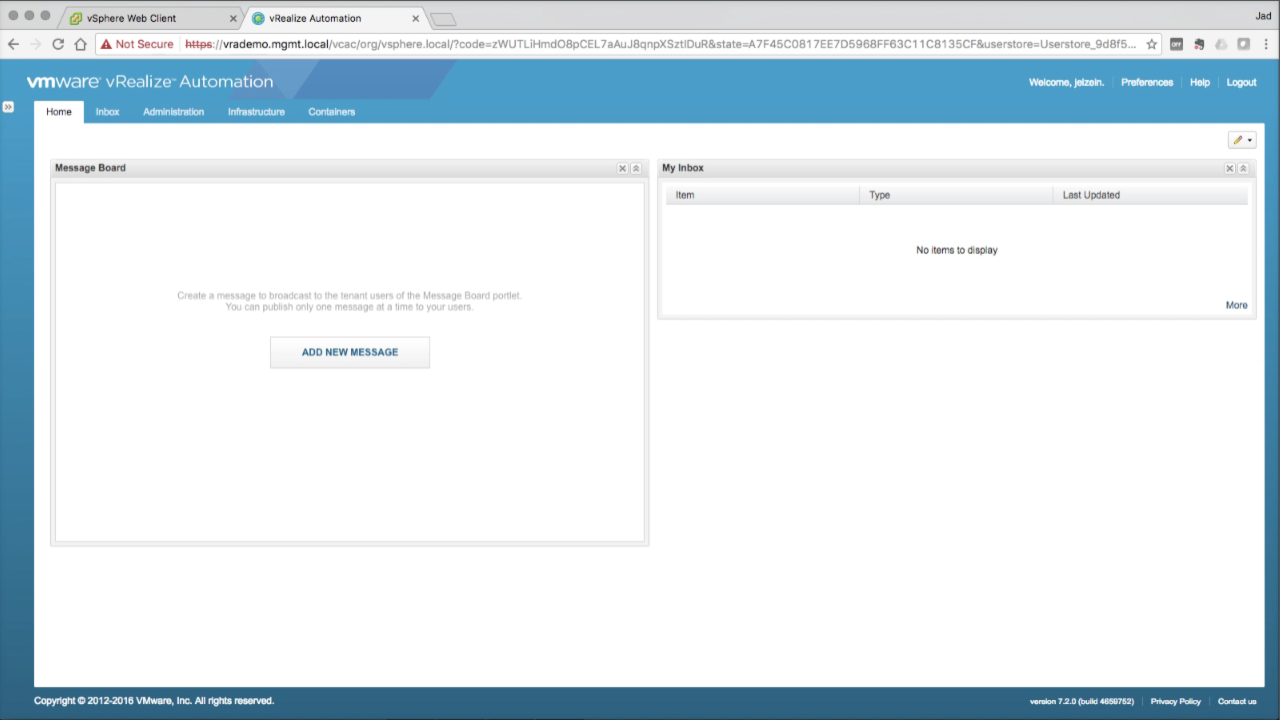 |
Review
While we’re sticking to the default tenant (vsphere.local) throughout this guide, you are free to add additional Tenants as needed. Any number of tenants can share a common directory…or be configured with one (or more) unique directories.
And now that we’ve got an initial set of users, we can move on to building out the remaining IaaS Fabric.
Next Step: 08 – IaaS Fabric
+++++
@virtualjad
![[virtualjad.com]](https://www.virtualjad.com/wp-content/uploads/2018/11/vj_logo_med_v3.png)
I am unable to login to the default tenant post deploying a new vRA setup. Post installation, I can see the vcac console and post entering the sso admin credentials, it just stucks on the screen and keeps circling. Any suggestions?
Has anyone tried this in 7.3? After clean install and upgrade – cannot see domain in subsequently created tenants?
Excellent