The Deployment Wizard is invoked by logging into the primary VA’s Virtual Appliance Management Interface (VAMI) using the configured root account. Once logged in, the admin is immediately presented with the new Deployment Wizard UI. The wizard will provide a choice of a minimal (POC, small) or enterprise (HA, distributed) deployment then, based on the desired deployment type, will walk you through a series of configuration details needed for the various working parts of vRA, including all the windows-based IaaS components and dependencies. For HA deployments, all the core components are automatically clustered and made highly-available based on these inputs.
In both Minimal and Enterprise deployments, the IaaS components (Manager Service, Web Service, DEMs, and Agents) are automatically pushed to available windows IaaS servers made available to the installer thanks to the management agent.
More Details: https://www.virtualjad.com/2015/10/vrealize-automation-7-part-3-the-deployment-wizard.html
Checklist:
- Log in to VAMI of Primary Appliance (vrava01)
- Initiate Installation Wizard when prompted
- Follow the prompts to complete a distributed installation
- Validate services are started
Video
Detailed Steps
| Configuration Details | Screenshots |
|---|---|
| Start the Deployment Wizard by logging into the Virtual Appliance Management Interface (VAMI) of the PRIMARY appliance (e.g. https://fde-vrava01.mgmt.local:5480).
Log in to VAMI with the credentials set during VA deployment:
Click Login… |
|
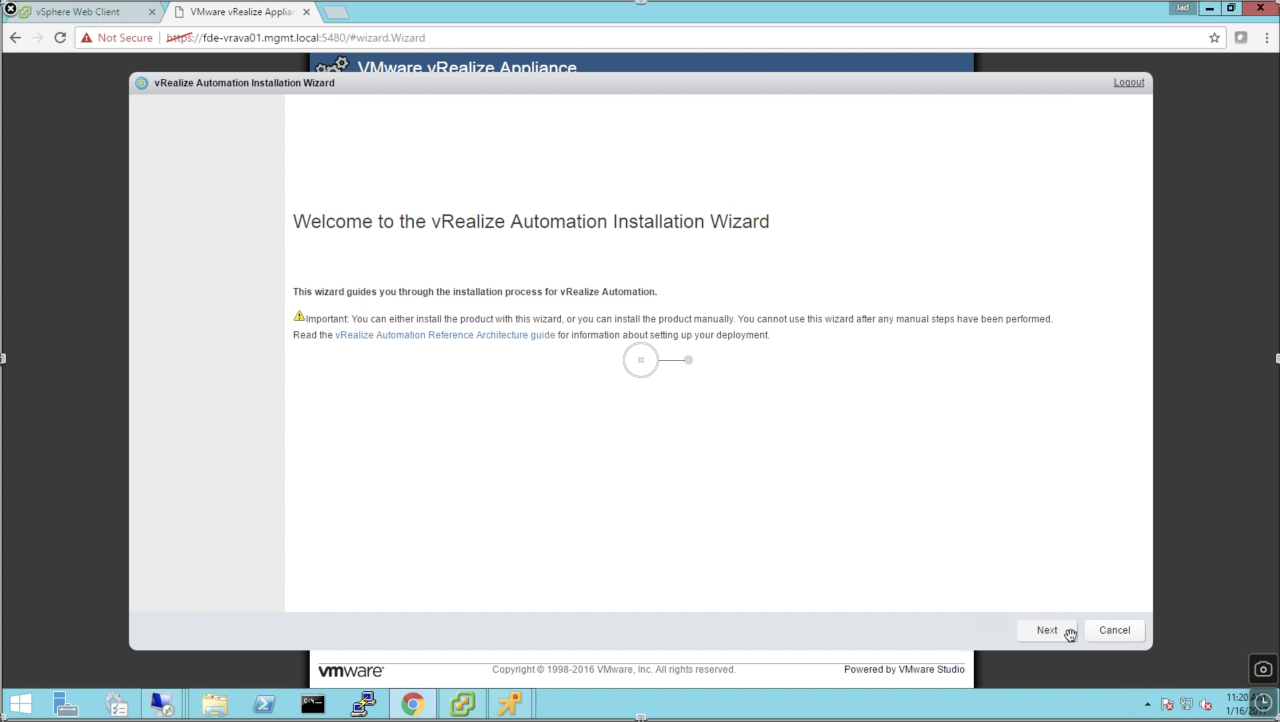
| Welcome
At first login, the the Deployment Wizard will automatically launch in the UI. Click Next to continue… |
|
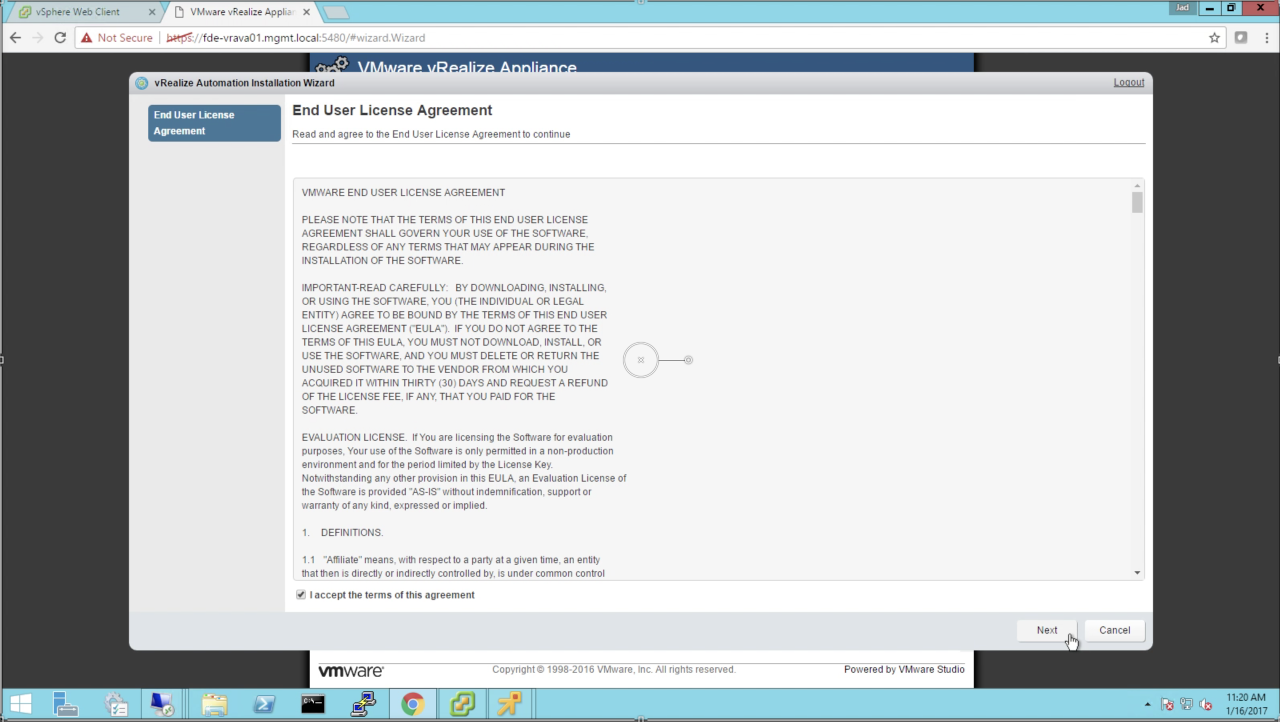
| EULA
Carefully read and memorize the entire EULA then tick the checkbox to accept the terms. Click Next to continue… |
|
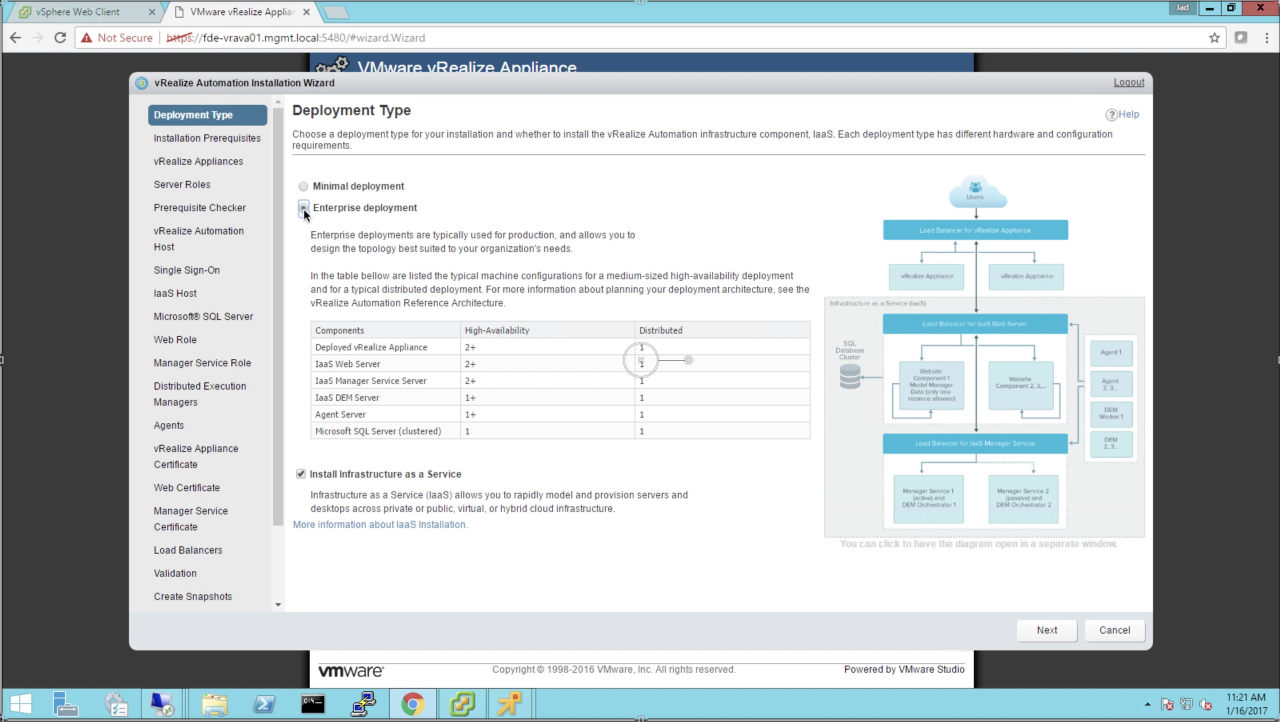
| Deployment Type
The wizard supports Minimal (monolithic / POC) and Enterprise (distributed / production) deployments. Since this guide is all about a distributed deployment, that’s what we’ll choose. Select Enterprise deployment Ensure the check box for Install Infrastructure as a Service is checked (default). Click Next to continue… |
|
|
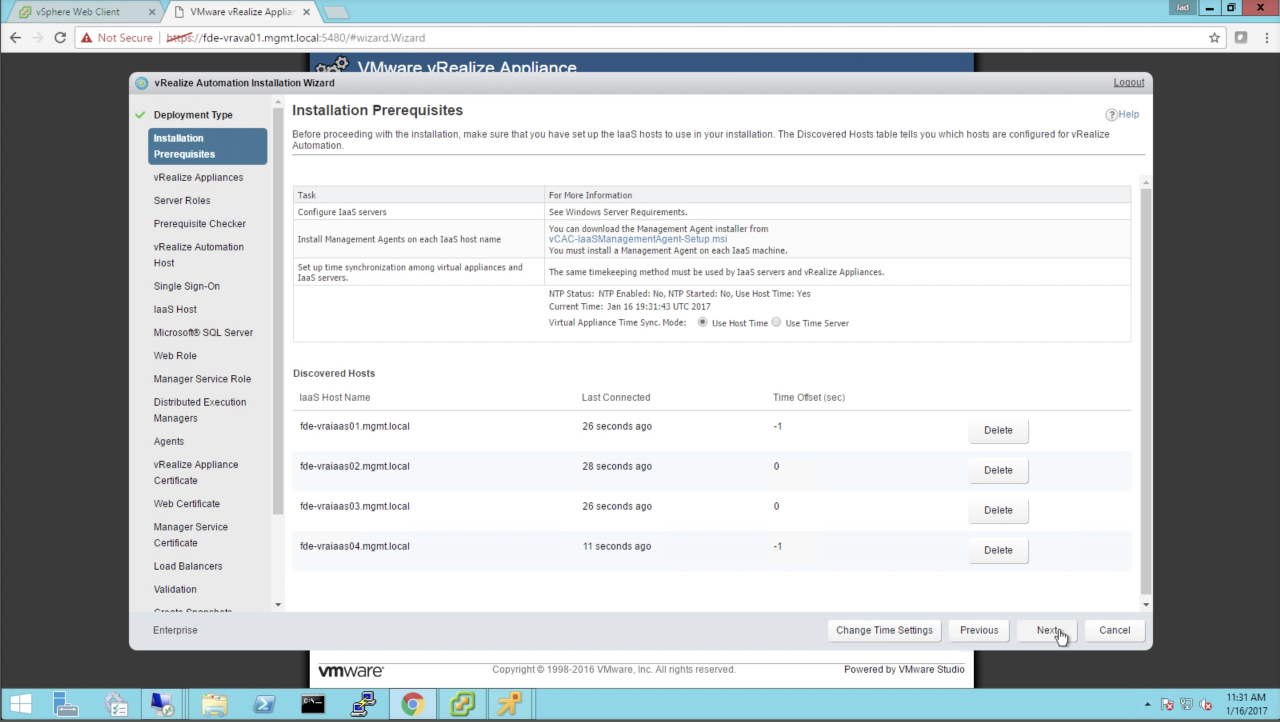
Installation Prerequisites (IaaS) Assuming the IaaS nodes were properly configured and registered, they should all show up in the list of Discovered Hosts. Review the list then click Next to continue…
The registration depends on the vRA Management Agent that was installed in IaaS Host Prep. If one or more hosts do not appear on this list, RDP into that host and ensure the management service has started and network is configured properly. |
|
| vRealize Appliances
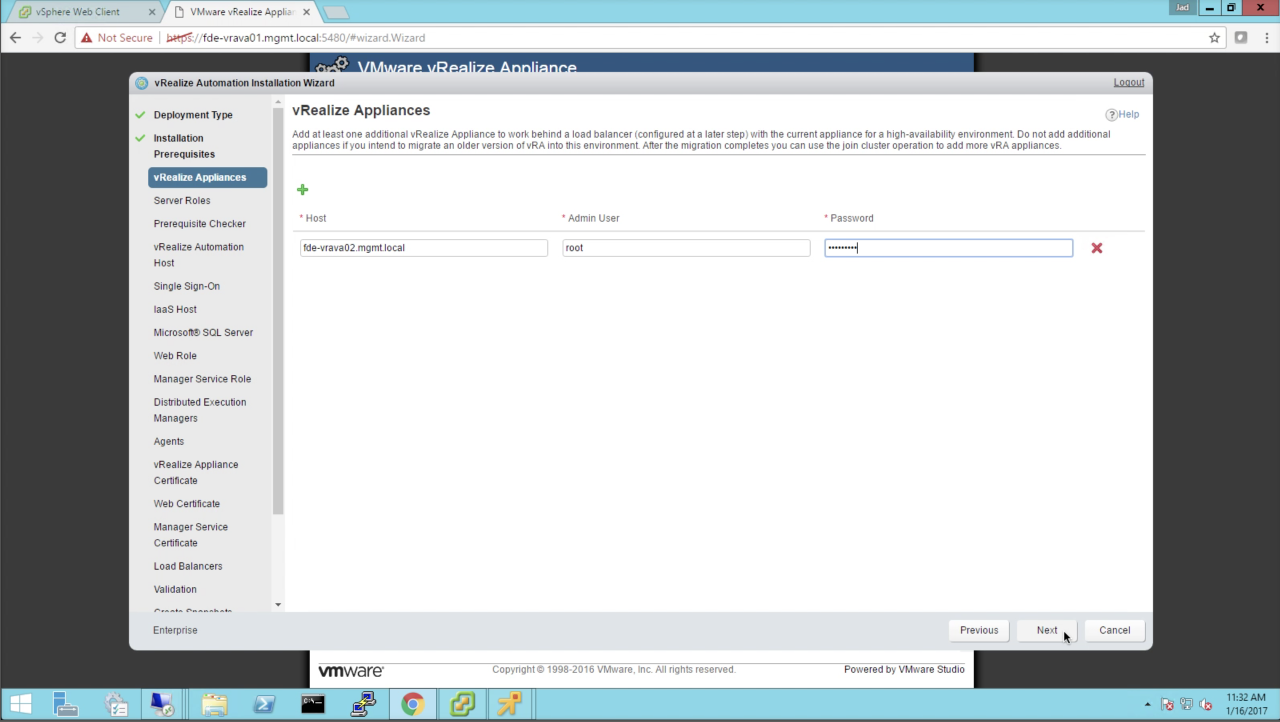
Click the + to add the secondary vRA VA (this host should be powered up and standing by). Enter the host information:
Click Next to continue… |
|
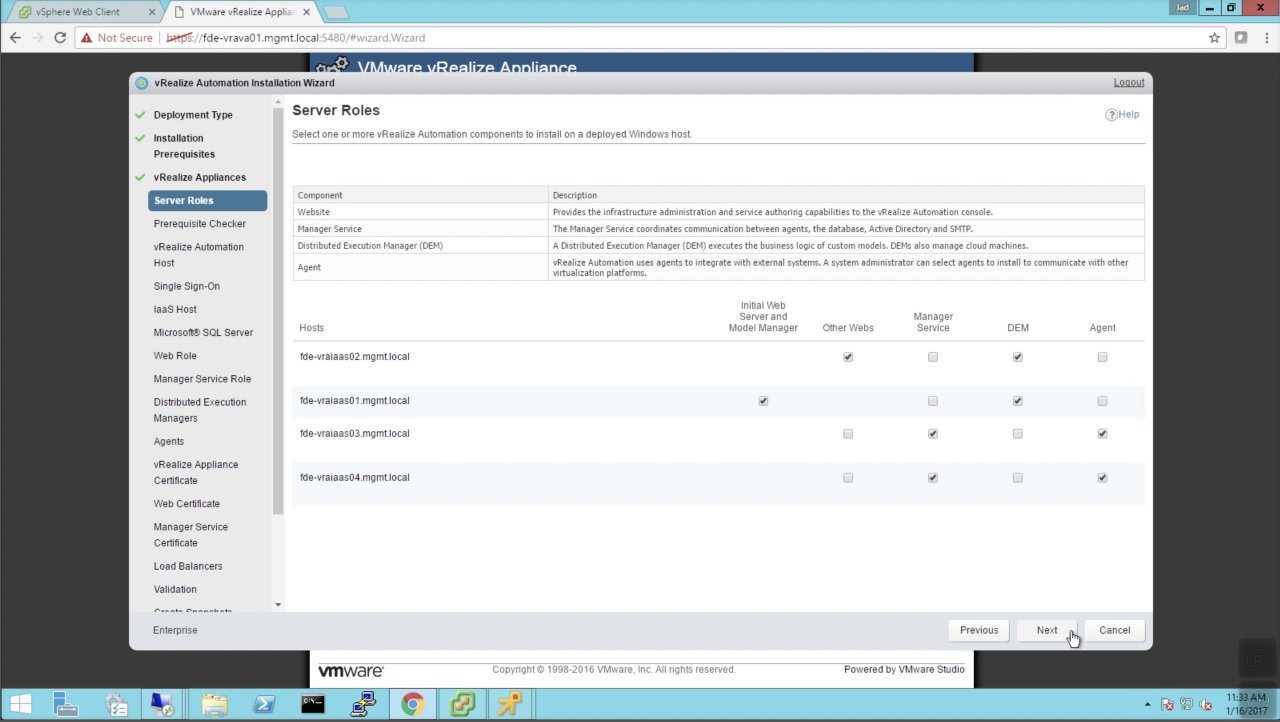
| Server Roles
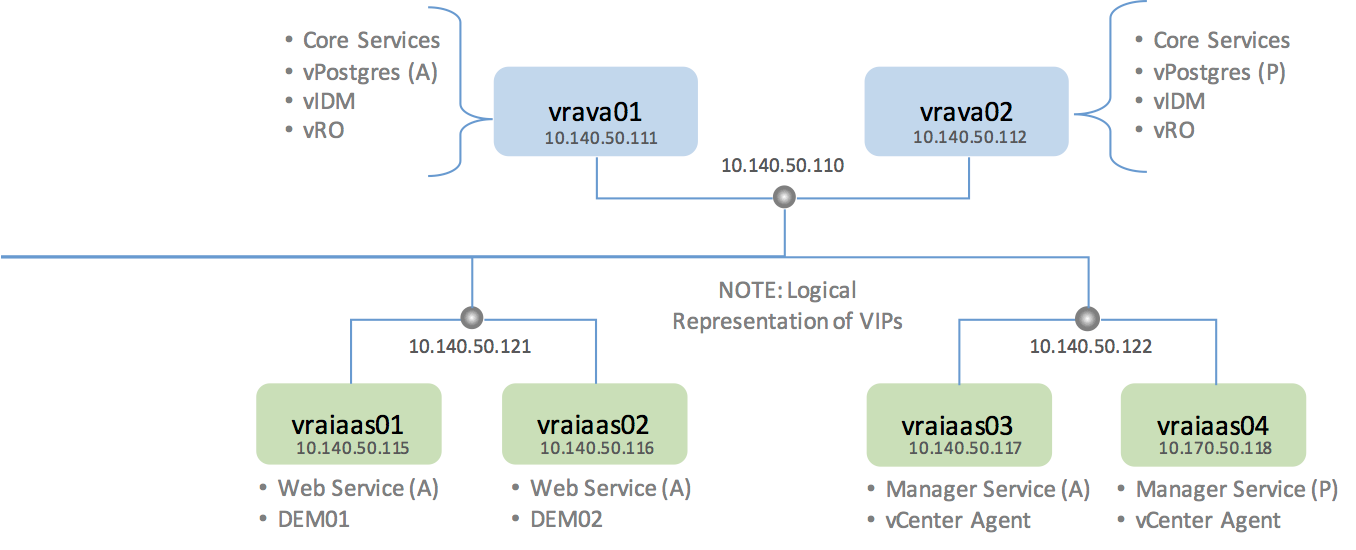
Now we’ll assign various IaaS server roles to the IaaS nodes. Refer back to the introduction to review the roles and planned service placement. In this environment, the roles are laid out as follows: fde-vraiaas01.mgmt.local
fde-vraiaas02.mgmt.local
fde-vraiaas03.mgmt.local
fde-vraiaas04.mgmt.local
Check the corresponding check box for each host and service, starting with Initial Web Server. Review, review again, then click Next to continue… |
|
| Prerequisite Checker
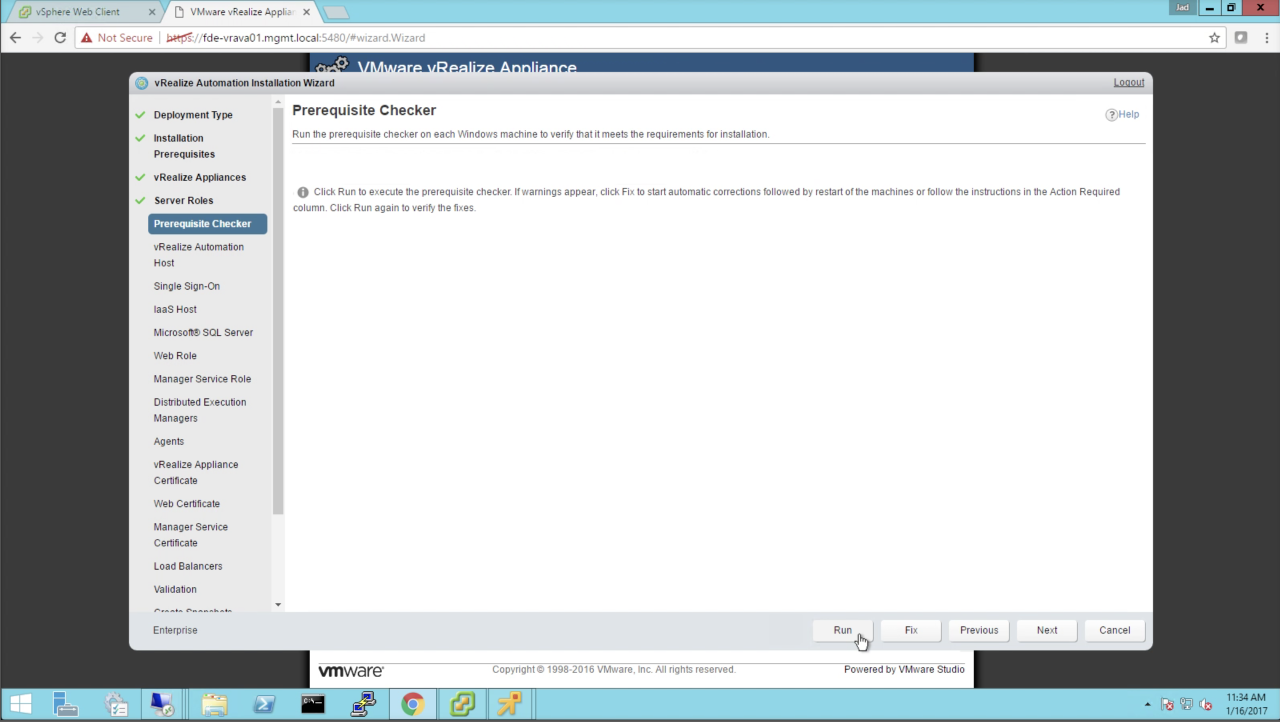
The Prerequisite Check will invoke the vRA Management Agent to analyze each IaaS node to determine prerequisite status. Click Run to initiate the check… |
|
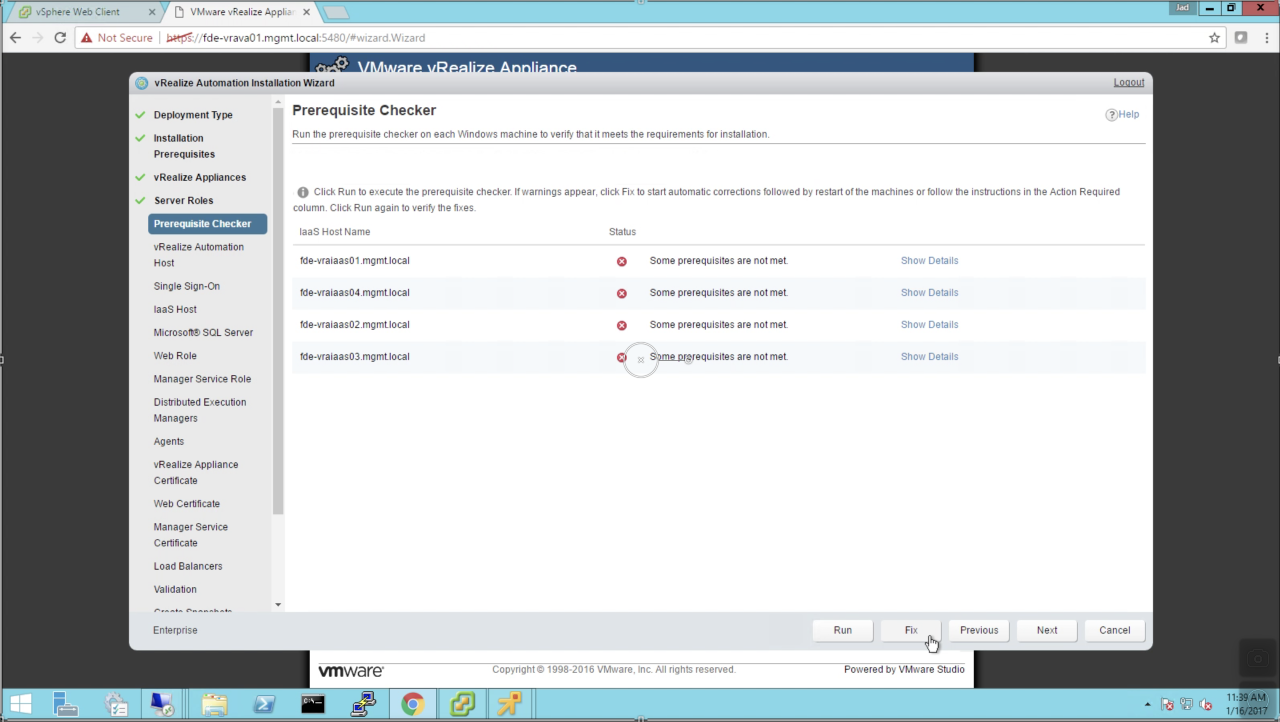
| Prerequisite Checker
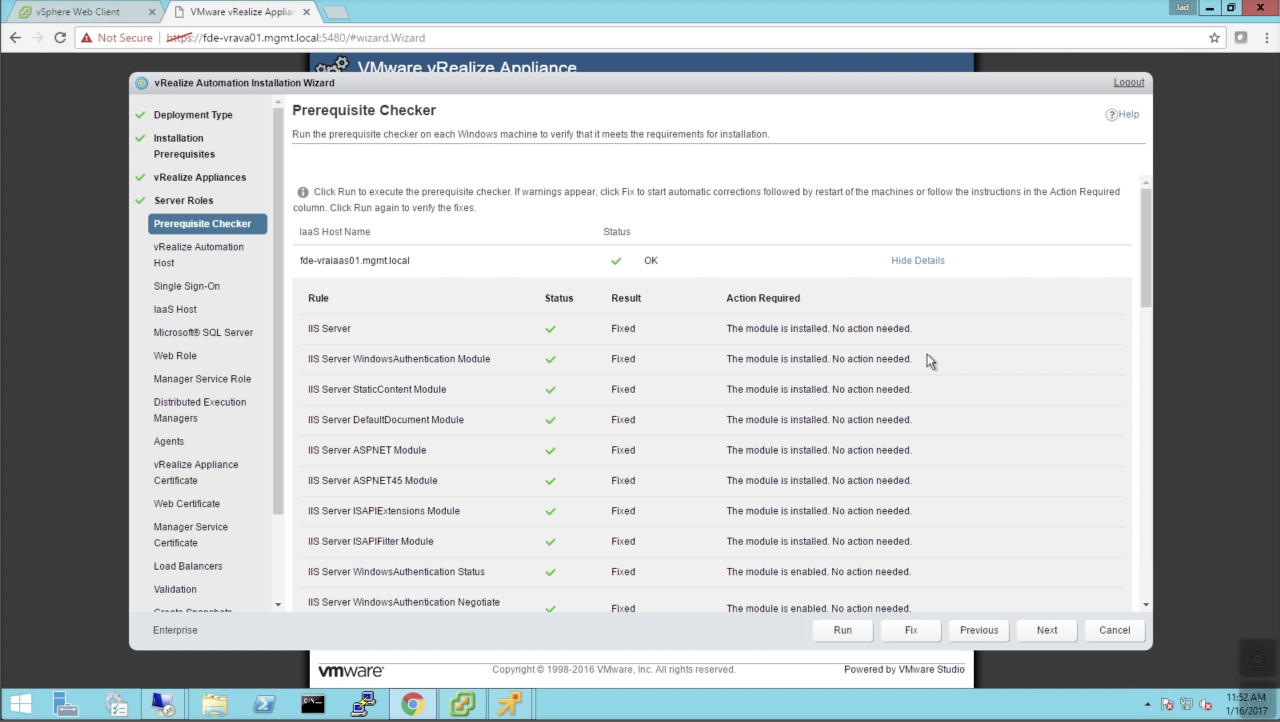
Since our IaaS nodes are mostly vanilla at this point, you should expect every node to fail with “Some prerequisites are not met”. You can select Show Details to get a detailed analysis. After reviewing details, click Fix to have the wizard automatically push the prerequisites to each of the IaaS nodes. A couple things to note… 1) this is awesome 2) this might take a while…in my environment, it took about 14 minutes. |
|
|
Prerequisite Checker Once the wizard has pushed all the updates to each node (and reboot), it will automatically run the check again. At this point you should have green checks for status. If all looks good, click Next to continue…
NOTE: If any of the prereqs failed to be fixed, you must inspect further to understand why – chances are something on the IaaS node is blocking access. In case the check fails a 2nd time, try manually configuring the prerequisites – you can then come back to the wizard and click Run again. |
|
|
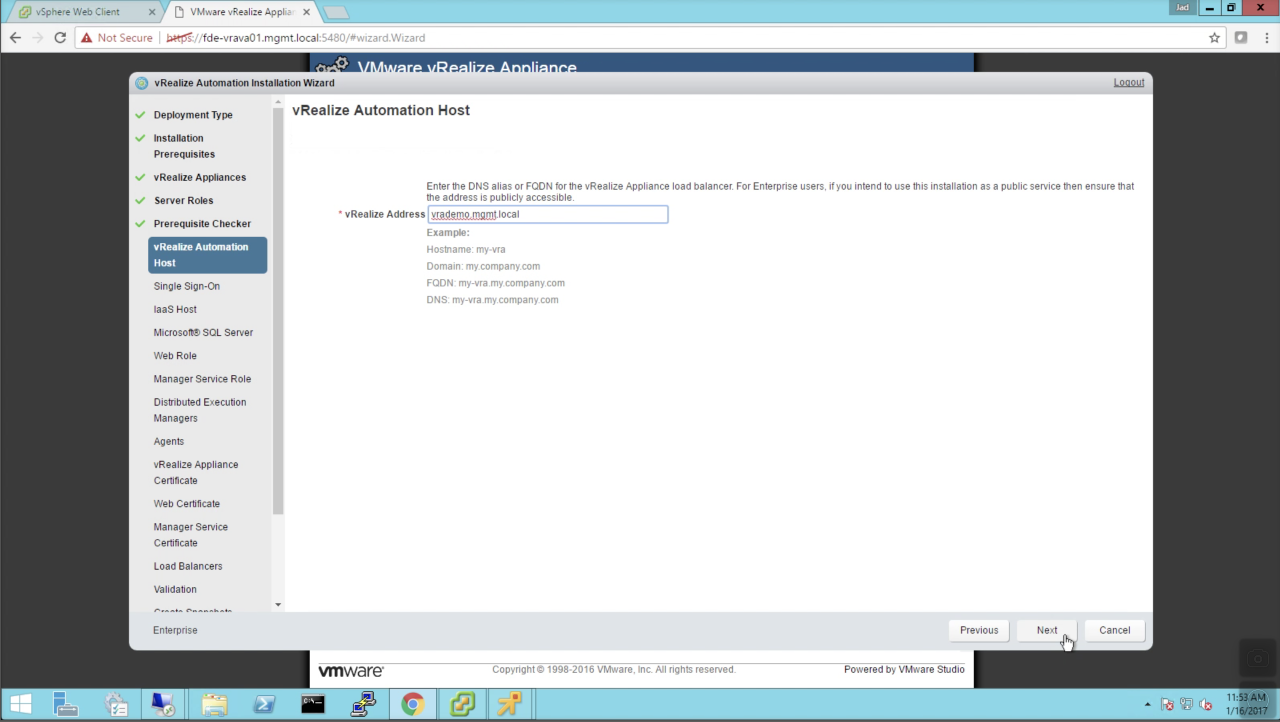
vRealize Automation Host vRealize Address: enter the FQDN of the LOAD BALANCER VIP (e.g. CNAME) Remember, we created a CNAME for what will eventually point to the load balancer VIP. At this point, the CNAME should be pointing to the primary appliance FQDN. If you’re unsure at this point, open a command prompt and ping this FQDN (e.g. vrademo.mgmt.local) – you should get a response from the primary VA (e.g. fde-vrava01.mgmt.local). If not, you need to fix DNS before you continue. |
|
| Single Sign-On
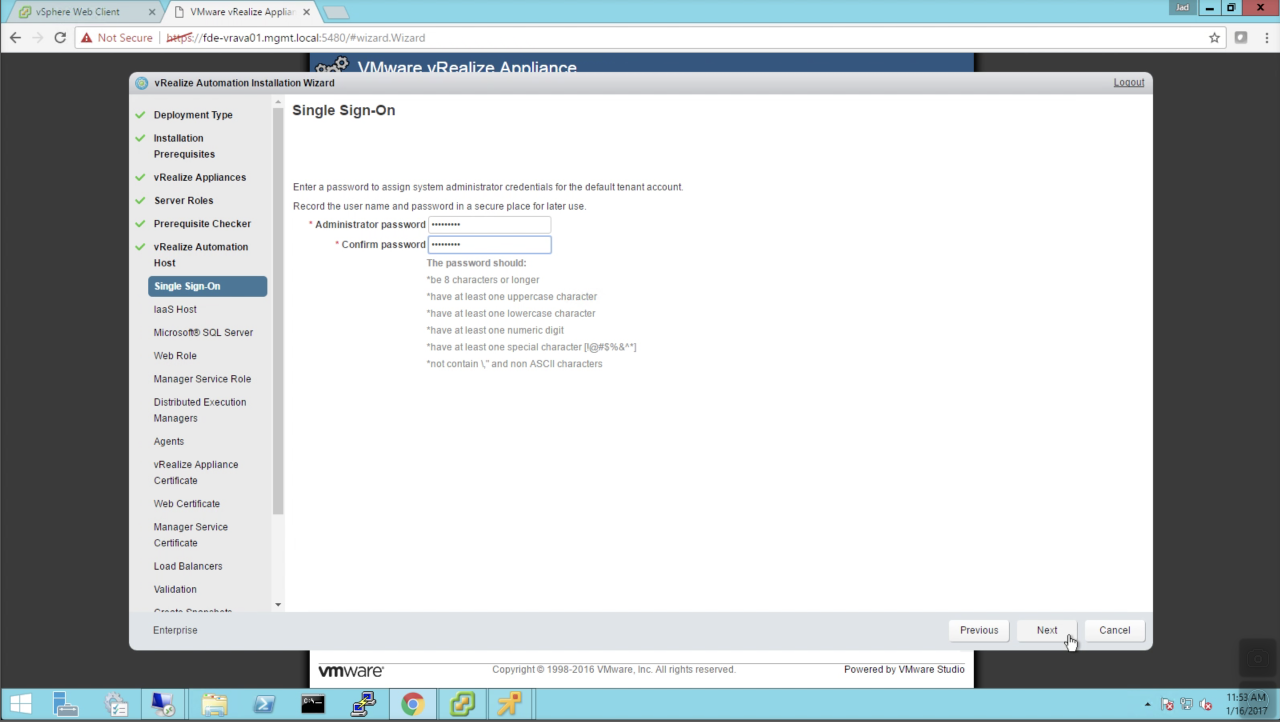
Enter and confirm a password that will be applied to vIDM’s default Administrator username ([email protected]). You cannot change the username. This is the account that will be used for initial login and tenant configuration. Click Next to continue… |
|
| IaaS Host
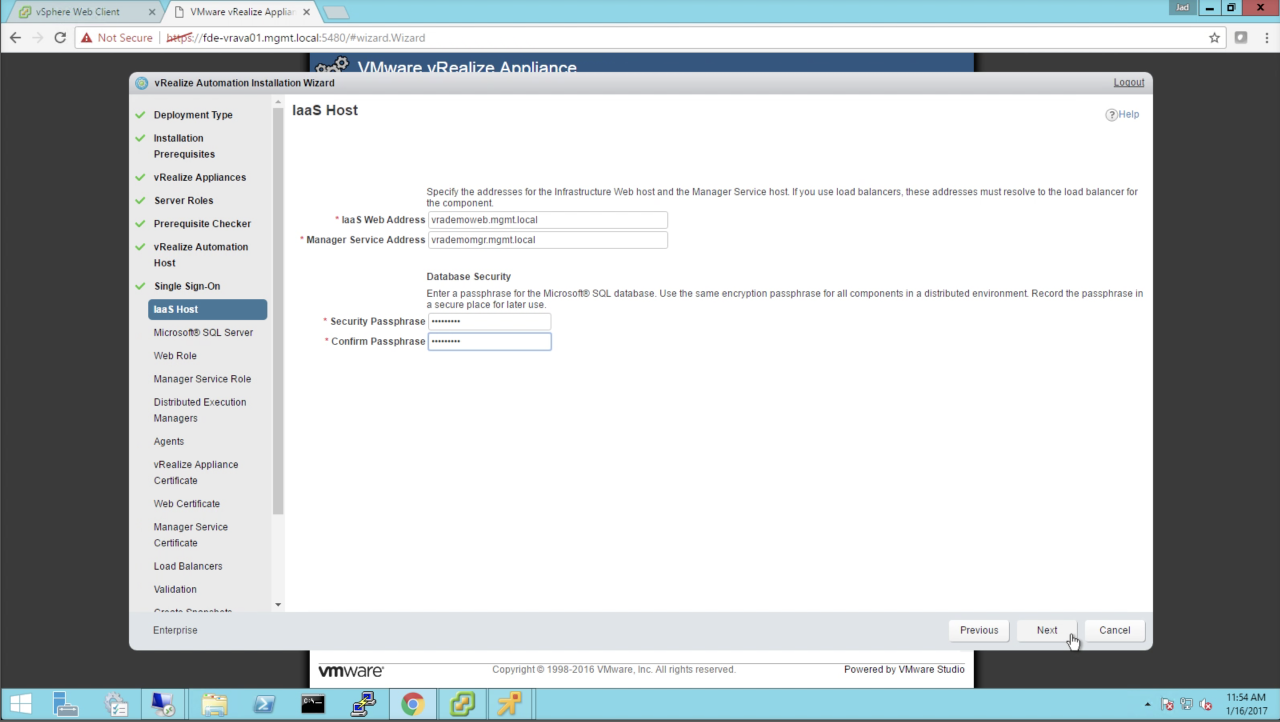
Enter the CNAME FQDN of the IaaS Web and Manager services. Again, these CNAME’s should resolve to the primary Web and Manager node FQDN’s at this point…but ultimately this will be pointed to the load balancer VIP for each service.
Database Security – enter and configure a passphrase that will be used to encrypt the SQL database. Click Next to continue… |
|
|
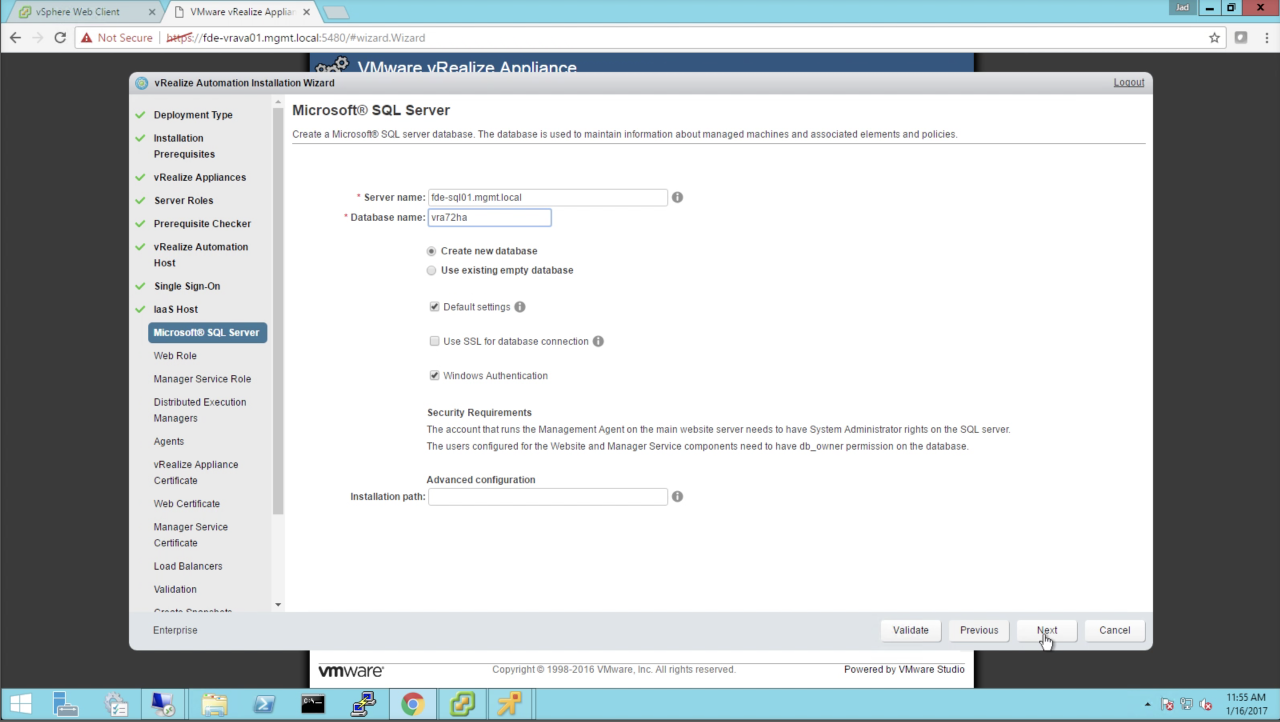
Microsoft SQL Server Enter the details of the SQL server:
Click Validate and wait for validation Click Next to continue…
NOTE: The database does not have to exist at this point…the installer will automatically create one using the defined DB name using the IaaS service account (when Windows Auth is used). Ensure that account has appropriate access to the target SQL instance. |
|
| Web Role
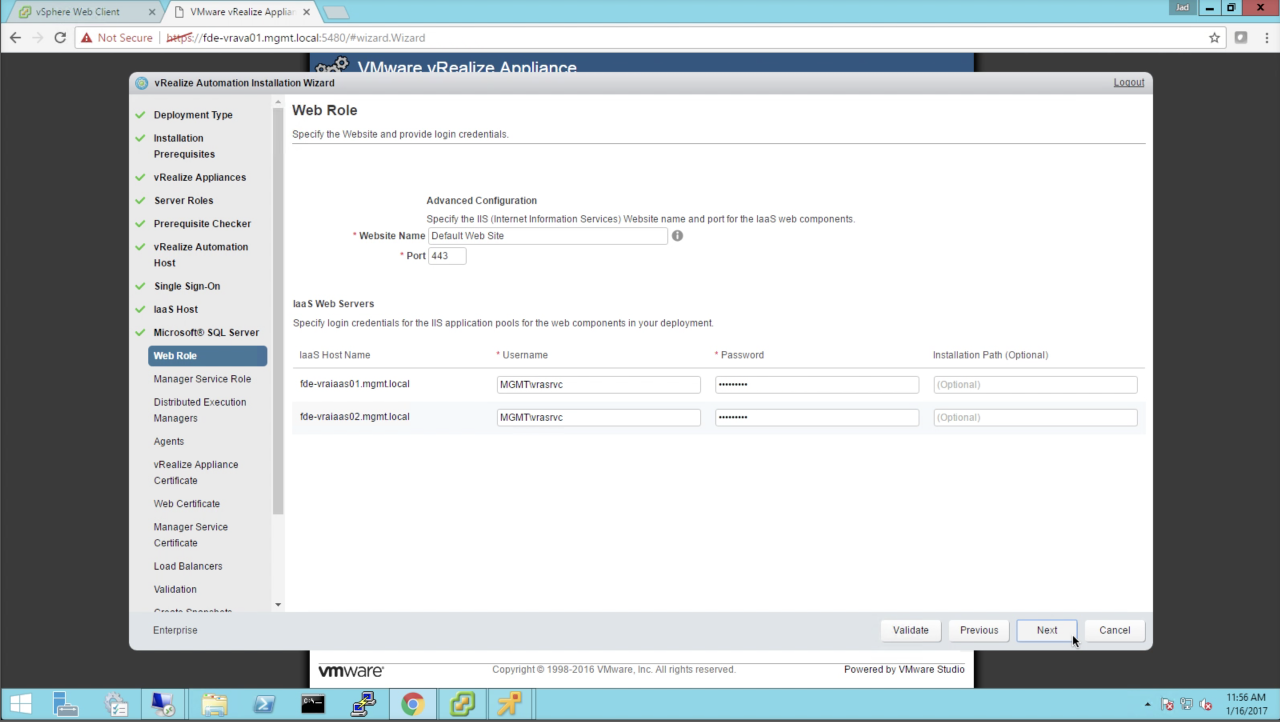
Use the default Website Name and Port. This assumes the IaaS nodes are dedicated for vRA and IIS was pushed by the prereq installer). IaaS Web Servers: Enter the Username (e.g. MGMT/vrasrvc) and Password for each of the web nodes. This should be the dedicated vRA service account. Click Validate (optional) Click Next to continue… |
|
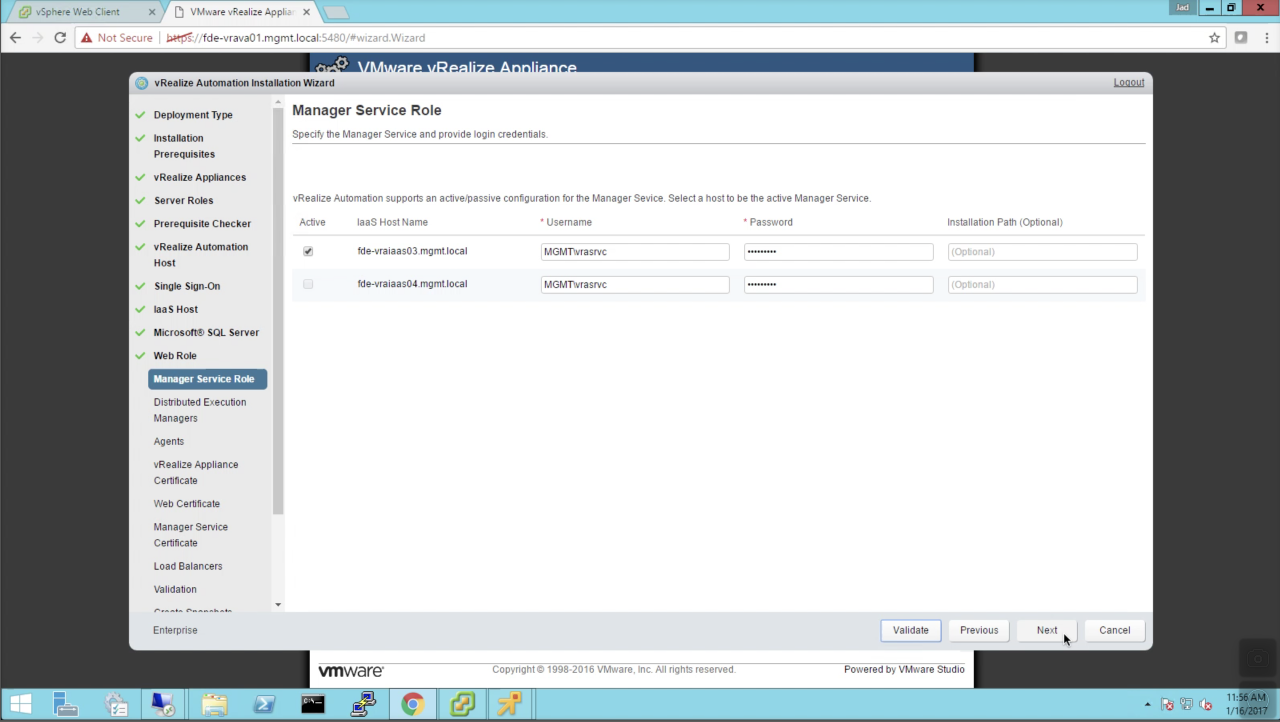
| Manager Service Role
Enter the Username (e.g. MGMT/vrasrvc) and Password for each of the manager nodes. This should be the dedicated vRA service account. Click Validate (optional) Click Next to continue… |
|
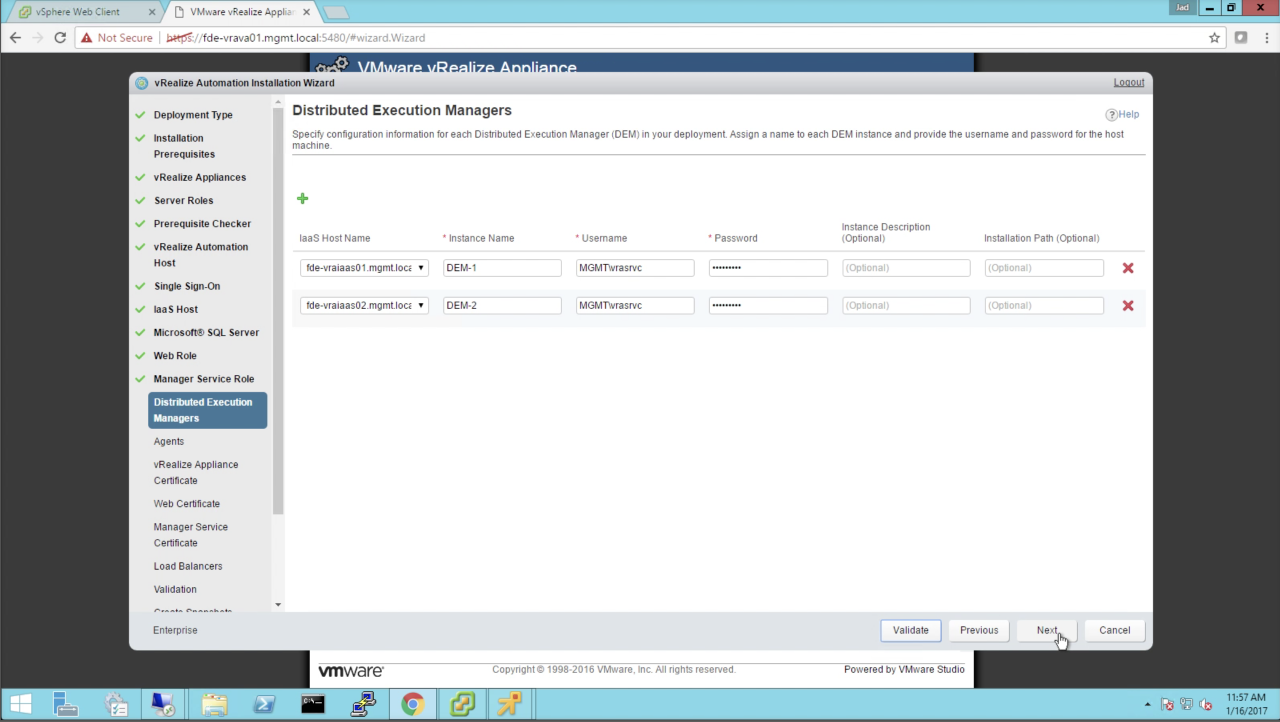
| Distributed Execution Managers
Enter the DEM Instance Name (e.g. DEM-1, DEM-2) for each of the target DEM servers. In this implementation, the DEM’s are collocated with the Web nodes. Enter the Username (e.g. MGMT/vrasrvc) and Password for each of the DEM instances. This should be the same dedicated vRA service account. Click Validate (optional) Click Next to continue… |
|
|
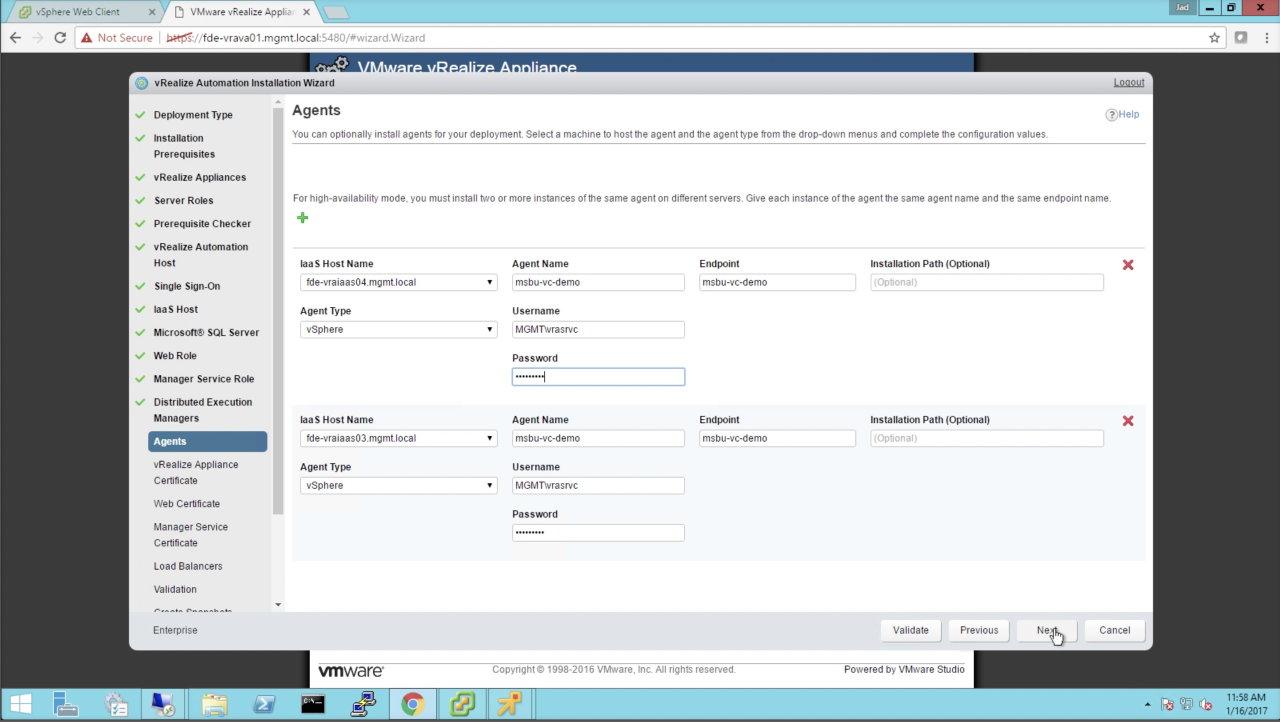
Agents The wizard installs and configures the initial agents…typically for vSphere/vCenter endpoints. Additional agents (for other platforms) can be installed separately. The Agents are collocated with the IaaS Manager servers in this deployment. Enter the [vCenter] Agent details for each of the target IaaS hosts:
Click Validate (optional) Click Next to continue… The Endpoint name used here MUST MATCH the Endpoint that will be configured in vRA at a later time. I prefer to use the target vCenter name to make easily distinguishable. |
|
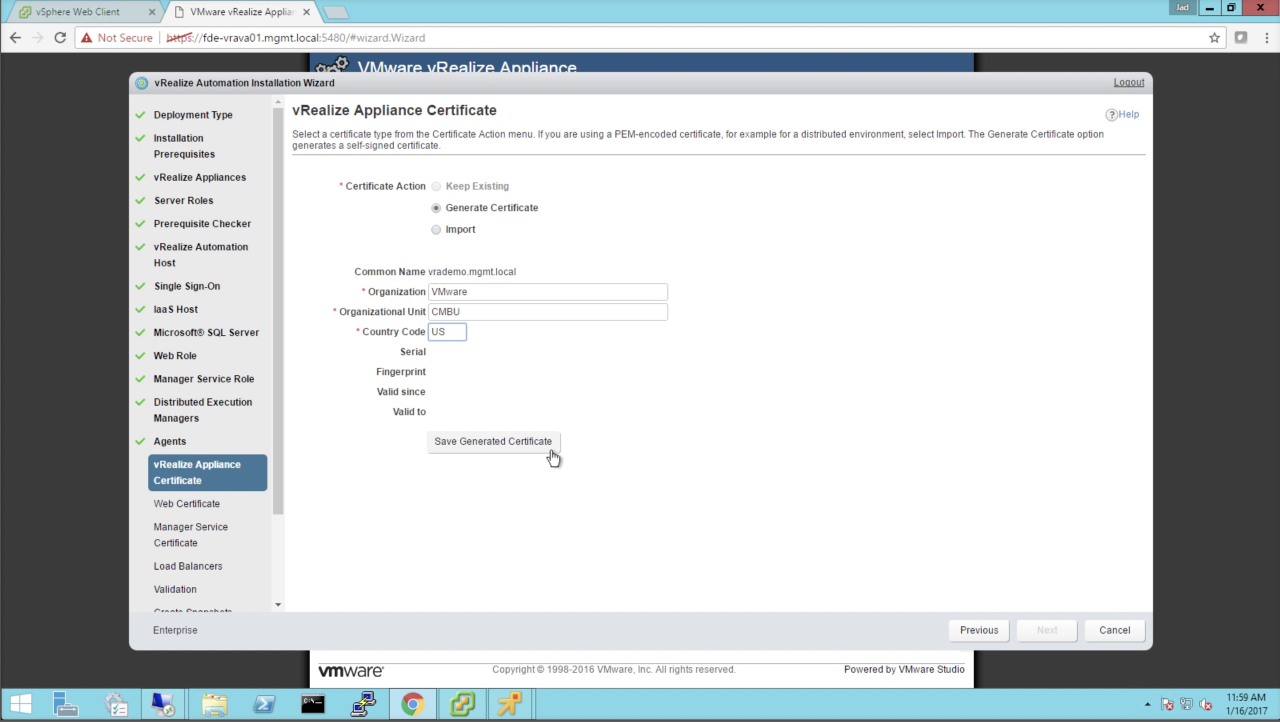
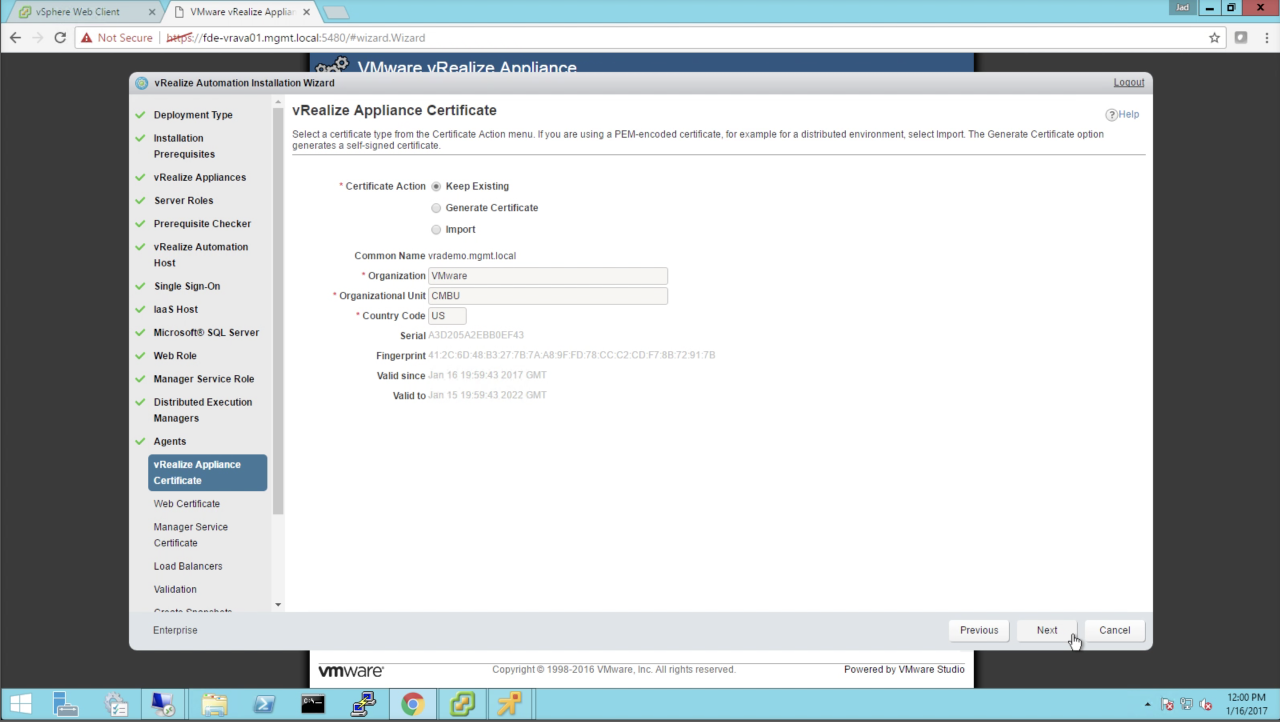
| vRealize Appliance Certificate
For the sake of getting through the deployment, I will be creating and using self-signed certs for all the nodes. The certs can be changed at a later time to CA-signed as needed.
Click Save Generated Certificate when ready. Once the certificate is generated (takes ~15 secs or more), click Next to continue… |
|
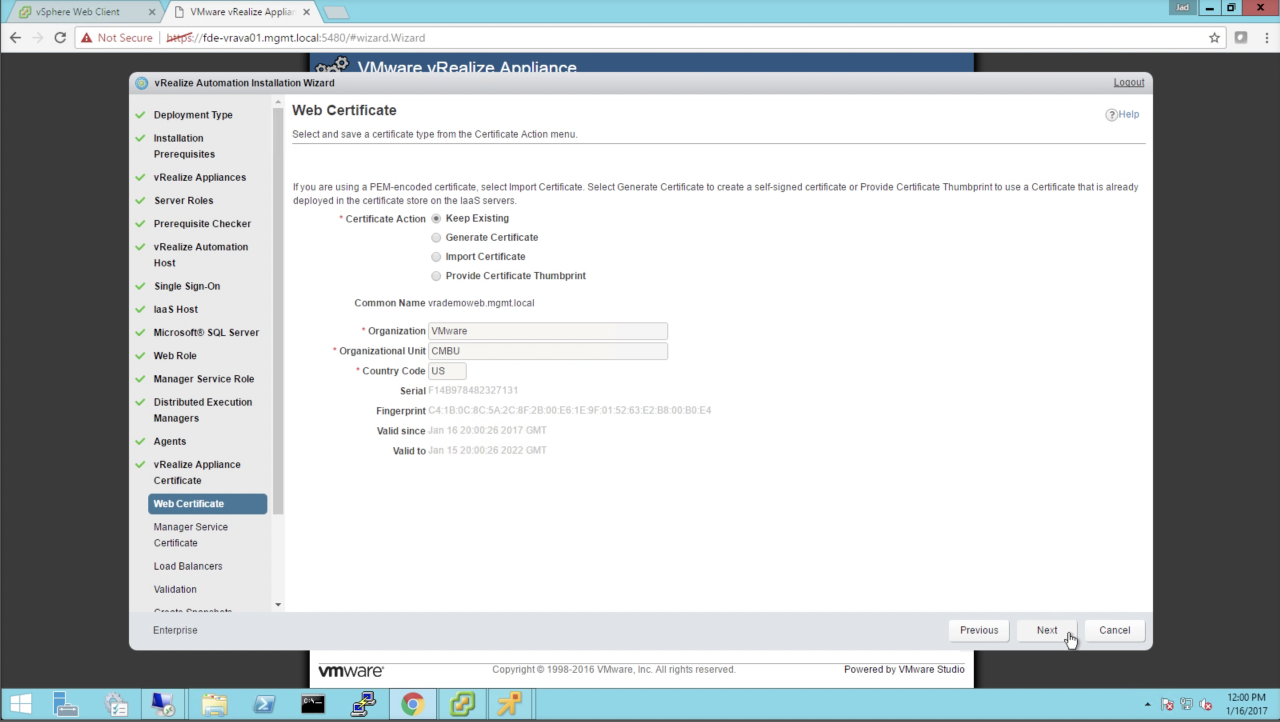
| Web Certificate
We’ll be generating and using a self-signed certificate for Web nodes as well:
Click Save Generated Certificate when ready. Once the certificate is generated (takes ~15 secs or more), click Next to continue… |
|
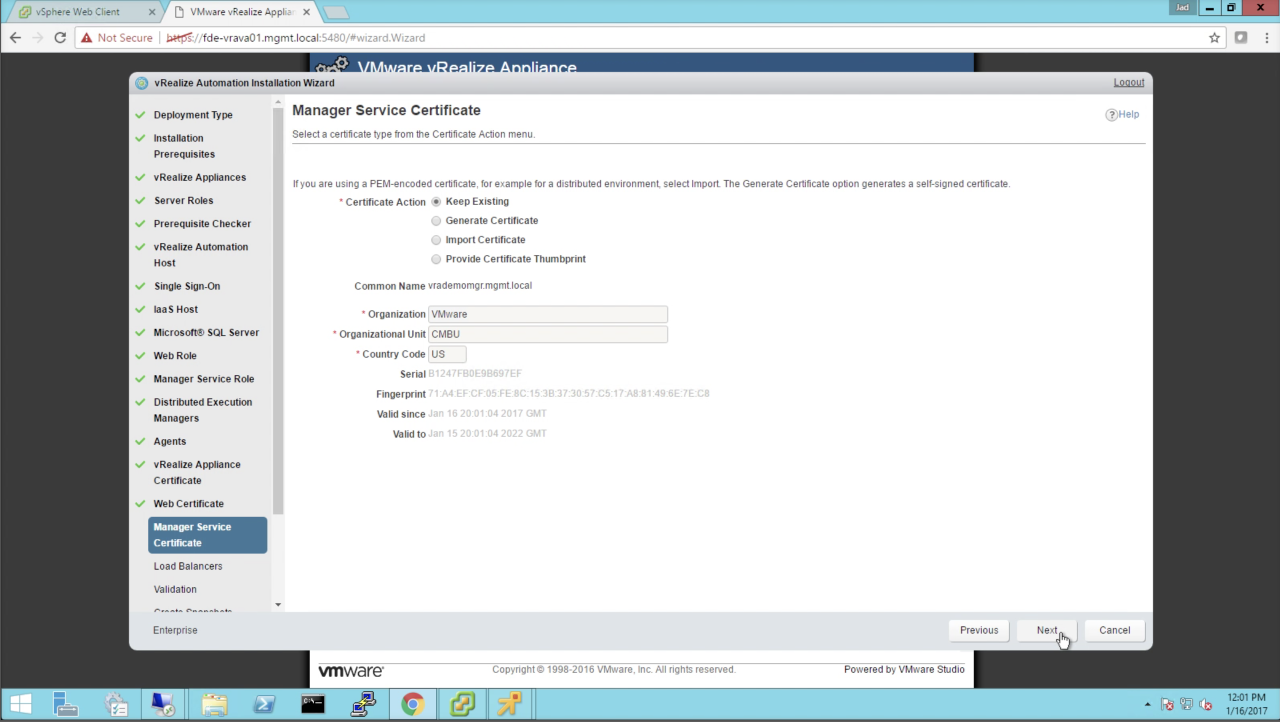
| Manager Service Certificate
We’ll be generating and using a self-signed certificate for Manager nodes as well:
Click Save Generated Certificate when ready. Once the certificate is generated (takes ~15 secs or more), click Next to continue… |
|
|
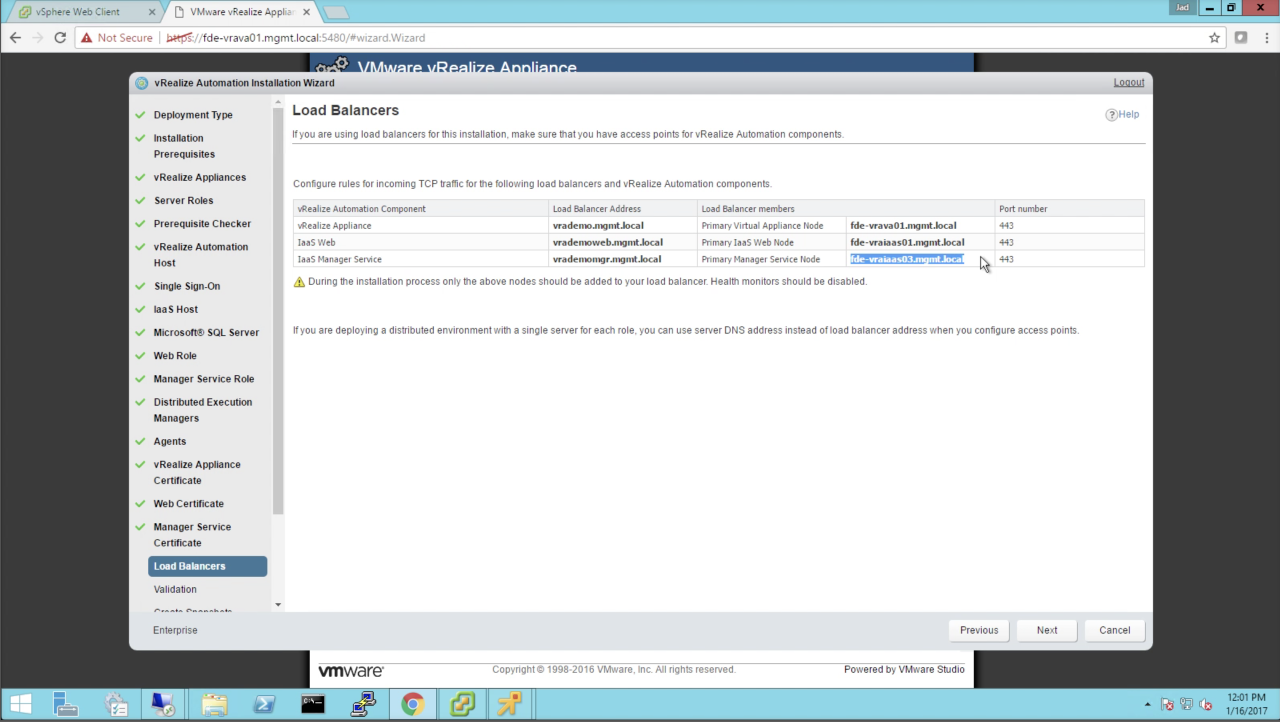
Load Balancers Review the recommended Load Balancer requirements before moving forward with the install. As I’ve mentioned throughout this guide, the Load Balancer VIP address is a DNS CNAME at this stage. Those CNAME’s should each point to their respective primary node (VA, Web, Mgr). Review one more time and ensure this list accurately represents your environment. Click Next to continue…
NOTE: The use of CNAME’s is my preferred method to ensure misconfigured load balancers don’t get in the way of the initial install. However, you may choose to already have the VIPs and LB’s already in place…and it’s up to you to use (or not) CNAME’s per this guide. It’s not a requirement, just a recommendation. |
 |
|
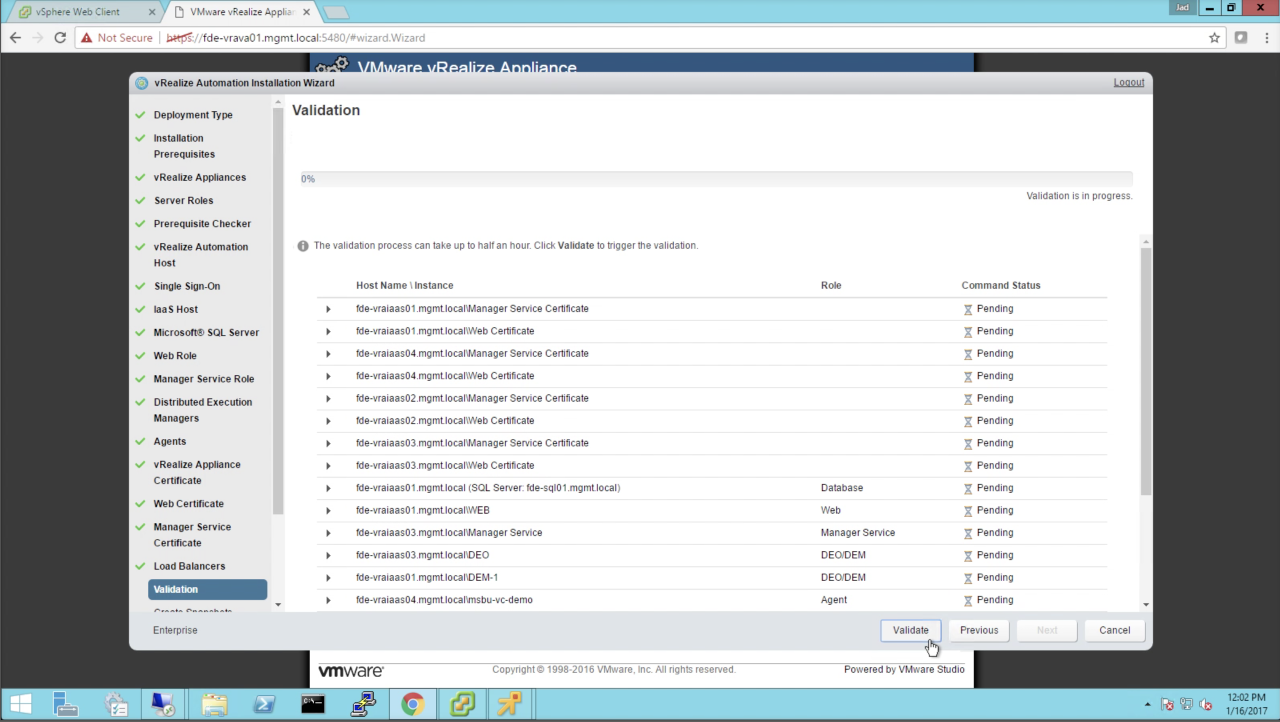
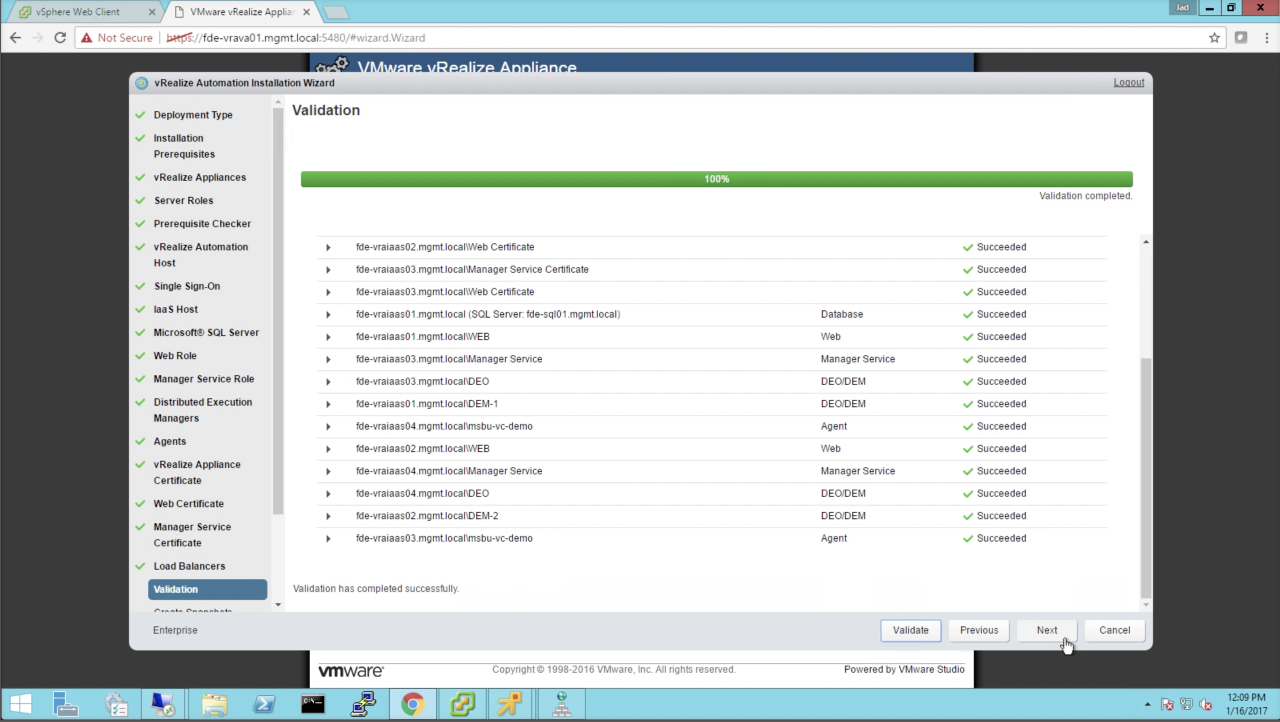
Validation The wizard will run through a full validation of all the entered parameters to ensure nothing obvious will interrupt the deployment. Click Validate to initiate the validation The validation will take up to 10 minutes to complete (7 mins in my environment). The results should show Succeeded for ALL components. If any component fails validation, you should not continue until that issue is addressed. Details will be provided for anything that fails. Fix the issue then come back to the wizard and try validation again.
WARNING: Do not cancel the wizard if you need to fix an outstanding issue with the IaaS nodes – minimize the window, fix the issue, then come back to continue. Assuming a successful validation – and only then – click Next to continue… |
|
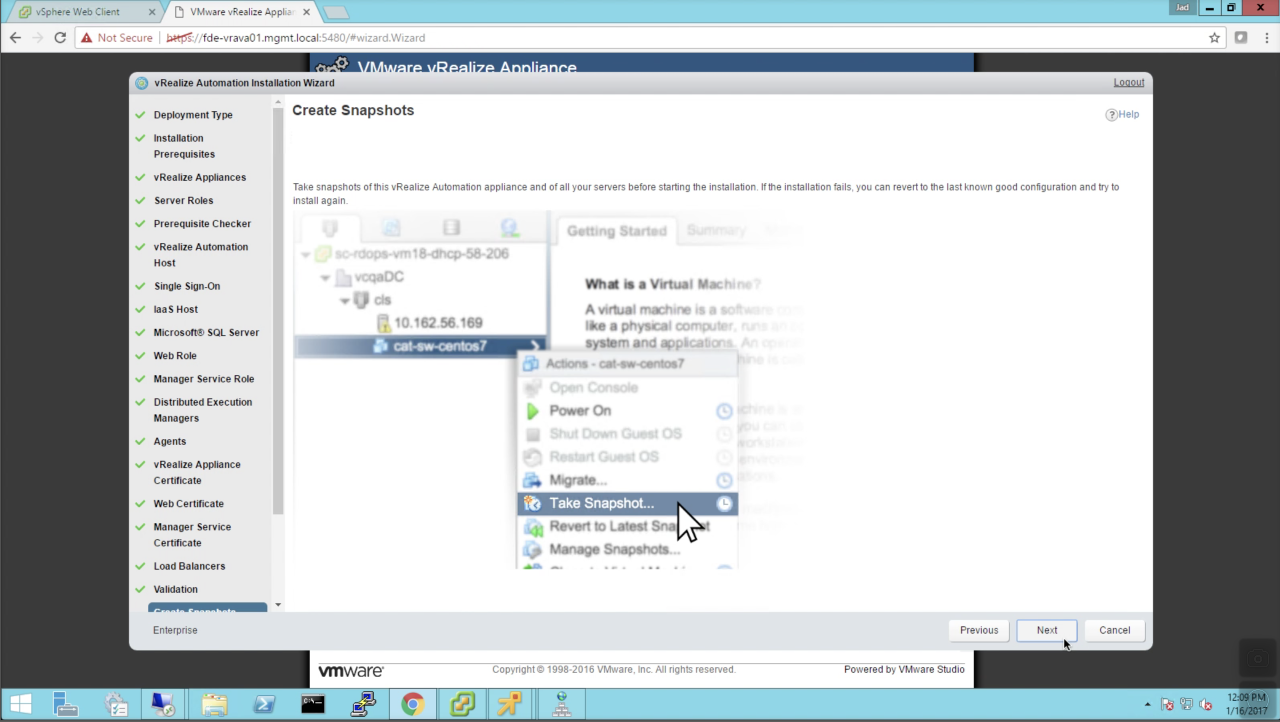
| Create Snapshots
It’s always a good idea to create snapshots prior to continuing. Be sure to snapshot all the target nodes (2 x vRA VA, 4 x IaaS). Even if you have existing snapshot, creating one now will capture the prereqs. While the wizard will give you a chance to retry a failed install, you might end up having to revert to snapshot and starting over. Create snapshots. Don’t be over confident. Just do it. Click Next to continue… |
|
|
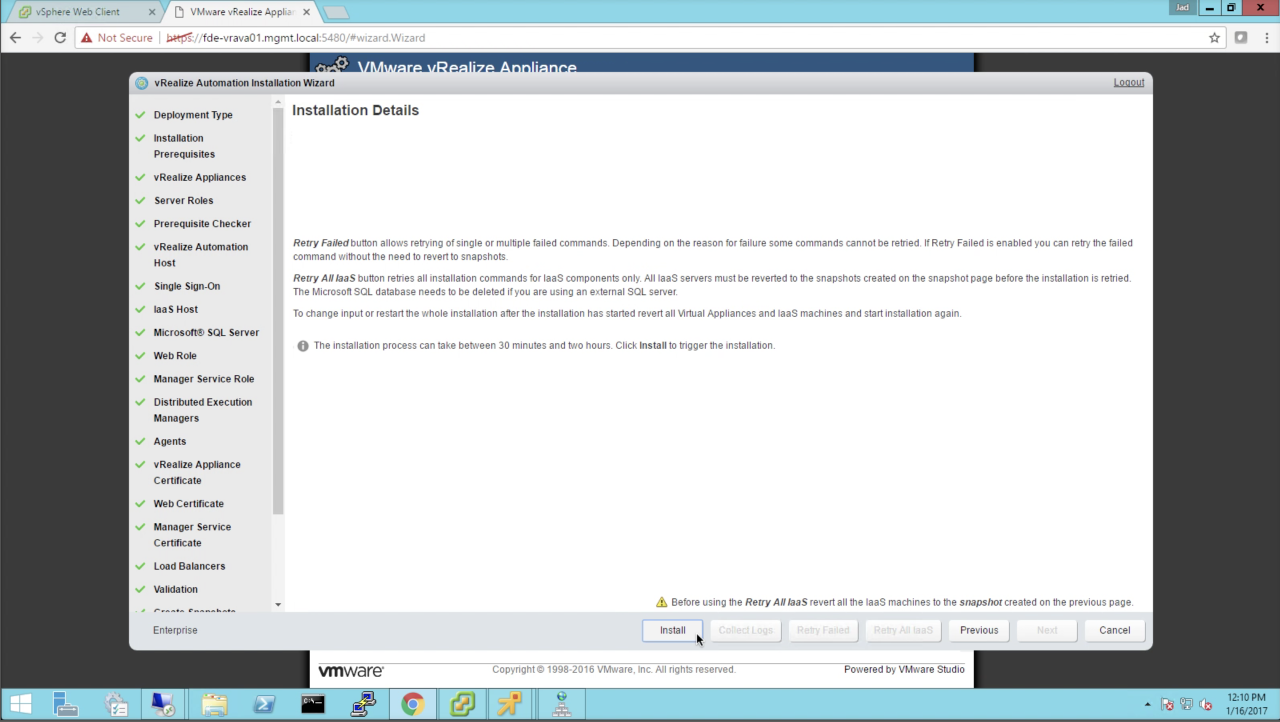
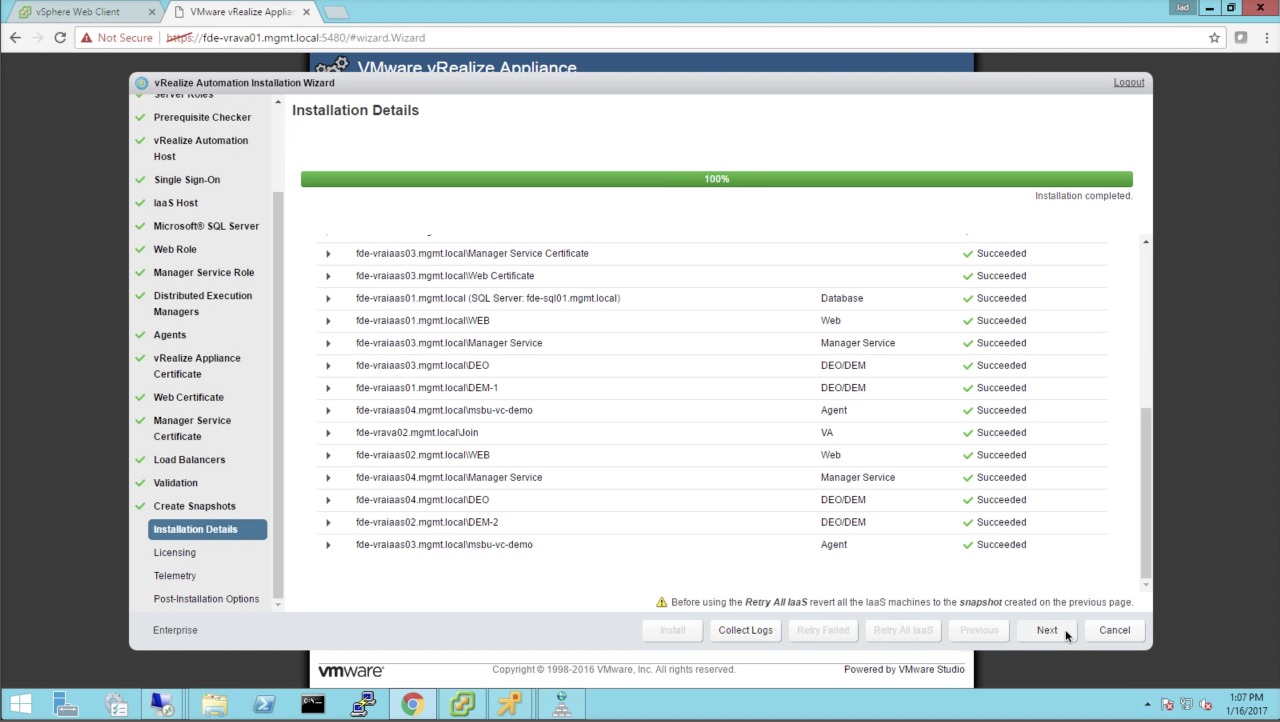
Installation Details Almost there! Review the important notes in case a Retry is required. Click Install when you’re ready to go… Take a break. There’s a lot going on here – assuming all goes well, the deployment wizard will take up to 1 hour to install, cluster, and configure the distributed deployment. Let the installer do it’s thing – do not log into, reboot, modify or otherwise disturb any of the target nodes during the installation. The only acceptable result is Succeeded. If any component fails to install, check the details and try to mitigate the issue. You can come back and use Retry Failed or Retry All IaaS to give the installer another try.
NOTE: If you still cannot get passed a given failure after troubleshooting, you might consider reverting to snapshots and trying again as a last resort. The vast majority of failures are related to the IaaS nodes being misconfigured, GPO’s in the way, network or DNS issues, etc…so start there. If all goes well, click Next to continue… |
|
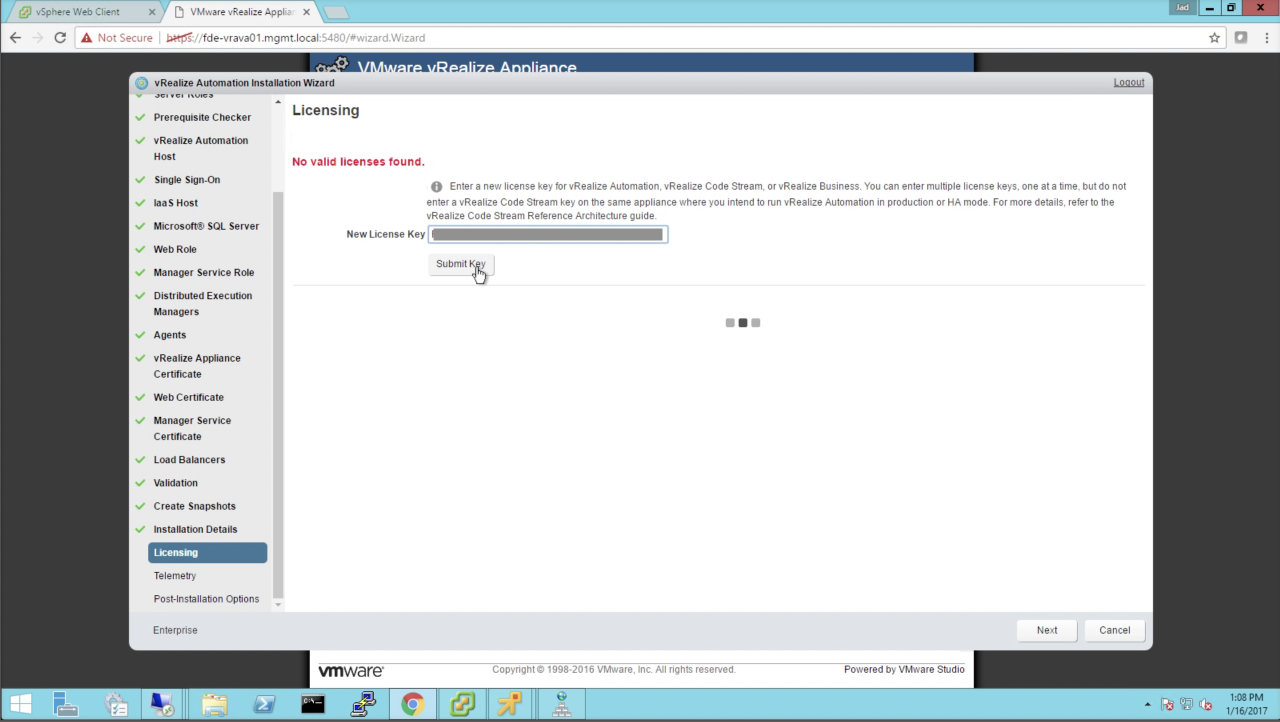
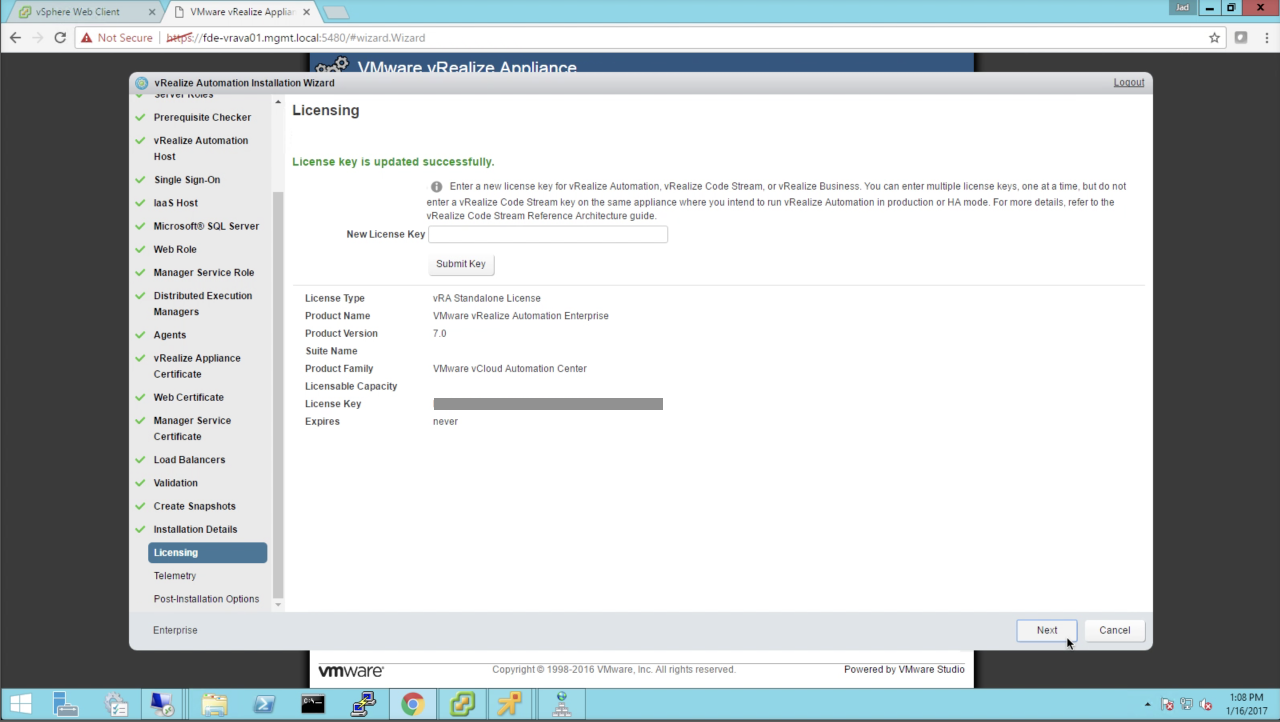
| Licensing
Enter a valid license key (active or eval):
You can add multiple licenses if needed. Click Submit Key to accept each license. Click Next to continue… |
|
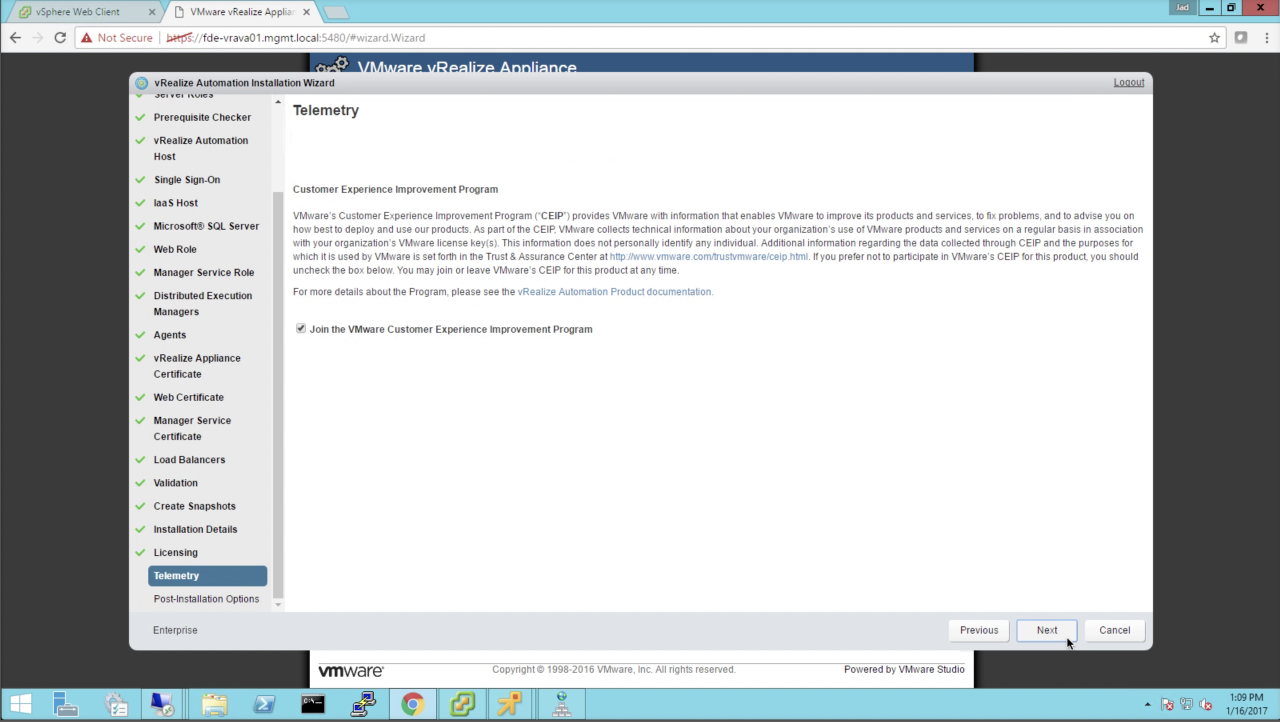
| Telemetry
Do us all a favor and keep Telemetry checked (optional). This will enroll you in the VMware Customer Experience Improvement Program (CEIP). This provides valuable product feedback – anonymously – so we can target specific issues and quality in subsequent releases. Click Next to continue… |
|
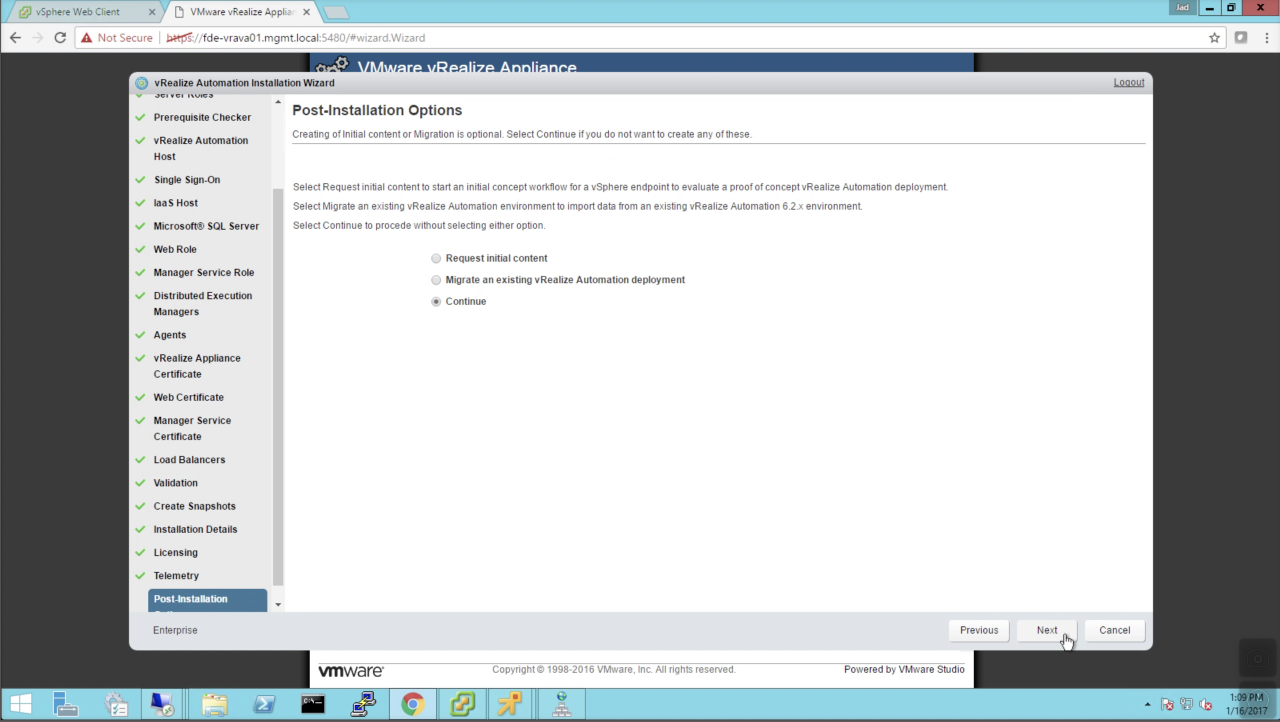
| Post-Installation Options
As an optional step, you can automatically initiate post-install steps (or not):
More info: https://www.virtualjad.com/2015/10/vrealize-automation-7-part-3-the-deployment-wizard.html Click Next to continue…. |
|
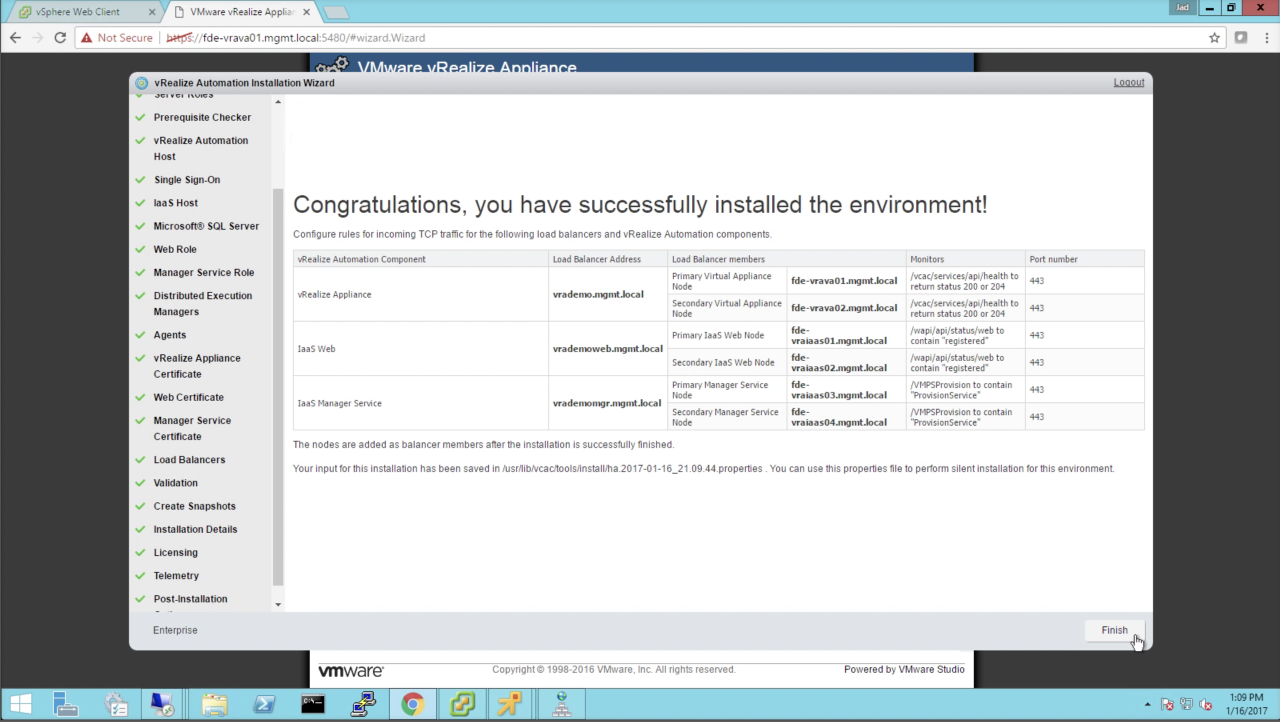
| Done!
The wizard will display some important load balancer information. This info will be used in the next module to create the load balancing policies. Take a screenshot, copy/paste, whatever…just be sure this info is noted. Click Finish to…finish! |
|
|
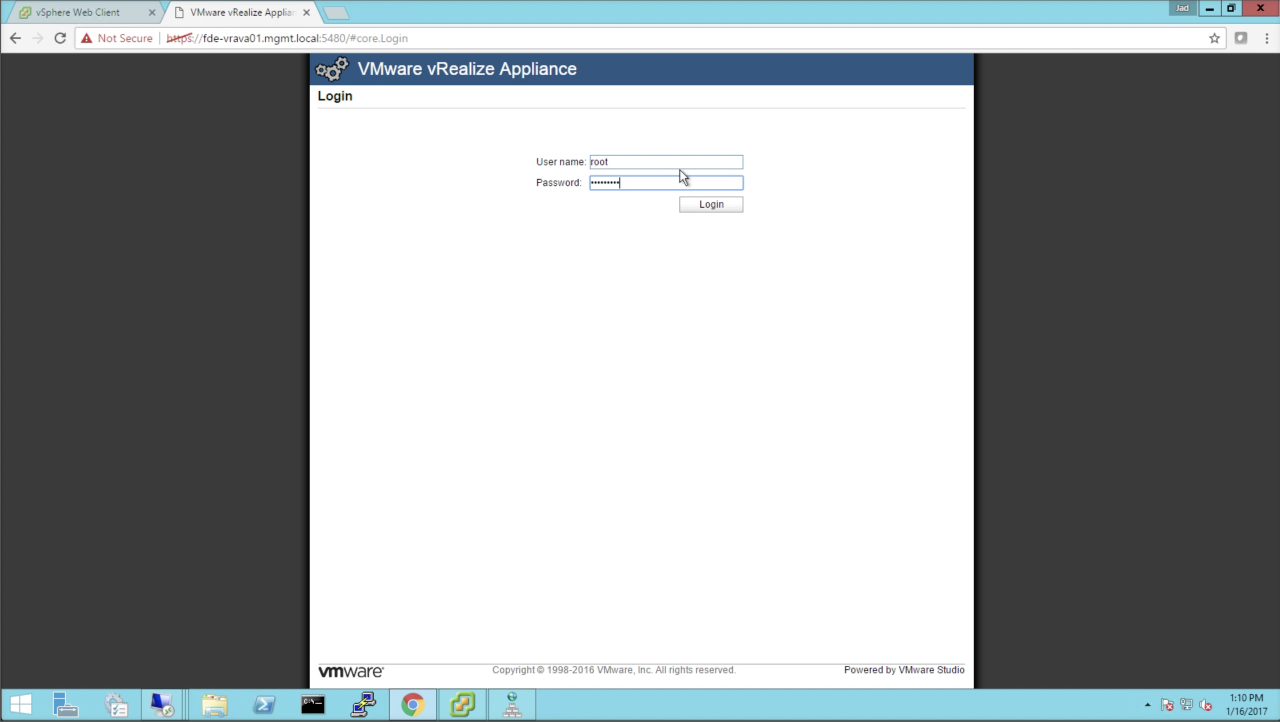
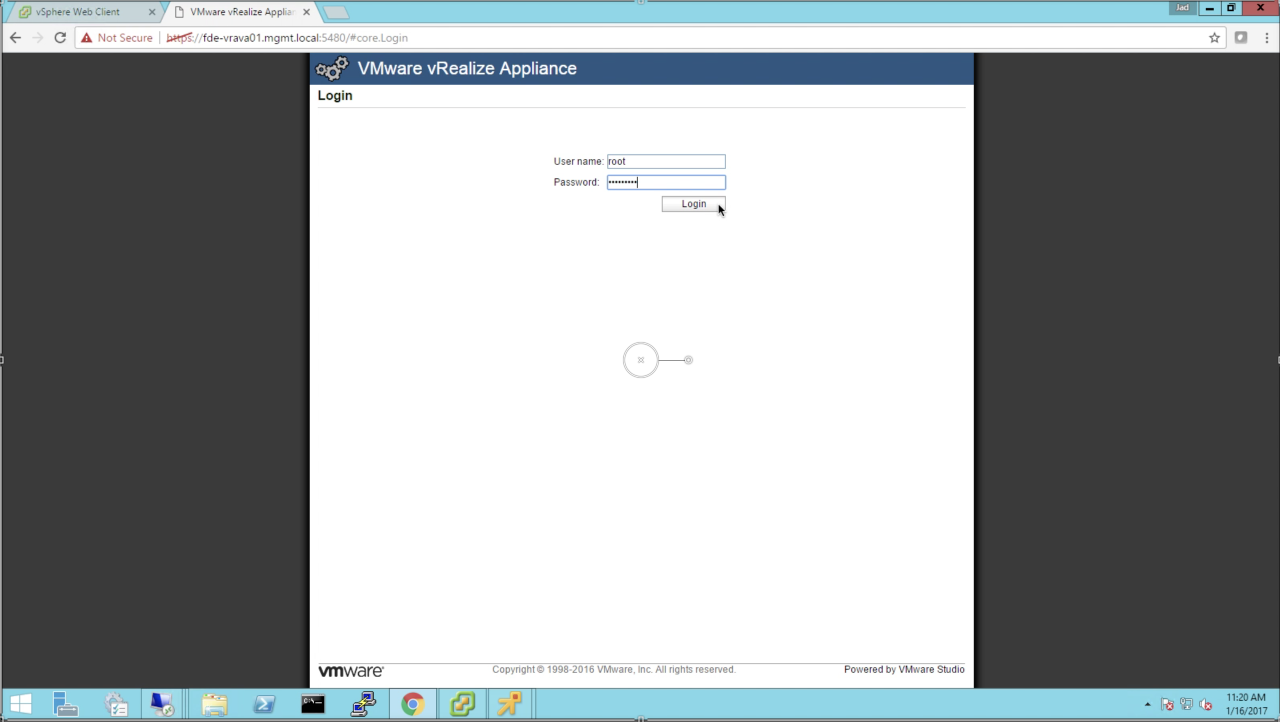
Navigating the VAMI Once the installation bits have settled, you can log into the VAMI of each appliance and explore the configuration. Browse to the primary VA’s VAMI (e.g. https://:5480) Log into the VAMI:
Click Login…
NOTE: Whenever you need to connect to the VAMI, be sure you use the appliance’s local FQDN and not the VIP/CNAME. VAMI access needs to be directed to the individual appliance(s). |
|
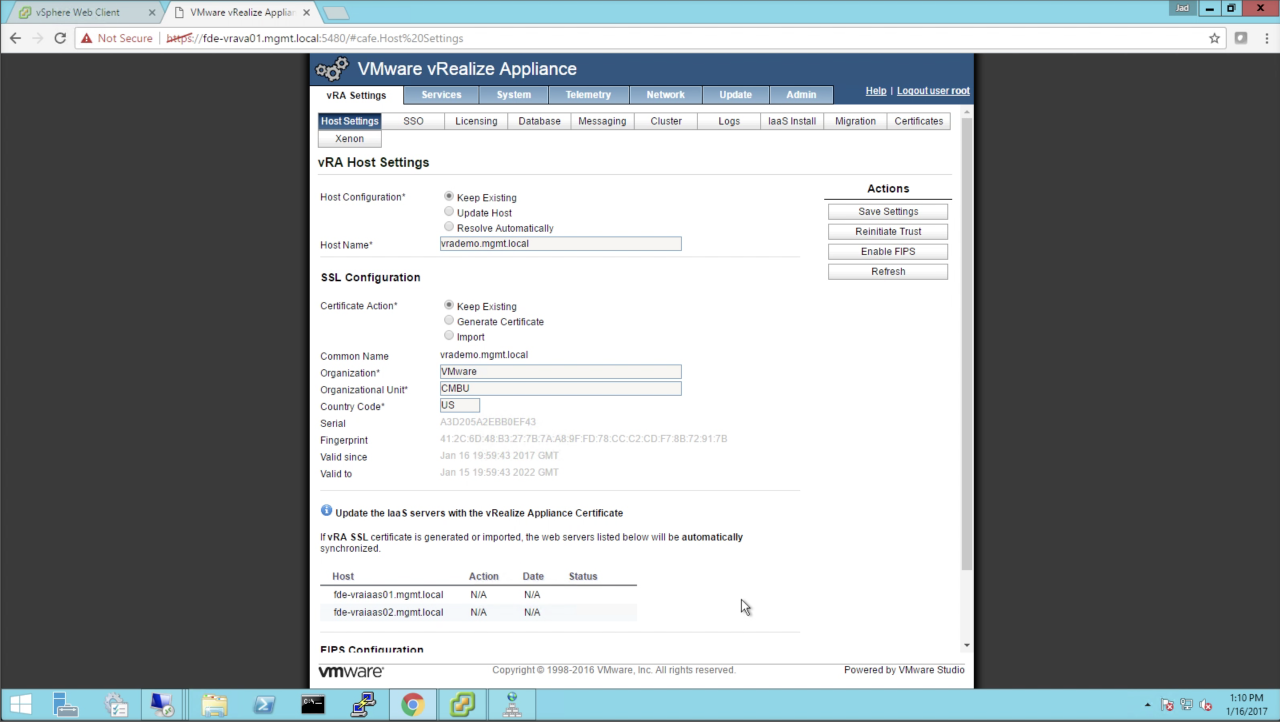
| vRA Settings → Host Settings
Review the configuration and make note / take screenshots for your records. Things to look for:
|
|
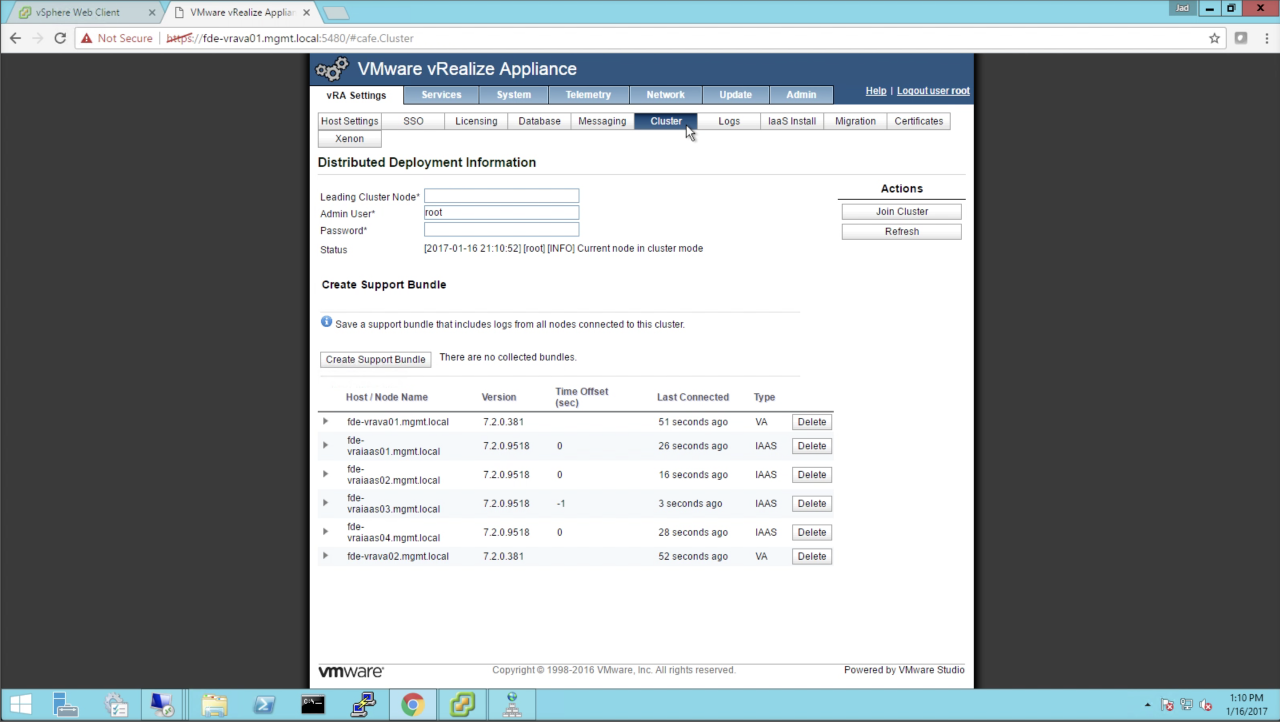
| vRA Settings → Cluster
Review the configuration and make note / take screenshots for your records. Things to look for:
|
|
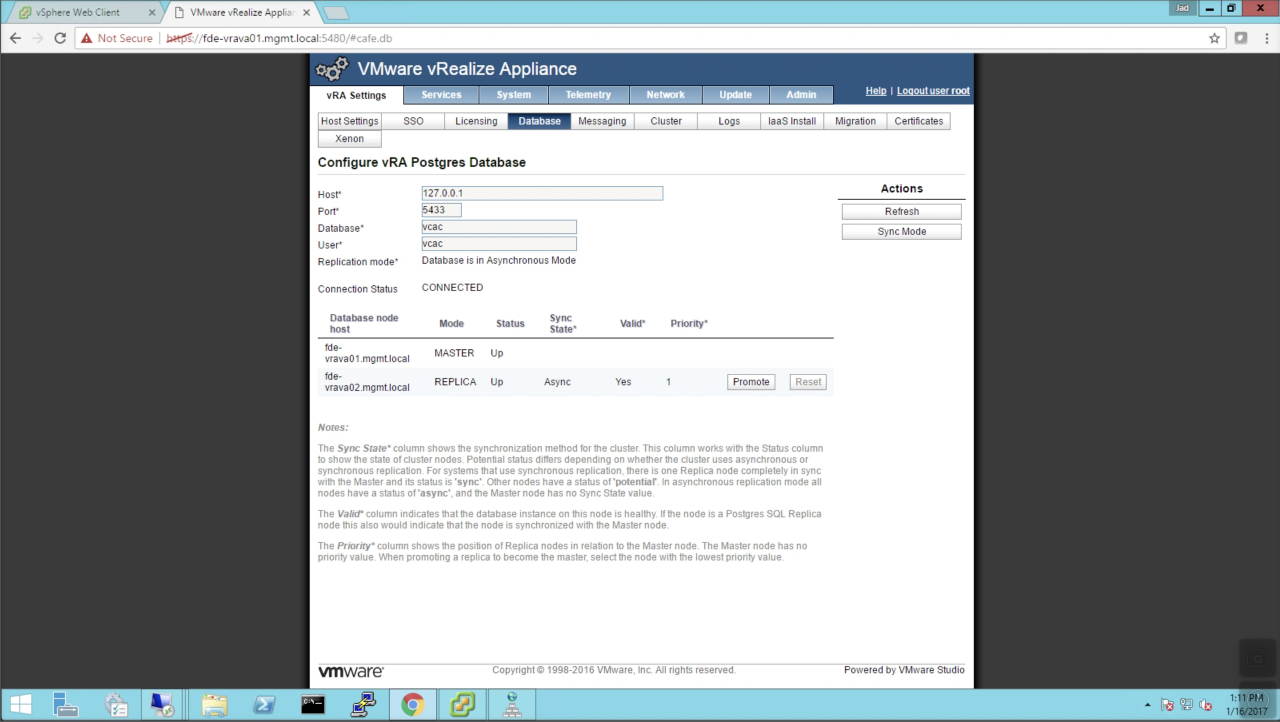
| vRA Settings → Database
Review the configuration and make note / take screenshots for your records. Things to look for:
|
|
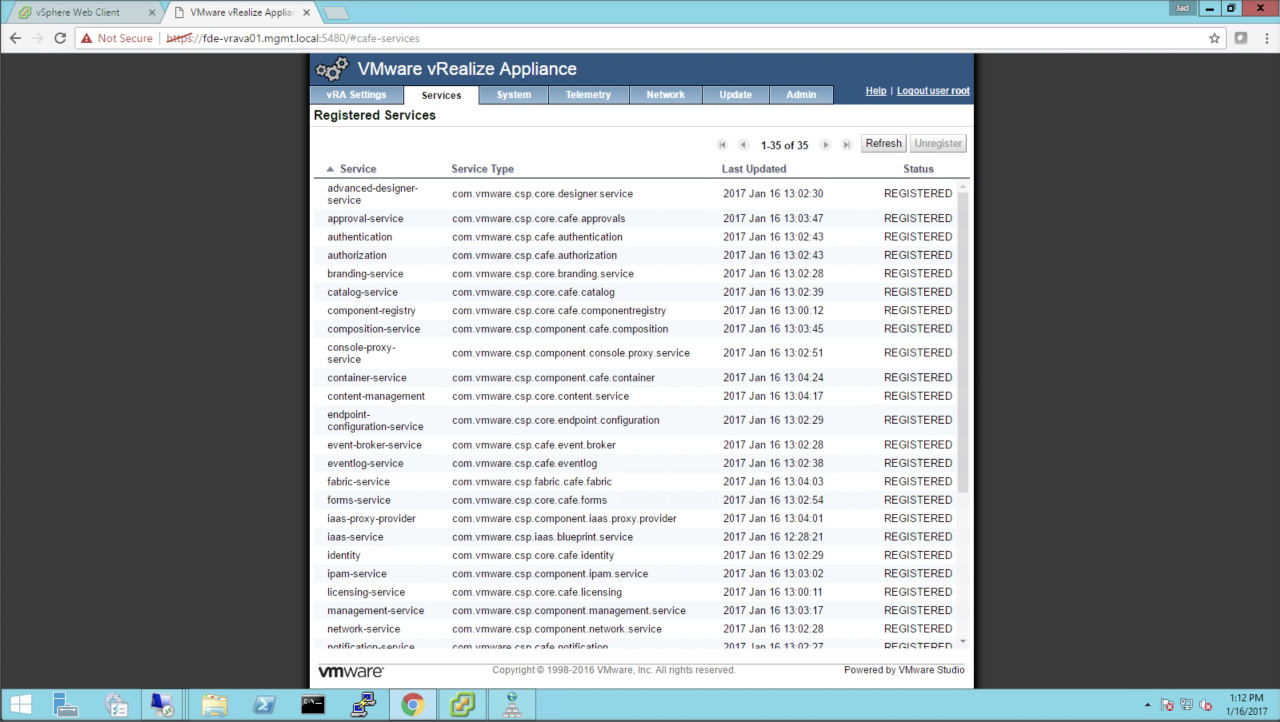
| Services
Review the configuration and make note / take screenshots for your records. Things to look for:
Service initialization will typically take 5-10 minutes after a successful boot. You can hit Refresh to see if any unregistered services eventually register. If not…it’s time to start troubleshooting. When you’re done exploring, go ahead and log out of the VAMI |
|
|
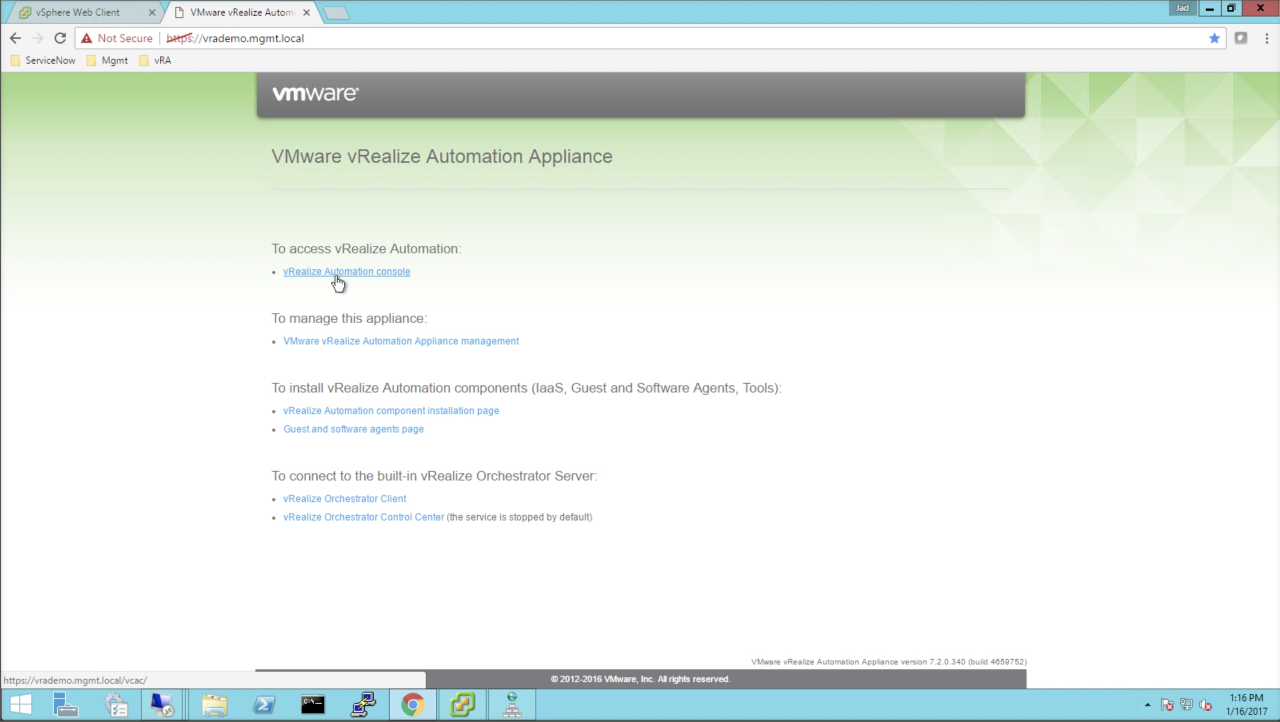
vRA Landing Page Assuming all your services have registered, you can connect to vRA’s landing page to verify it is available. Browse to the vRA URL (e.g. https://vrademo.mgmt.local) To access vRA’s default tenant, click vRealize Automation console
NOTE: The vRA URL from this point forward is the VIP/CNAME FQDN of the appliances. This is the entry point for all vRA management and consumption. At this point, that URL is still pointing to the primary VA. |
|
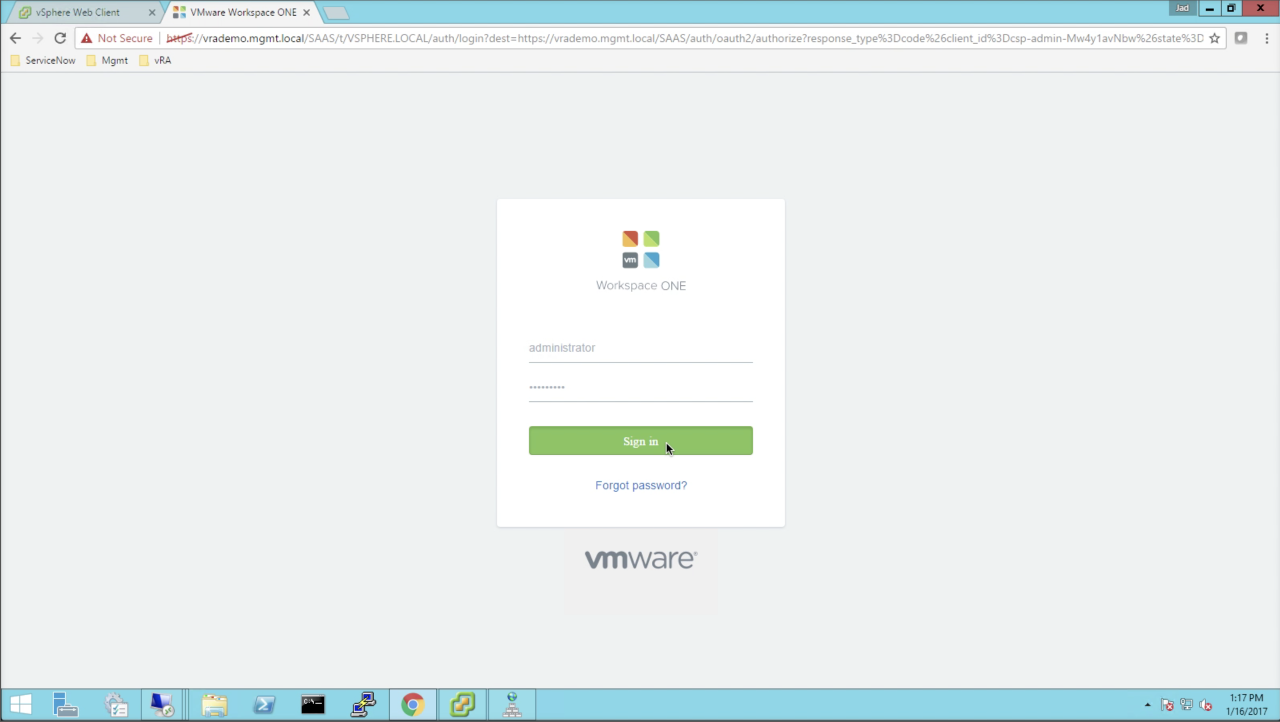
| vRealize Automation Console
To log into vRA, use the SSO administrator account and password configured during the wizard:
Click Sign in to log in… |
|
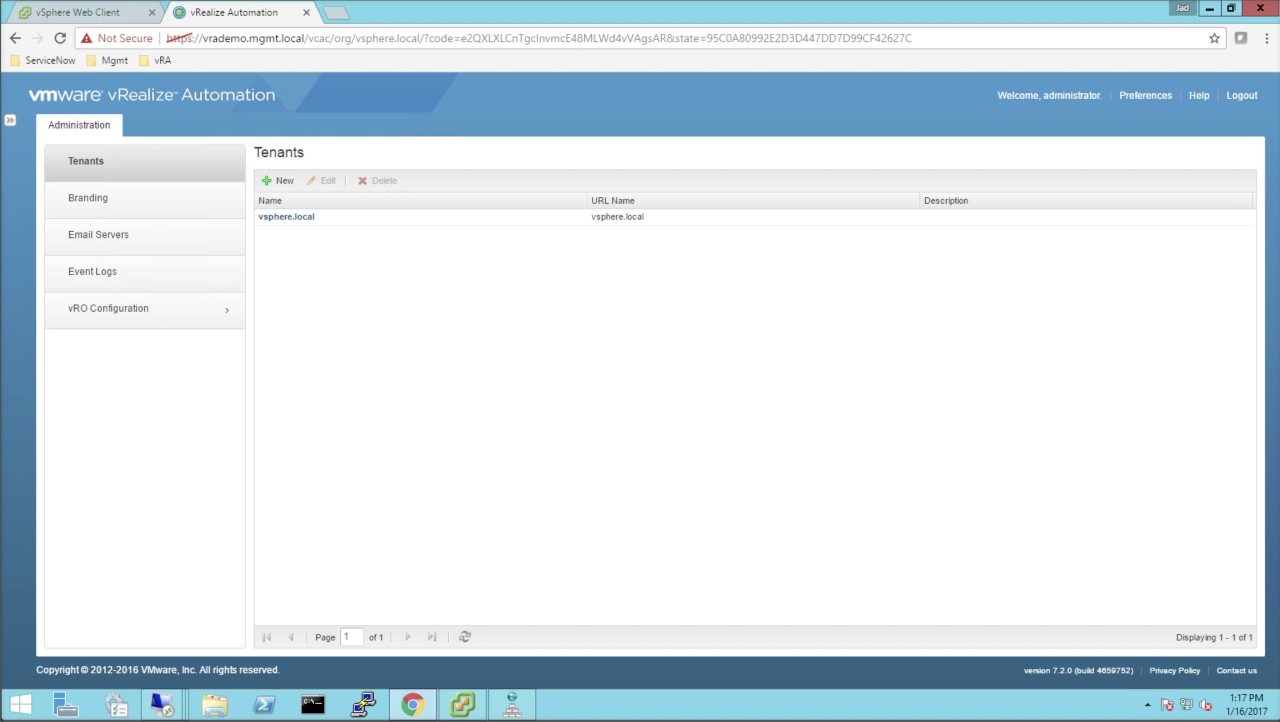
| vRealize Automation Console
Once logged in, the only Tenant that should be visible is the default Tenant – vsphere.local. Logging in with the administrator account is required for all system-level configurations, including creating Tenants and granting the initial admin permissions to each. We’ll dig more into setting Tenants up in another module. For now, pat yourself on the back for successfully deploying vRA! |
|
Review
Congrats! You’ve deployed vRA in a highly-available, distributed architecture…pretty easy, eh? Now take a well-deserved, yet brief, break…we’ve got more work to do.
Next up we’ll need to complete the load balancer configuration (in NSX) to activate the secondary nodes for vRA VA, Web, and Manager services.
Next Step: 06.1 – NSX Load Balancer Config
+++++
@virtualjad
![[virtualjad.com]](https://www.virtualjad.com/wp-content/uploads/2018/11/vj_logo_med_v3.png)
Do installation wizard install DEM worker and DEM Orch together or it install DEM-Orch with Manger service?
I am setting up similar environment in my lab which have one esxi server 6.5. Same 4 iaas servers (management agents installed), one AD server, one vcenter 6.5 server 2 VRA appliances, DNS enteries created, alias names created. During the automated installation of VRA 7.2, it detects the iaas server, however it stucks at “waiting for host to trigger pre-requisite checker”, sometimes it shows message “there are network connectivity issues between VRA appliance and iaas hosts”, it stucks at validation as well. Have checked connectivity from VRA to iaas hosts and vice versa and also DNS resolvability, it seems ok. Also, NTP server is not there in my environment. Time is synced with local esxi host. Please advise wher I am getting this wrong.
How to get back the new UI wizard if I press the cancel button??
I did create the setup as per the instructions. There seems to be one issue, if the entire setup is brought down and then powered on, vRA tries to connect to the Windows IaaS Load balancer address. Load Balancer does not see the IaaS service up, so it becomes chicken and egg situation. On my setup for the time being, I changed the IaaS to point to primary, just like before the setup, and then VRA got Iaas Service working. After that I restored the IaaS LB to point to LB VIP.
Please let us know if you see the same issue on your setup
@Pankaj – during deployment it’s best to keep the LB’s out of the picture (CNAME points to primary node of each service). I don’t incorporate them until after deployment.