Introduction
A logical switch emulates a traditional network switch by creating logical networks that can be used to connected one or more vnics of a virtual machine to the corresponding logical network. In an NSX environment, logical switches are directly mapped to an available Transport Zone (VXLAN) and is stretched across all hosts and clustered configured with that VXLAN. Similarly, a Universal Logical Switch is deployed when used with Universal Transport Zones and can be stretched across hosts, clusters, and even vCenters. Logical switches are typically created and managed using the vSphere Web Client. Once created, machines can be logically wired to them for connectivity to other machines and/or upstream services (e.g. NSX Edge Services Gateway or Distributed Logical Router…or anything else wired to the resulting logical network). Thanks to the power of NSX, these networks can be spun up rapidly (albeit statically) and exist exclusively in the virtualization layer, saving countless management cycles and associated overhead (+ cost).
As you are well versed by now, NSX delivers the critical services needed for a modern network infrastructure while lifecycle automation of network and security services — from provisioning to decommissions (and everything in between) — are defined by the automation layer. While NSX provides the platform to create and manage logical networks, it is vRealize Automation (vRA) that automates when and how those services are consumed.
If you need a primer, be sure to review the Intro to Networking and Security Automation.
Logical Switches in vRA
From a vRA perspective, NSX logical switches can be simply consumed as existing [external] networks or dynamically provisioned when leveraging On-Demand networks.
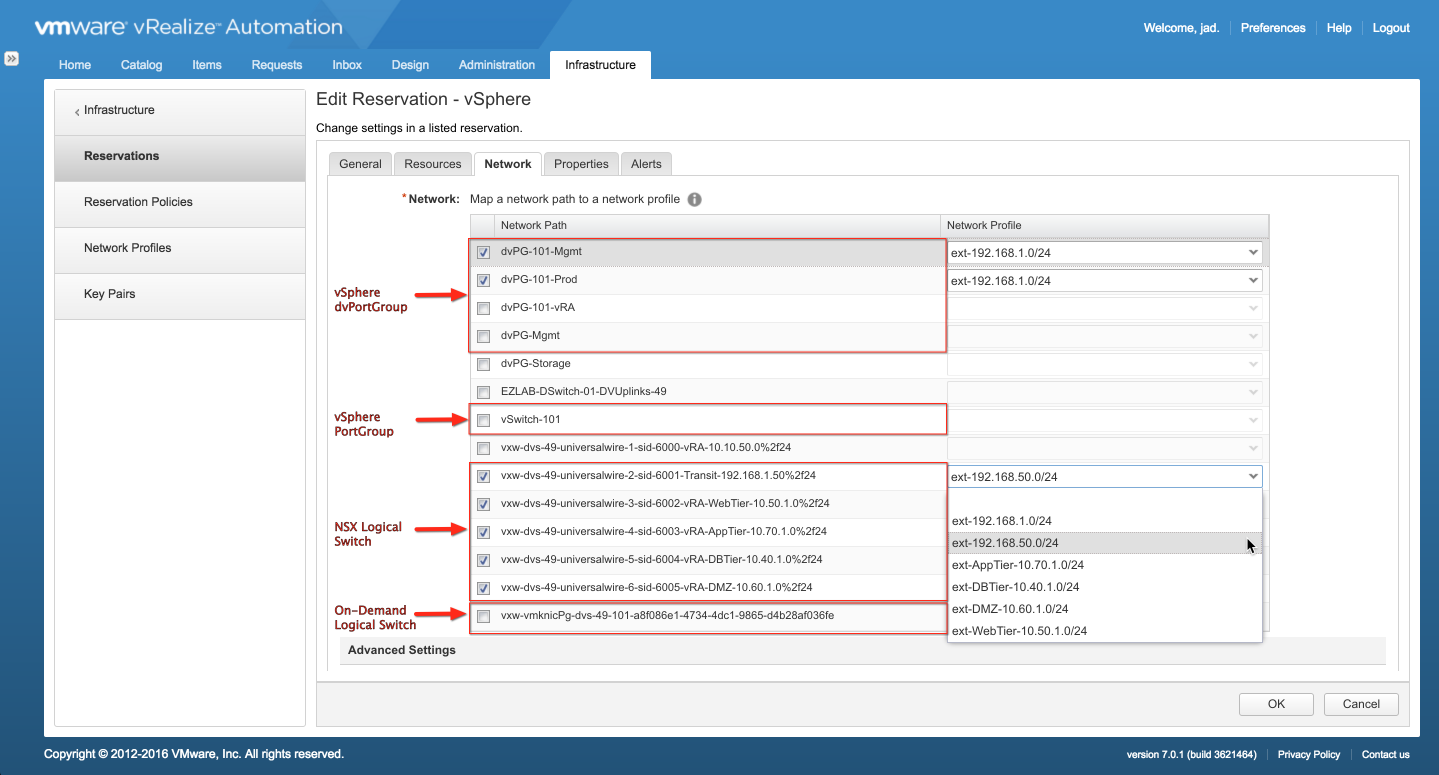
Existing logical switches are collected with endpoint inventory and appear as Network Paths just like traditional vSphere networks. They can then be selected and bound to an External Network Profile, which is done in a vRA Reservation:
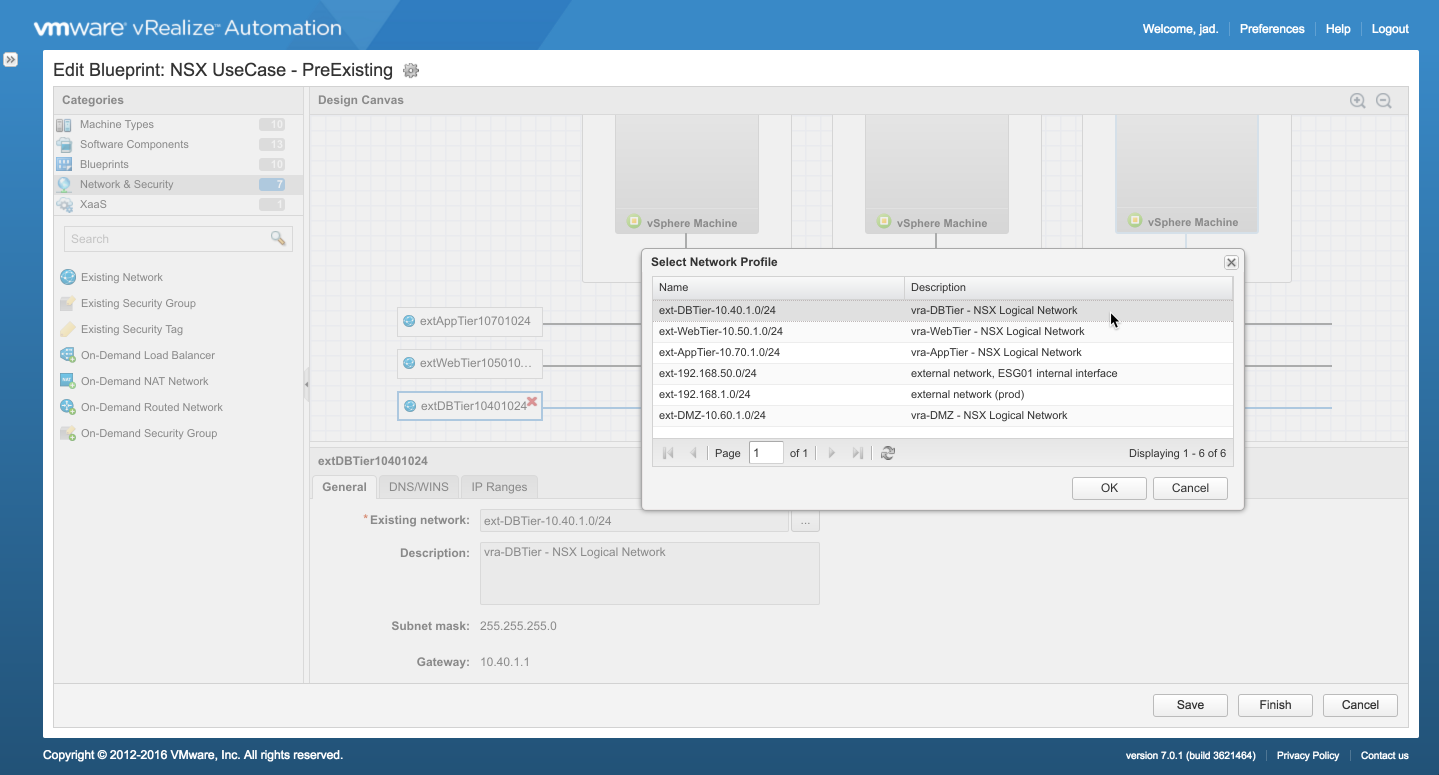
Once configured, a machine can be wired to the logical switch by dragging an Existing Network to the converged blueprint canvas, selecting the corresponding Network Profile, and wiring the machine’s vnic to the network:
While on-demand provisioning of networking and security services is one of vRA’s great benefits, many organizations will opt to stick to the consumption model — or some combination of existing and on-demand — until networking and security automation becomes second nature. I will cover on-demand services in much detail later in the series, but for now we’ll focus on pre-creating a number of NSX Logical Switches to be collected and consumed as existing networks in vRA. We’ll also create a dedicated logical switch for interconnecting the Edge and Routed gateways, often referred to as the Transit network.
Staging NSX Logical Switches for vRA
Objectives:
- Create a Transit Logical Switch
- Create Logical Switch(es) for WebTier, AppTier, DBTier Networks
Create a Transit Logical Switch
As previously mentioned, the Transit logical switch is created to provide interconnectivity between the Edge Services Gateway (ESG) and Distributed Logical Router (DLR). The DLR’s uplink interface and an ESG’s internal interface are wired to the Transit network, providing the needed connectivity.
Note: The ESG and DLR are deployed and configured later in the series. For now we’re just creating the logical switches.
1. Log in to vSphere Web client and navigate to Networking & Security.
2. Select Logical Switches in the Networking & Security pane.
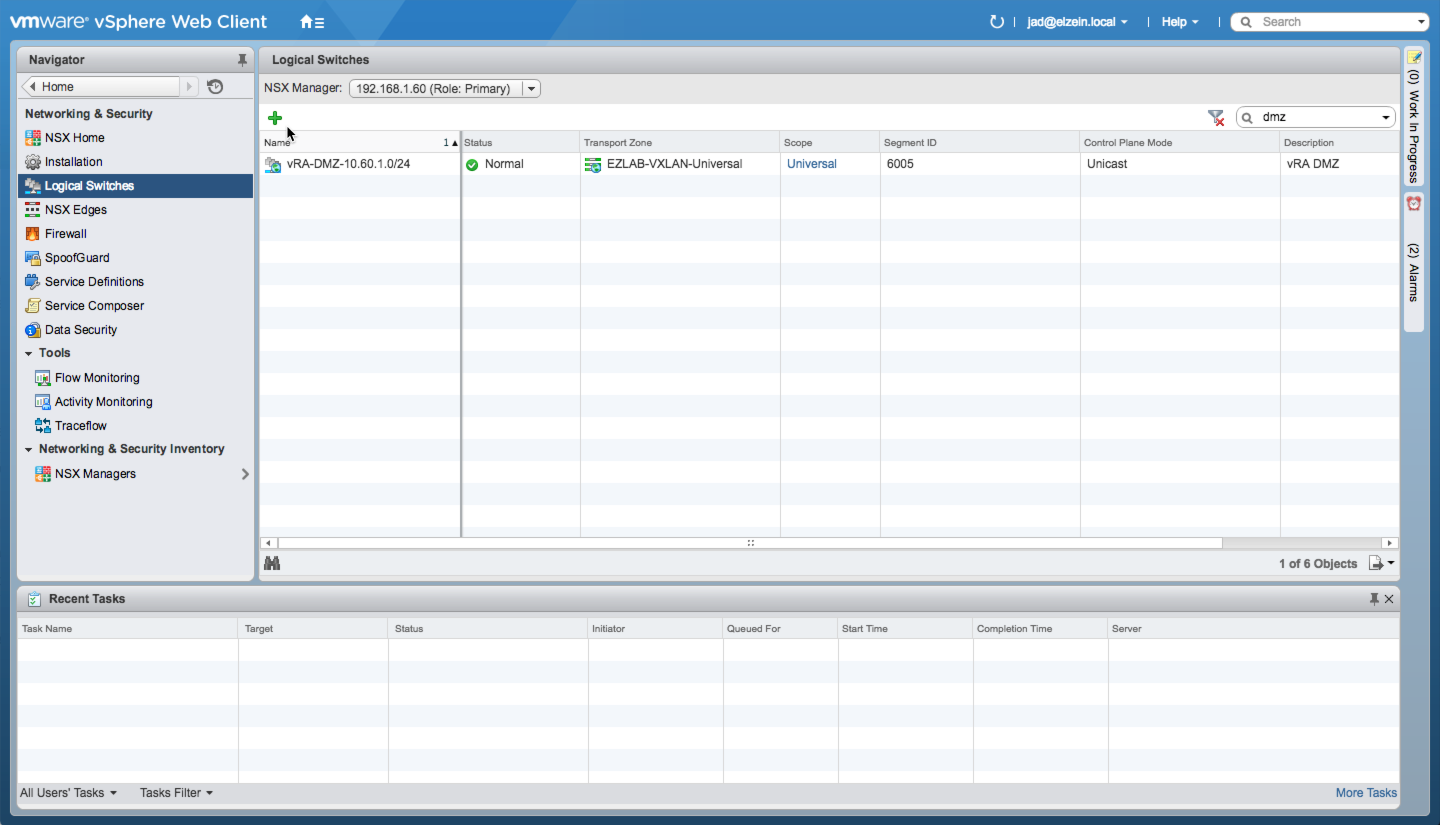
3. Click on green ” + ” in the Logical Switches configuration pane to a add a new logical switch:
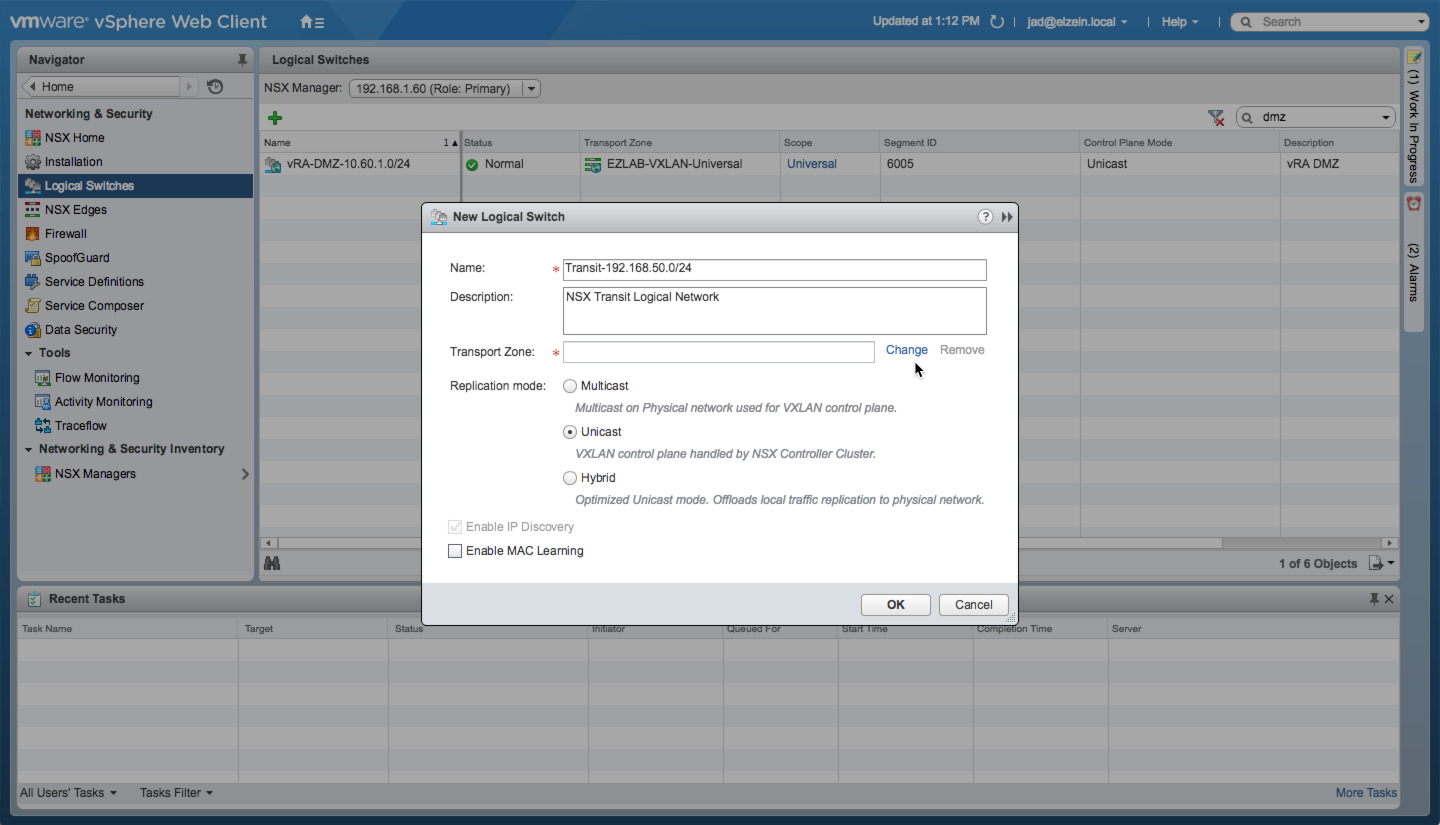
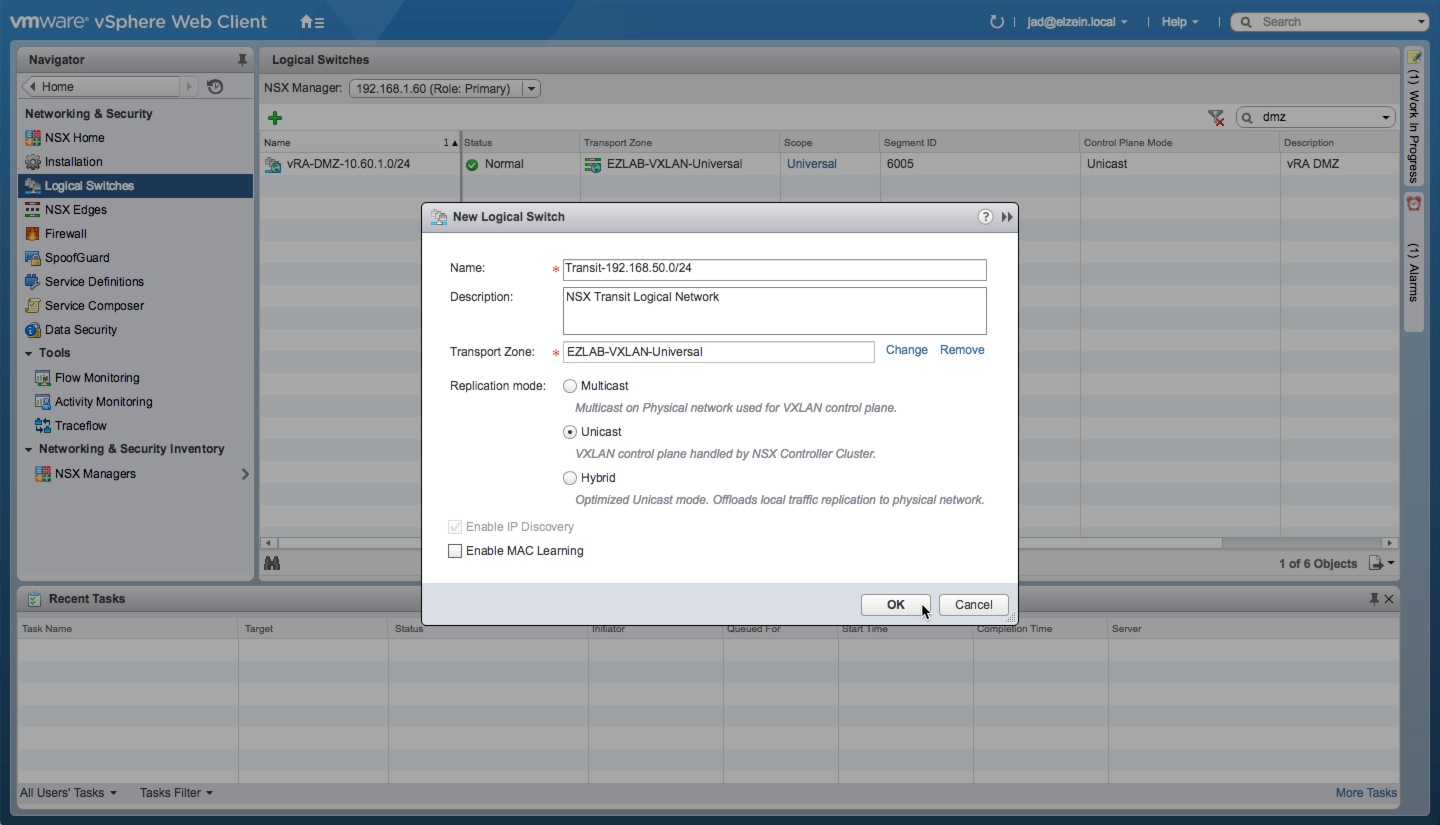
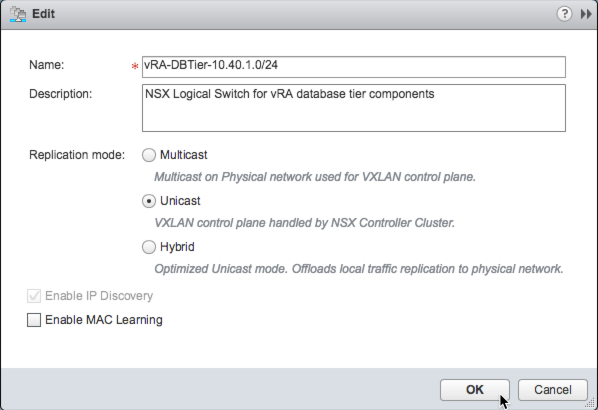
4. Enter a Name and Description for the Transit Logical Switch per your environment (special characters accepted):
Note: A Logical Switch is a Layer-2 device and does not require the configuration of any IP addresses or subnets…IP address will be configured once we create and wire the ESG and DLR interfaces to the logical switch(es). However you should know the subnet information for each logical network ahead of time to avoid possible confusion later. I like to use the subnet information in the name of each logical switch to make them easily identifiable.
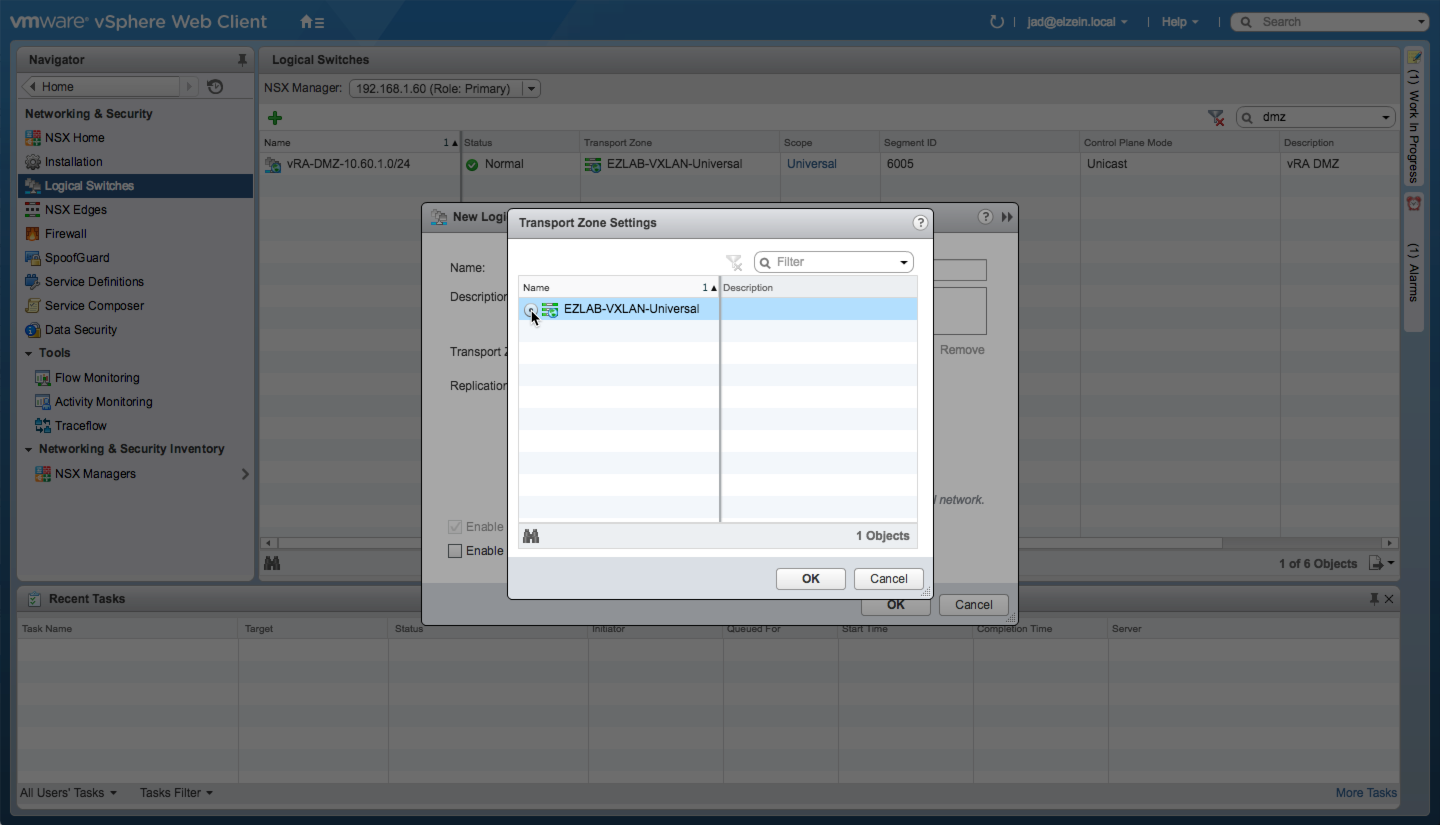
5. In the Transport Zone section, click Change to select the desired VXLAN network then click OK.
6. Use the default setting for Replication mode (Unicast) unless your environment is configured to use Multicast (or Hybrid).
7. Click OK to create the logical switch.
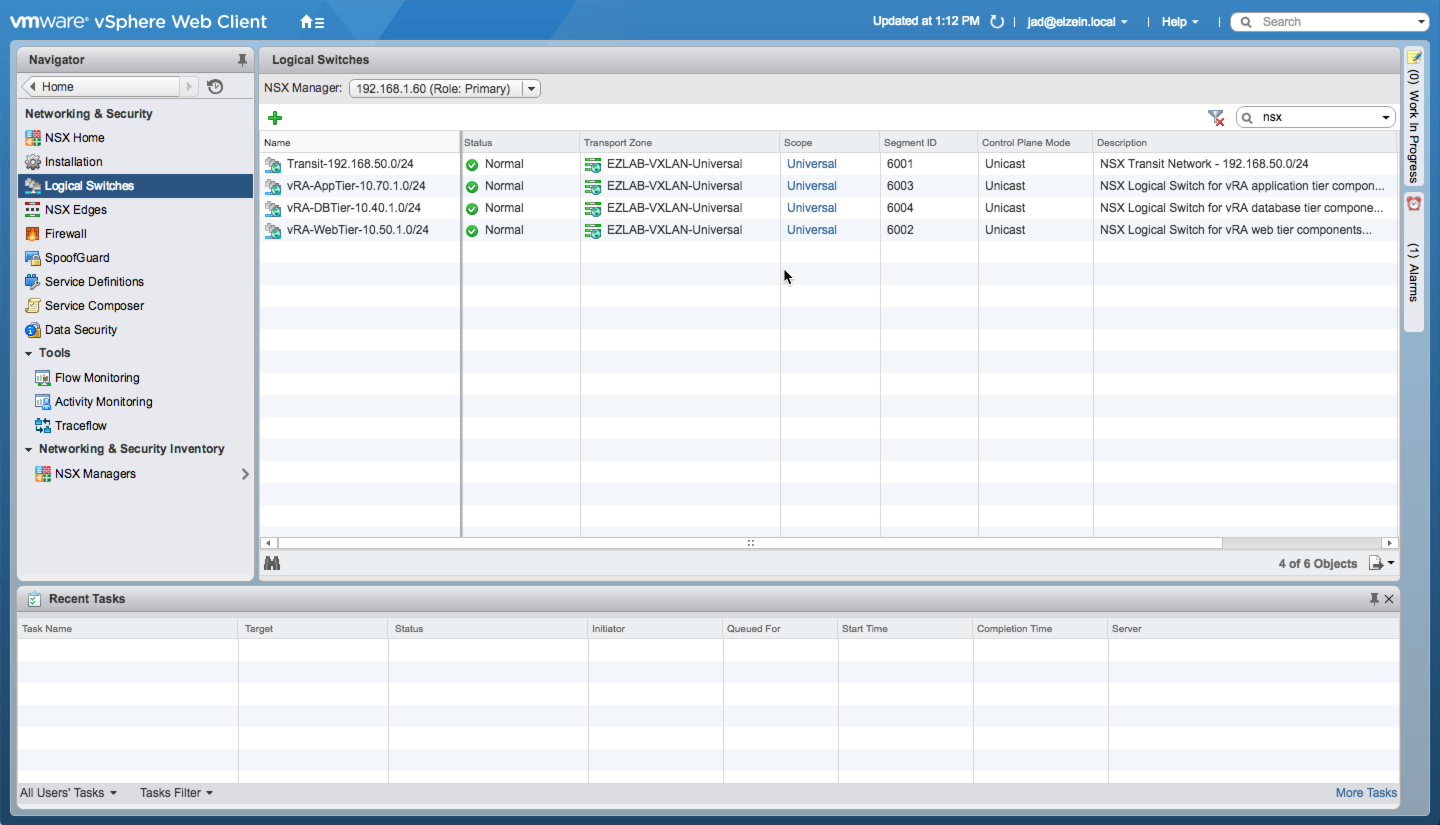
Once complete, the new logical switch will show up in the list of switches. We’ll refer back to this Transit network when configuring the ESG and DLR later on in the series (Part 4).
Create Application Logical Switches
Now we will repeat the steps above to create a Logical Switch for all other desired networks. Do this for any logical network you wish to add.
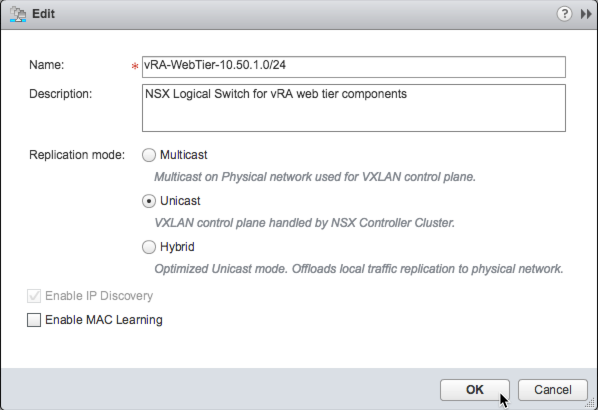
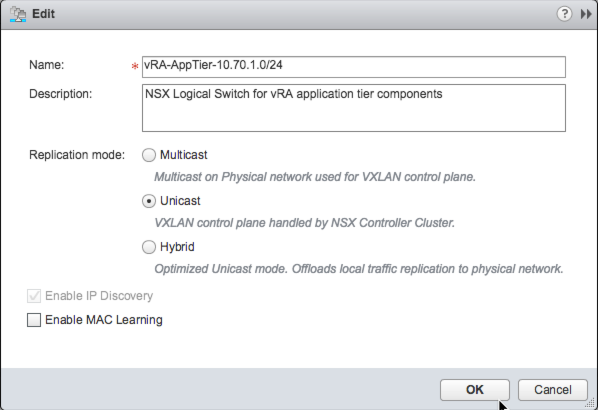
Name Description Transport Zone Replication Mode Network vRA-WebTier-10.50.1.0/24 NSX Logical Switch for vRA web tier components EZLAB-VXLAN-Universal Unicast 10.50.1.0/24 vRA-AppTier-10.70.1.0/24 NSX Logical Switch for vRA application tier components EZLAB-VXLAN-Universal Unicast 10.70.1.0/24 vRA-DBTier-10.40.1.0/24 NSX Logical Switch for vRA database tier components EZLAB-VXLAN-Universal Unicast 10.40.1.0/24
1. Navigate to the Logical Switches section in Networking & Security
2. Click on the + to create a new logical switch for each of the following networks (configured per the table above):
6. Review the Logical Switches configuration once all the switches have been added.
Summary
At this point all the desired NSX Logical Switches have been created and will be ready for collection / use by vRA once the Endpoint is configured and an initial data collection is run…but we’re not quite ready for that yet. The logical switches will each need to be wired to an NSX Gateway interface and configured with the proper subnet to complete the logical network configuration. But first, we’ll be creating some of the static security logic (Security Groups and Security Policies).
Next Up: Part 3, Security Groups and Policies
Back to vRA and NSX Integration Series home
+++++
virtualjad
![[virtualjad.com]](https://www.virtualjad.com/wp-content/uploads/2018/11/vj_logo_med_v3.png)

3 Comments