Introduction
Recapping Part 2 of this series: We staged a number of NSX Logical Switches to be consumed by vRA machines as External Networks. vRA collects and identifies these networks as traditional [vSphere] Network Paths and allows them to be wired for consumption in the Converged Blueprint (CBP) designer as needed (or using custom properties, but that’s beyond this post). Logical Switches can be created for a consumption-only model, automatically created per Deployment when using On-Demand services, or some combination of these.
Moving on…
Similar to it’s relationship with NSX Logical Switches, vRA provides both consumption-based and dynamic security services to deliver a number of use cases leveraging NSX Security Groups and Security Policies.
A Security Group defines — and logically groups — the objects you want to protect (e.g. virtual machines) and the policies that protect them (via a security policy). Group membership can be static or dynamic (e.g. based on logical naming, containers, tags, or as members of other security groups). Pre-created security groups are collected by vRA endpoint inventory and consumed as Existing Security Groups (SG) within the Converged Blueprint designer. These security groups may ultimately contain a combination of unmanaged vSphere VMs and vRA-managed machines.
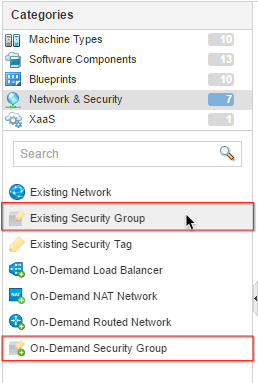 vRA also supports On-Demand Security Groups (ODSG) within CBP, which requires the use of an existing Security Policy. When a blueprint containing an ODSG is provisioned, vRA hands off to NSX to create the dedicated security group(s) and dynamically applies the security policies per the design. Since these security groups are created per deployment, they are often not shared with machines outside the deployment. However, there’s nothing preventing the addition of VMs using the vSphere Web Client.
A Security Policy is collection of Firewall rules (and other services) designed to secure machines at the vnic level. Once created, security policies are mapped to a Security Group for enforcement across all the machines that are members of the security group. vRA consumes security policies (collected in endpoint inventory) when one or more policies are added to an ODSG. Security policies can not be created dynamically (i.e. no on-demand) for all the right reasons. This helps alleviate some of the anxiety associated with security controls.
Besides defining security groups and policies per blueprint, baseline security groups can be implemented as default protection policies for an entire set of machines in a given reservation. Hit the link for more details.
Staging Security Groups for vRA
In the following exercise, we’ll be creating several Security Groups and Security Policies using NSX’s Service Composer in the vSphere Web Client to provide logical security and service boundaries for the desired machine tiers.
Objectives:
- Create NSX Security Groups for App, Web and DB tiers to be consumed as Existing Security Groups in vRA
- Create an NSX Security Policy allowing only web (http/https) and RDP traffic for use by On-Demand Security Groups in vRA
Create NSX Security Groups
1. Navigate to Service Composer in the Networking & Security section
2. Select the New Security Group icon to start the security group creation wizard:
3. Configure three (3) new Security Groups per the table using the default settings for steps 2-5 (unless you wish to experiment with those settings):
Security Group for all database servers in development
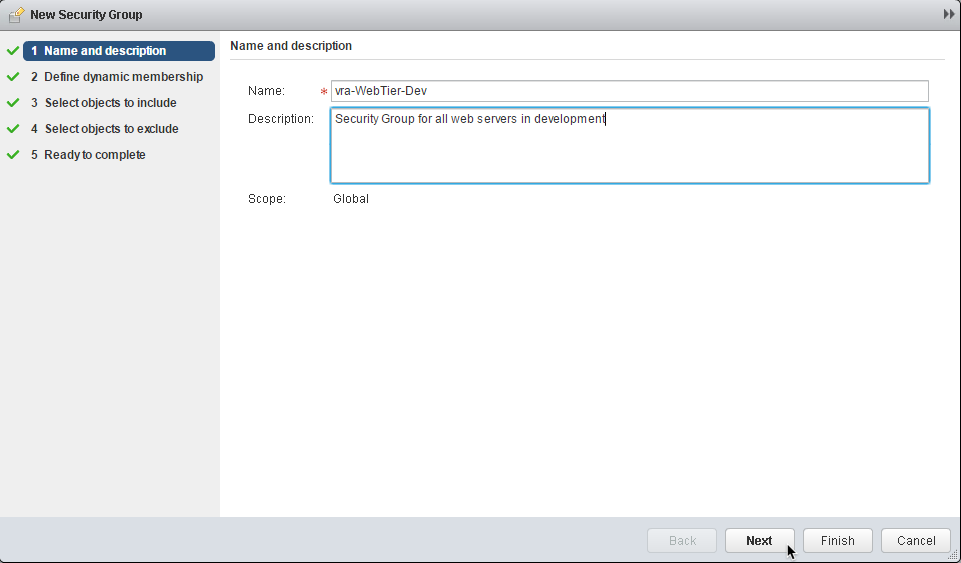
4. Name and description: Provide a Name and [useful] Description for the Security Group then click Next:
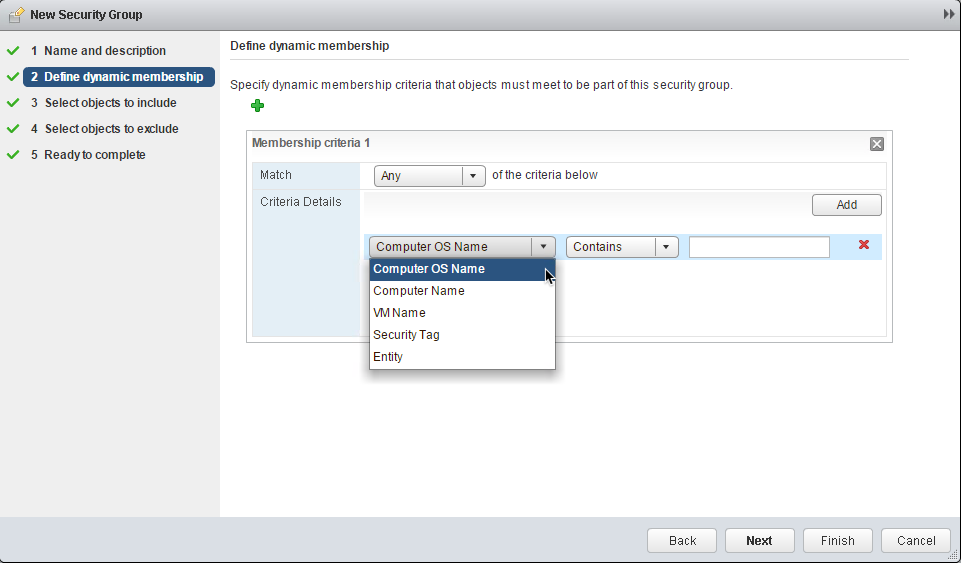
5. Define dynamic membership (optional): Define a dynamic membership policy to automatically add provisioned machines to the security group:
You can use dynamic membership policies to include provisioned machines by a set of criteria, regardless if they were provisioned or managed by vRA. The policy is based on one or more criteria that, once created, will apply to all machines visible to vCenter/NSX. As we’ve already covered, vRA will consume the security group when a machine is bound to it in CBP. This policy can enhance that functionality by automatically machines to the group behind the scenes.
Example: a policy can be created to dynamically add machines based on the Security Tag “DEVELOPMENT”. In vRA’s CBP, a Security Tag can be dragged to the design canvas and bound to one or more machines. At provisioning time, the machine is automatically added to the appropriate security group based on the criteria match.
While we’re creating this security group specifically for use by vRA (in this example), there are many benefits for grouping managed and unmanaged machines together.
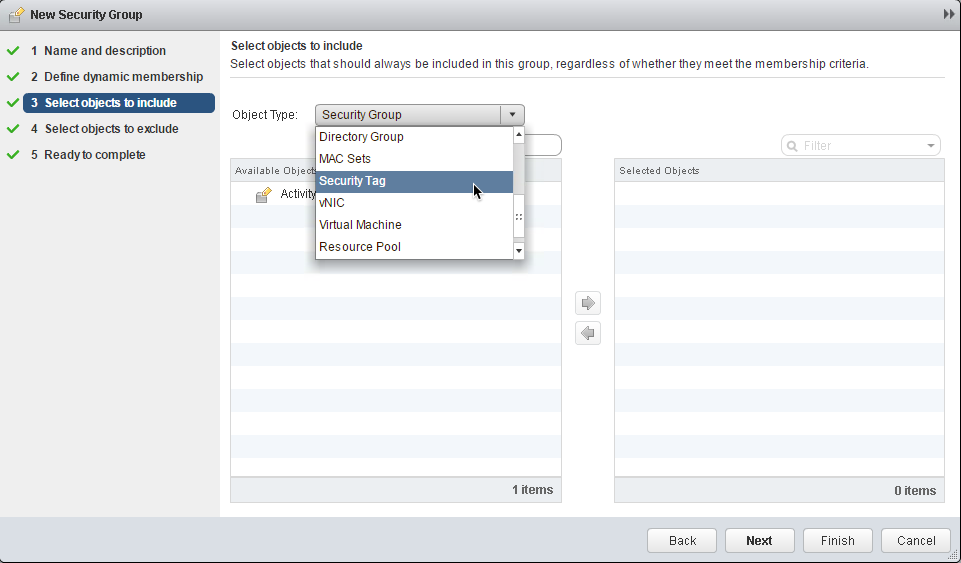
6. Select objects to include (optional): Select existing objects or components to add to the security group:
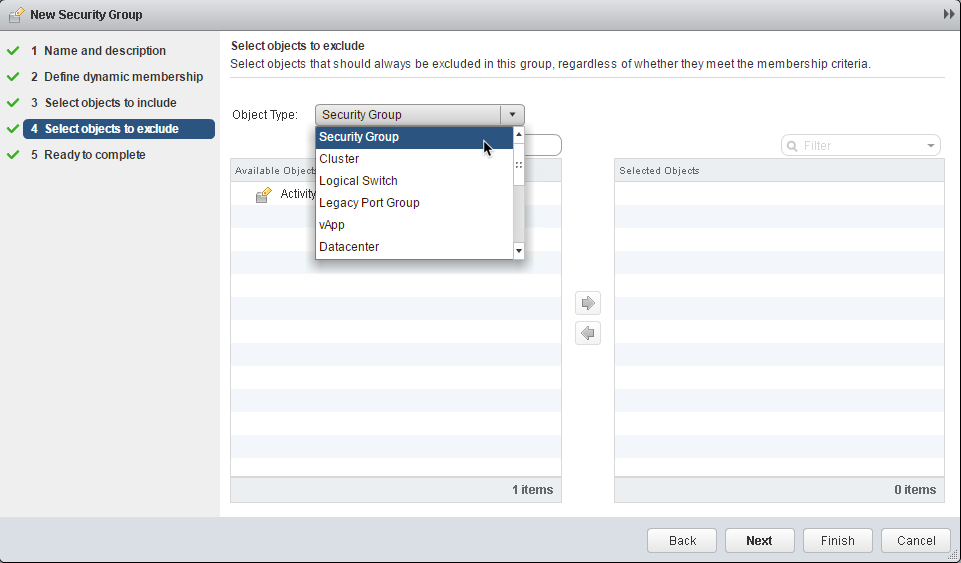
The security group wizard allows the inclusion (above) or exclusion (below) of existing logical objects managed by vCenter. Similar to dynamic membership, this can provide a means of grouping (or ungrouping) vRA-managed and unmanaged machines for a variety of security use cases, except this grouping can include a wider range of logical objects or characteristics. Once an object is added, the associated security policy will apply to all associated machines.
7. Select objects to exclude (optional): Select objects and components to exclude from the security group:
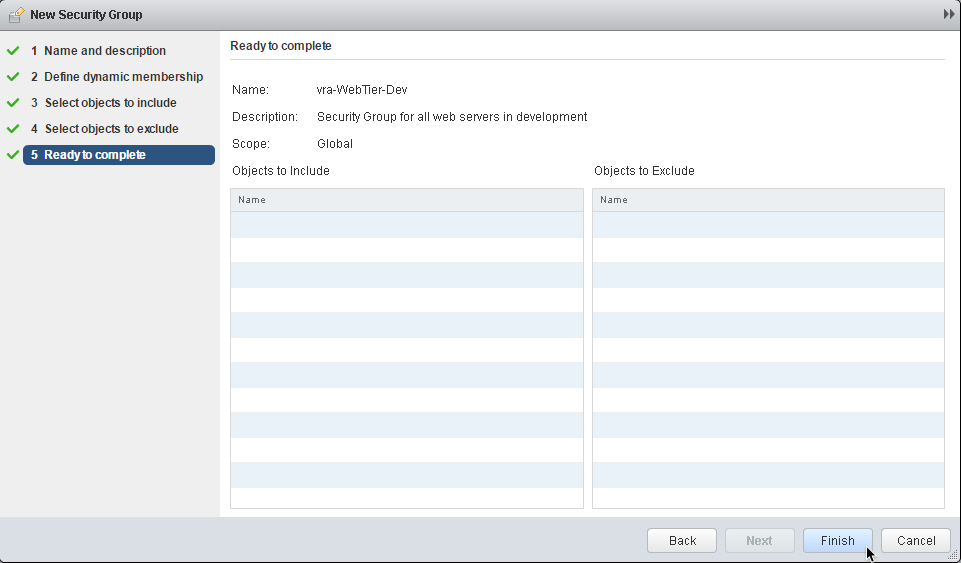
8. (Optional): Review the configuration then select Finish to create the Security Group:
9. Repeat these steps for the additional security groups (hint: you can click Finish after completing Step 1 to accept the defaults for all the optional sections).
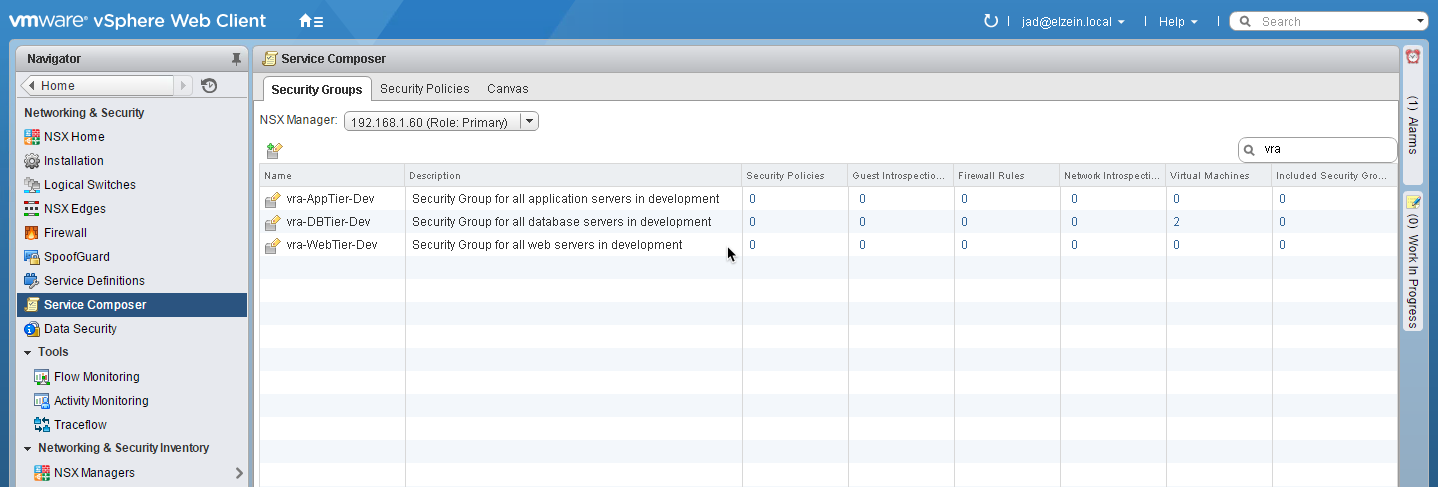
10. Review Security Groups once they’ve been configured:
Creating Security Policies
Next we will create a security policy that to define the logical security (firewall) for the security groups you have created. The objective of the security policy will limit inbound traffic to HTTP (TCP/80), HTTPS (TCP/443), and RDP (TCP/3389) to any machine or logical object added — statically or dynamically — to the associated security group. You will also be able to consume this policy when configuring on-demand security groups in CBP.
1. Navigate to the Security Policies tab in Service Composer
2. Select the Create Security Policy icon
3. Enter a useful Name and Description for the new policy:
(Tip: this is how the policy will be visible in vRA, so it’s helpful to clearly identify it’s purpose)
Inherit security policy can be used to incorporate an existing parent policy that will appended to this one. It’s an optional setting and will be left unchecked in this case. You also have the option to define the policy’s Weight, which determines the precedence of the policy and all its rules. A higher weight gives the policy a higher precedence. For example, two policies applied to the same security group can have competing policies (e.g. a conflicting firewall rule)…the policy with greater weight value will be applied to the objects in the security group.
4. Click Next
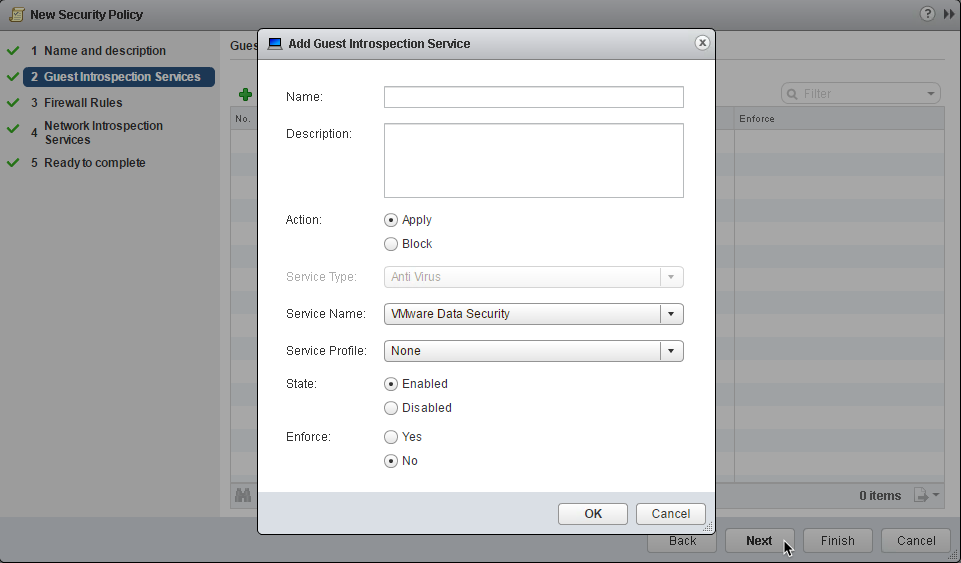
5. Guest Introspection Services: Click Next to accept the defaults for Guest Introspection Services (not configured in this example)
6. Firewall Rules: click + to add a new firewall rule:
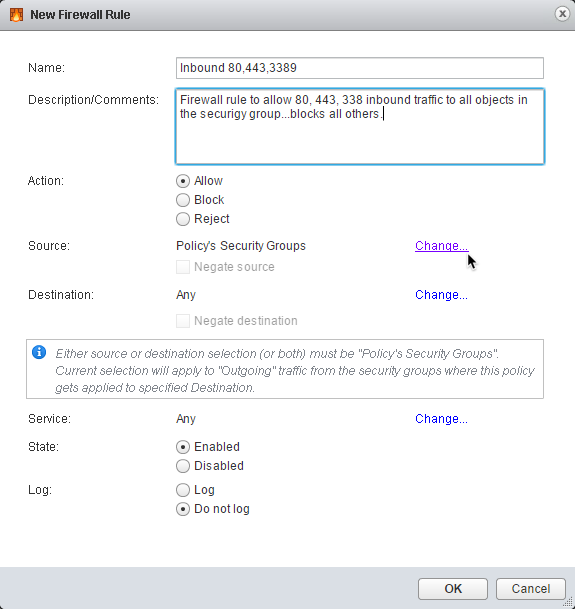
7. Enter a useful Name and Description for the firewall rule
8. Select Allow for the Action:
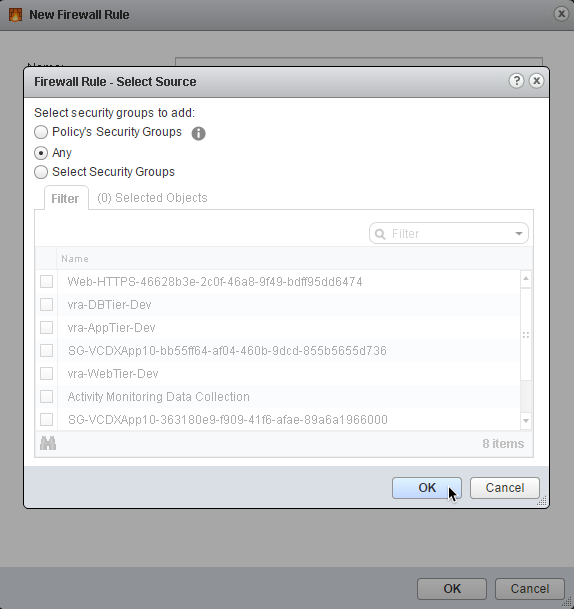
9. In the Source: section, click Change… to select source traffic
10. Select Any to apply the policy to all source traffic
11. Click OK to apply
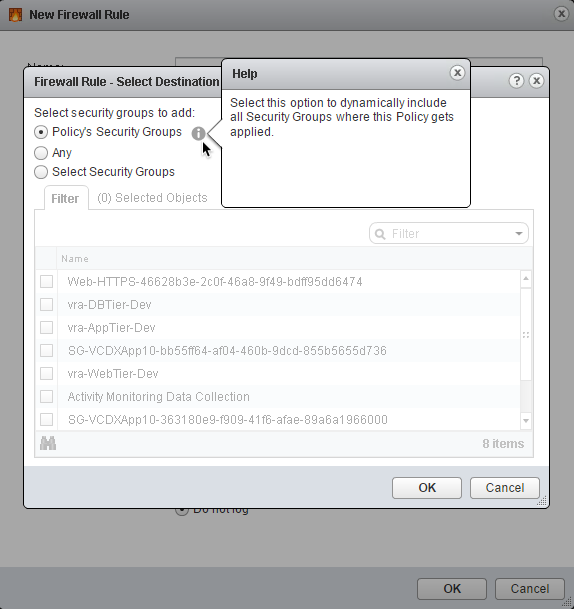
12. In the Destination: section, click Change… to define the destination traffic.
13. Select Policy’s Security Groups as the destination
14. Click OK to apply
With these settings, the firewall policy will filter all inbound traffic to any member machine (or object) of the security group in which it is bound. You can also choose to select one or more security groups in this step, depending on the desired outcome.
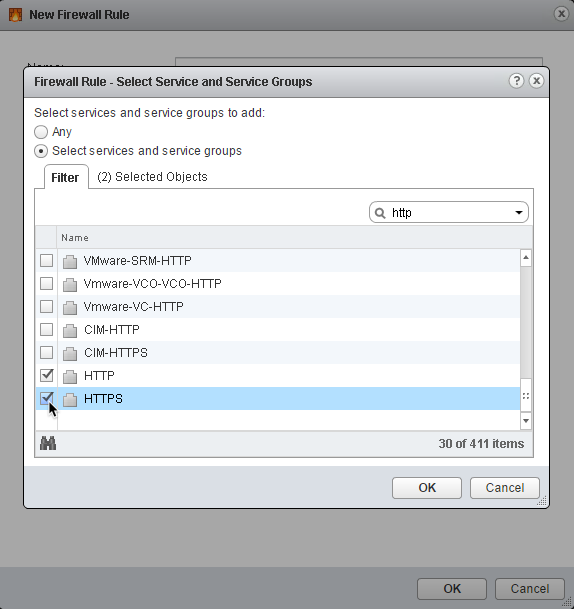
15. In the Service: section, click on Change…
16. Click Select services and service groups
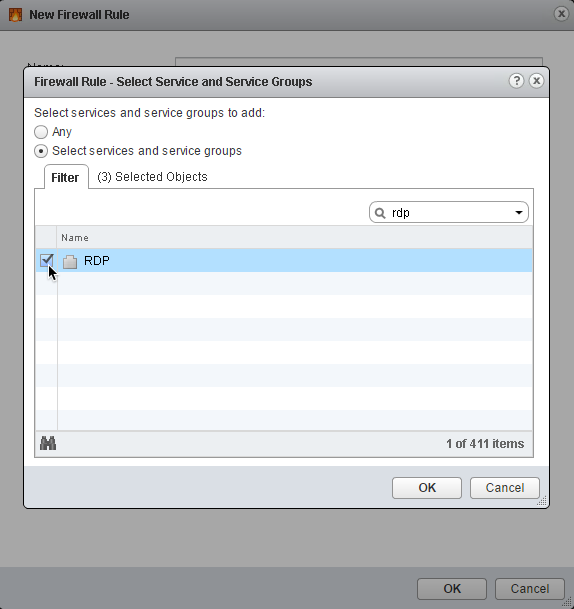
17. Add HTTP, HTTPS, and RDP services
(Tip: search for “http” and “rdp” in the search box to filter the list)18. Click OK to accept the selection
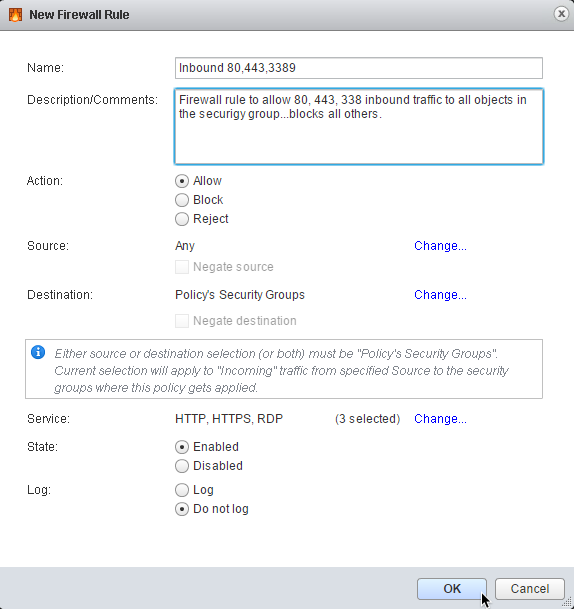
19. Review Firewall Rule configuration
20. Click OK to apply the firewall configuration
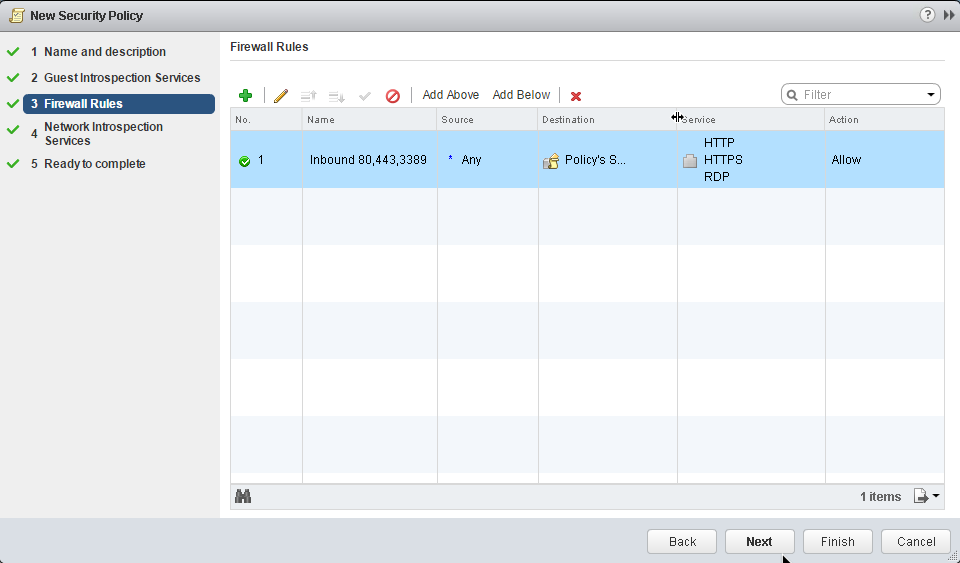
In this example we created a single firewall rule covering several different services. In some environments, it may be a best practice to create separate rules per service to provide greater control and enforcement granularity. In either case, the rules will all apply to the single policy being created.
21. Click Next to continue
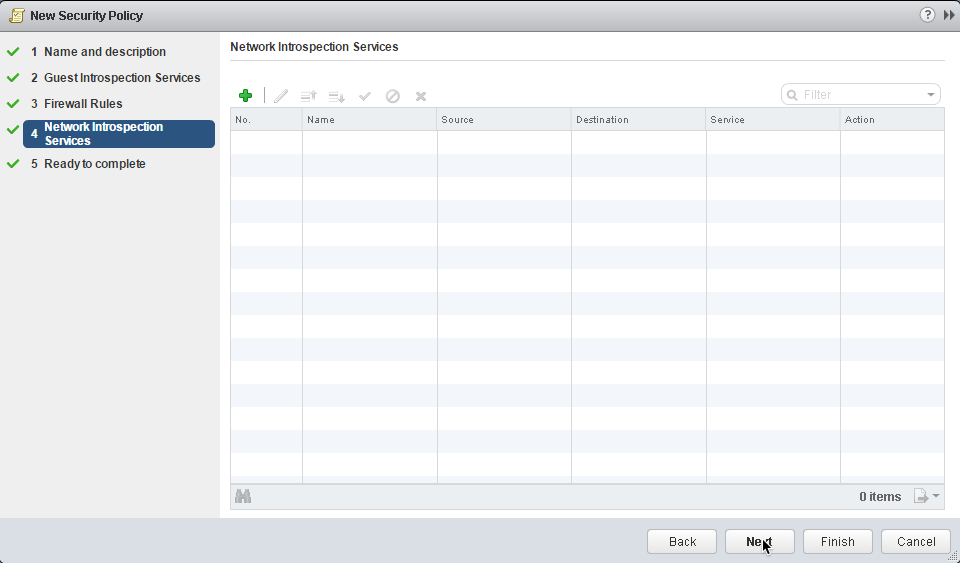
22. Network Introspection Services: We’ll skip the optional configuring network introspection services as they do not apply for this use case.
23. Click Next
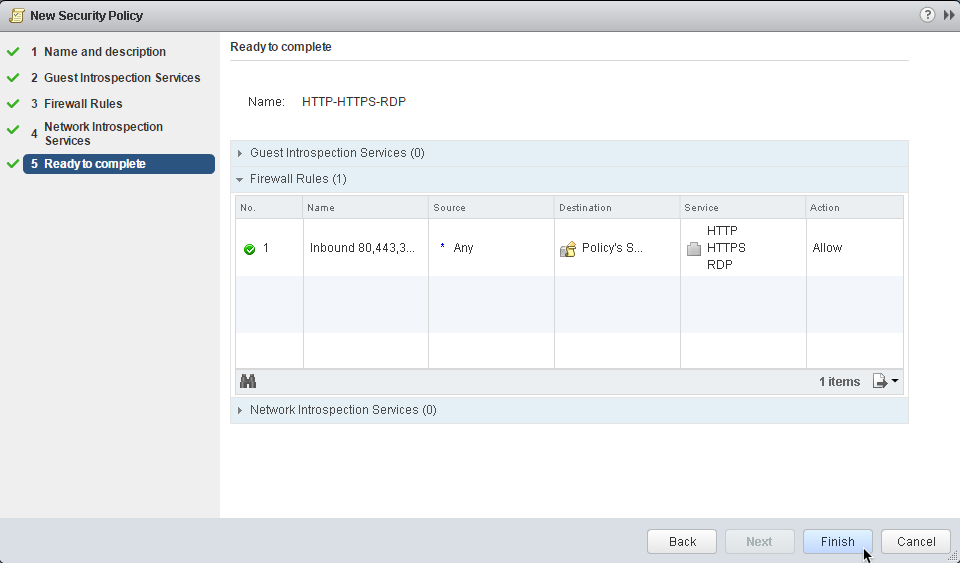
24. Ready to complete: Review the configuration one last time to make sure no errors stand out:
25. Click Finish to accept the security policy configuration and close the wizard
Apply the Security Policy to a Security Group
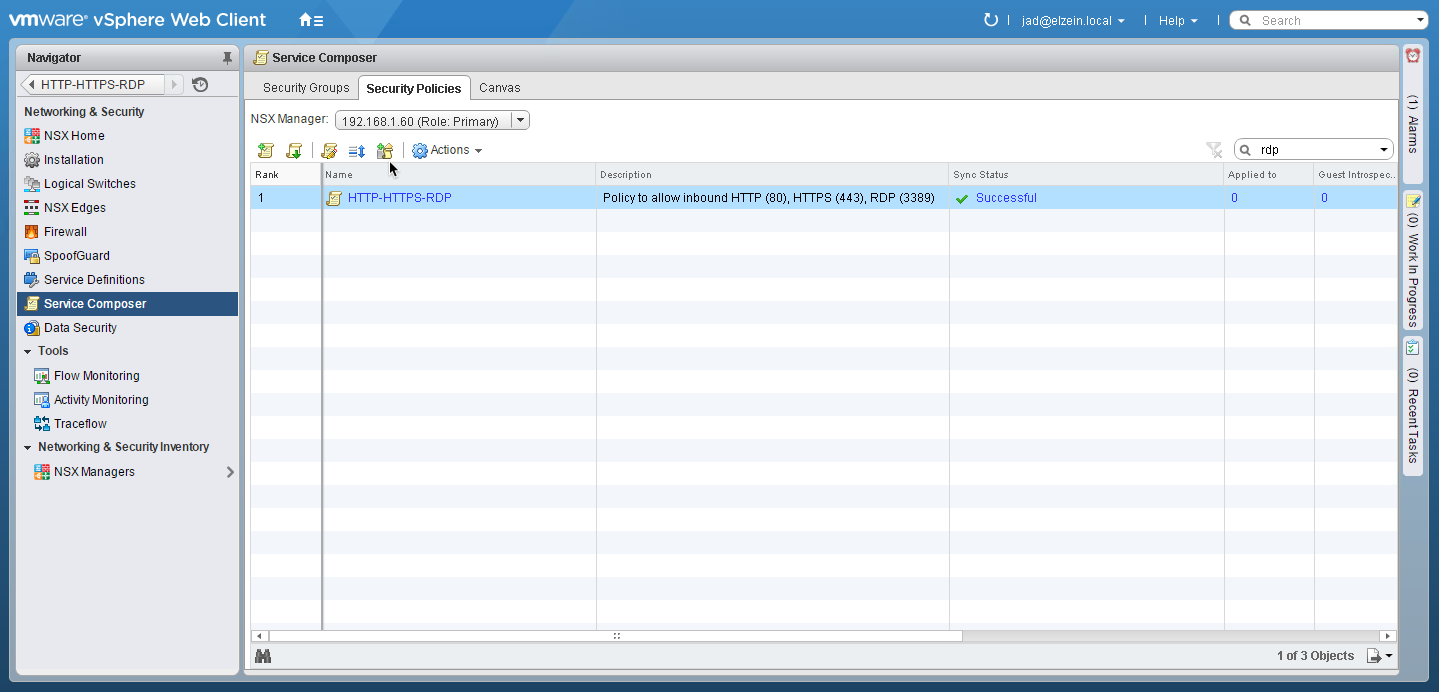
Now that the security policy has been created, we need to apply it to one or more of the existing security groups for it to be enforced. Remember, we have configured these static security groups to be consumed in vRA as Existing Security Groups. We’ll also have the option to use On-Demand Security Groups, which will allow us to select the Security Policy when authoring the blueprint in CBP.
1. Highlight the new security policy and select the
icon to apply it to security group:
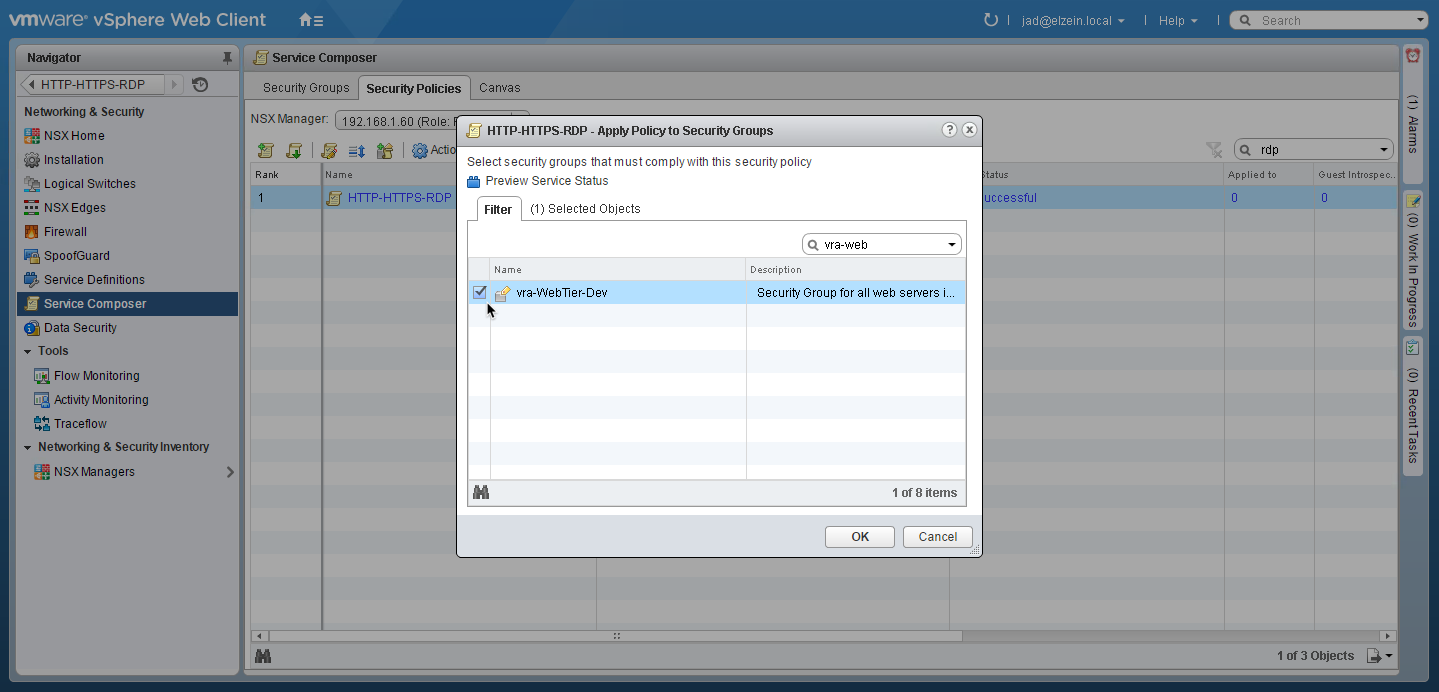
2. Select the desired Security Group (vra-WebTier-Dev in this case):
(Tip: use the search filter)3. Click OK when done
4. Repeat these steps to add the policy to other security groups (optional)
Summary
At this point we’ve prestaged a few Logical Networks (previous post), created a handful of Security Groups, created a Security Policy and applied the policy to the desired security groups…all for the primary purpose of consuming these services in vRA. We’ve got a couple more things to cover on the vSphere/NSX side of the house before jumping into vRA…that’ll be covered in the next post.
Next Up: Part 4, Edge and Routed Gateways
Back to vRA and NSX Integration Series home
virtualjad
![[virtualjad.com]](https://www.virtualjad.com/wp-content/uploads/2018/11/vj_logo_med_v3.png)



This is a great write up so far and I’m looking forward to the next piece about integrating Edge and GW’s as it’s something I’m currently working on for a PoC. Are you going to do a piece on Load Balancers on demand blueprints?